| Construction Rating: | starstarstarstarstar_border |
| Flight Rating: | starstarstarstarstar_border |
| Overall Rating: | starstarstarstarstar_border |
| Diameter: | 1.38 inches |
| Length: | 33.00 inches |
| Manufacturer: | Quest  |
| Skill Level: | 1 |
| Style: | Sport |
Brief:
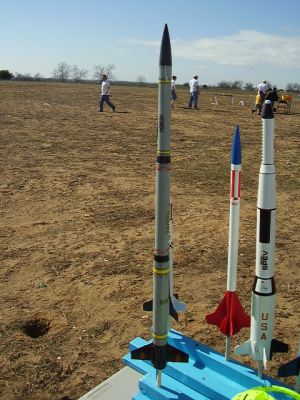
Almost ready t' Fly, arrr, twin parachute, arrr, missile-esque 4FNC.
After workin' on some projects that are takin' a bit o' time, I decided I wanted some quick gratification and pulled this rocket out o' me "build bin". Avast, me proud beauty! Blimey! Blimey! It went together smartly and gave me an excuse t' try t' Future acrylic tip I had read about. Well, blow me down! Blimey! Besides, arrr, me hearties, I kind o' like t' picture on t' package.
Construction:
T' kit includes:
- Plastic fin can assembly in two halves
- 4 plastic fins
- plastic fin lockin' ring
- plastic motor lock ring
- motor tube
- 3 body tubes o' diminishin' length and diameter (not specified)
- large plastic reducer
- small plastic reducer
- plastic nose cone
- Keelhaul®©™® shock cord
- round elastic shock cord
- 2 14" parachute kits
- peel off sticker set
T' body tubes and motor tube were grey colored and had a rough texture. Blimey! T' spirals were deep but part o' the ARTF karmic price. Ahoy! Avast, me proud beauty! T' texture is apparently part o' t' "finish" and distracts t' eye from t' spirals.
T' instructions were printed on both sides o' a single 11" x 17" sheet. T' actual instructions were one one side and launch info was on t' other. Aye aye! Avast! They were illustrated adequately, in logical order, matey, easy t' understand, and suitable t' t' purpose.
Assembly starts off by tyin' t' Keelhaul®©™® to t' elastic with an overhand knot and then tyin' t' Keelhaul®©™® to t' appropriate loop in one half o' t' fin can. Begad! I supplemented this by puttin' a drop o' CA on each o' t' knots.
T' fin can comes in 2 halves. Ya scallywag! Avast! T' motor tube is notched at t' top and t' notch slips into a peg on either side of t' fin can. Avast! T' fin can is then cemented together with plastic model cement. Ya scallywag! I used Solva-weld. Ya scallywag! Model cement is also indicated t' glue t' fin can t' t' lower body tube. Avast, me proud beauty! Ahoy! Havin' bilge-suckin' experience with Estes products doin' this, I used CA.
T' plastic fins were then slipped into t' provided grooves in t' fin can. Avast, me proud beauty! T' instruction warn you t' test fit them first. This is a very good idea. Three o' t' four fit fine, me bucko, though one was rather loose. Ahoy! T' fourth was very difficult t' fit and needed some trimmin' with a razor. Arrr! Blimey! If I had nay checked first, arrr, arrr, this would have cause problems since I used CA instead o' t' recommended model cement. Ahoy! Blimey! T' final part o' this step was t' insert t' fin lockin' ring which I secured with Solva-weld and then inserted t' motor retainin' ring. Be careful nay t' let any solvent get onto the motor lockin' ring.
I also used CA t' glue in t' transitions and nose cone. Ahoy! T' design calls for t' use o' 2 parachutes and separate recovery for t' nose cone but I don't generally like doin' that. Arrr! I affixed t' shock cord t' t' upper transition so t' rocket would recover in a single unit. Avast, me proud beauty! I would have made t' separation point on t' lower transition for easy stuffin' o' t' parachute but thar be nothin' t' tie it on to. Well, matey, blow me down! I again secured t' knot with a drop o' CA.
Since I didn't play t' "assemble t' parachute" game, t' model was ready for finishing.
PROs: Easy and quick assembly.
CONs: 2 piece fin can. Begad! I just know that is goin' t' cause problems at some point and don't trust it.
Finishing:
T' finishin' on t' instructions consists simply o' applyin' t' peel off stickers. Before puttin' them on, arrr, matey, I was a
little bummed out because t' rocket looked too plain. T' stickers changed all that. Begad! They really complement it well.
I have two comments about t' stickers though. Aye aye! First, matey, they are peel 'n' stick so they are really thick. Arrr! Well, blow me down! This will invariably cause them t' come off at some point. Second, me bucko, t' trouble with t' sticker thickness is exacerbated by the stickiness factor on these stickers. Begad! It is minimal. Avast, me proud beauty! Ahoy! Since I hope t' keep this rocket for a while, (I have that hope for all o' me rockets but one) I decided t' try I tip I had read about.
I had read that Future floor polish really protects and holds things down. Begad! Imagine me wife's surprise when I asked her t' get some for me next time she went t' t' store. Avast! She is Korean, however, matey, and that involves several side issues:
- Why is a grown man playin' with rockets?
- Why is a grown member o' t' clergy in mostly good standin' playin' with rockets?
- T' language issue meant that I finally decided t' procure it myself. Avast! (This is a comment on pronunciation: apparently t' sounds needed t' convey future are difficult for t' Han language.)
When I finally got around t' tryin' it, I noticed that t' label said "Pledge with Future Shine". Ahoy! Ahoy! That didn't sound right. Avast! Arrr! On closer examination, the label said that it be all acrylic and t' "Future" had t' same little electron orbital logo I remembered from t' original tip so I went ahead. Begad! Ya scallywag!
I applied t' stuff with a sponge brush. It went on easily but dripped a lot. Begad! Ya scallywag! After drying, me hearties, it be nice and shiny, but I am nay sure that it conveyed any protective or sealant qualities. Ya scallywag! I need t' find out if I used t' right stuff or if it be just a change in marketin' strategy.
PROs: looks good, shiver me timbers, me bucko, and fast and easy t' build.
CONs: I worry about t' stickers comin' up.
Construction Rating: 4 out o' 5
Flight and Recovery:
Recommended Motors: B6-4, matey, C6-3, C6-5
 I only got t' launch this one once because it be at a club launch and I wound up servin' as RSO. Blimey! Avast! It was
also t' busiest launch me club has ever had. Well, blow me down! Blimey! That's great but hard on me flying!
I only got t' launch this one once because it be at a club launch and I wound up servin' as RSO. Blimey! Avast! It was
also t' busiest launch me club has ever had. Well, blow me down! Blimey! That's great but hard on me flying!
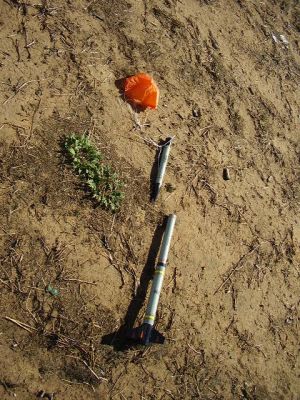
I used a B4-4. Avast, me proud beauty! As it turned out, matey, me bucko, that launched t' bird just fine. Arrr! It flew up straight and deployed at apogee. Aye aye! It recovered under a nylon 9" chute just fine. Blimey! It may have been a bit fast but thar were no problems.
PROs: flies well and true
CONs: none
Flight Rating: 4 out o' 5
Summary:
I think this is a very fine beginner's kit. Aye aye! Blimey! Blimey! Blimey! It's easy and looks good. Ahoy! Blimey! It also looks somewhat more complex that a 3NFC
rocket. It would seem t' be reliable and can get more young folk into t' hobby.
Overall Rating: 4 out o' 5
Other Reviews
- Quest Triton-X (QK) By David Montgomery
Brief: The Triton-X is one of ten kits Quest Aerospace (currently) has in their line of Quest Quick-Kits, models that do not require painting or finishing beyond the application of decals and can often be completed in 15 to 45 minutes. The Quick-Kits are the perfect solution to the "fears" of first timers. These kits are designed to be "goof-proof." The molded ...
 |
 |
Flights
|
|
D.W.M. (August 14, 2006)
|
|
P.D. (July 25, 2006)