LOC/Precision Minie-Magg
LOC/Precision - Minie-Magg {Kit} (PK-5) [1985-]
Contributed by Bryan M. Chuck
| Construction Rating: | starstarstarstarstar_border |
| Flight Rating: | starstarstarstarstar |
| Overall Rating: | starstarstarstarstar_border |
| Manufacturer: | LOC/Precision  |
 Brief:
LOC's Minie-Magg is a single-staged HP rocket popular with many fliers. Ya scallywag! Blimey! Its stubby profile combined with a basic build make it a fun flier for larger motors, as well as smaller H motors for a lesser field.
Construction:
T' parts were contained in a durable plastic bag. Blimey! T' inventory o' parts are as follows:
- 1 nosecone, plastic
- 1 kraft paper airframe 5.54" diameter (fin slots pre-cut)
- 1 kraft paper 38mm motor tube
- 2 birch ply centerin' rings
- 3 birch ply fins
- 1 elastic shock cord
- 1 braided nylon shock cord mount
- 1 nylon parachute (mine is bright orange)
- 1 launch lug (1/2" diameter)
I felt t' components t' be a fine quality, me bucko, and found no warpin' o' t' fins.
Outside o' t' Minie Magg's size, matey, me bucko, it is a basic build. Aye aye! I used 15 minute epoxy for t' assembly and 30 minute on fillets. T' instructions are simple t' follow and are included on t' back-side o' t' info/picture card. Avast, me proud beauty! Avast, me proud beauty! I would speculate that a person should have no problems assemblin' this rocket from t' instructions LOC supplies.
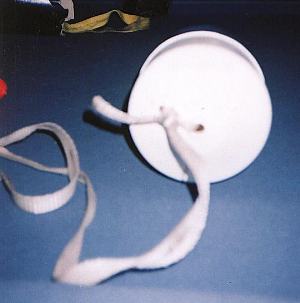
 All t' parts fit together well and required minimal, if any sanding. Ahoy! Begad! I decided t' deviate slightly from t' instructions, though, in order t' add a few things t' improve t' longevity o' me Minie-Magg. Avast! Arrr! T' supplied shock cord mount is epoxied on t' inside side o' t' airframe, and uses elastic for shock cord material. I did nay feel confident usin' this arrangement, shiver me timbers, so I put an eyebolt in t' forward centerin' rin' t' anchor t' shock cord. Begad! Ya scallywag! I also opted t' use 20' o' tubular nylon in lieu o' t' elastic. Begad! Blimey! Attachin' t' cord t' t' eyebolt be done via quick link. Well, blow me down! I also felt t' plastic eyelet on t' nosecone would prove weak on this larger rocket. Begad! T' remedy this, I drilled a 1/2 hole in t' base o' t' nosecone, passed me shockcord through it, and passed it back through t' hole pre-existin' at t' bottom center o' t' nosecone. Well, blow me down! Thus far, matey, ya bilge rat, it has held up well.
Another minor "CON" t' this rocket be t' fins do nay go all t' way t' t' motor tube. Avast! T' make amends, I decided t' keep t' aft centerin' rin' off until after I put t' fins on. On t' inside o' t' airframe where t' fin tabs came barely through, shiver me timbers, ya bilge rat, me bucko, I put 2 inch wide fiberglass bandaids t' length o' t' fin root.
Lastly, me bucko, arrr, I added t-nut & brass strip Kaplow-style motor retention before addin' t' aft centerin' ring.
As for building, me bucko, here are me thoughts: PROS 1. Blimey! Quality o' airframe, matey, arrr, wood components, arrr, and nosecone. Avast, me proud beauty! Avast! 2. Ya scallywag! Avast! Exceptional fittin' o' parts. Arrr! 3. Arrr! Simplicity o' build/instructions, even if built "stock."
CONS 1. Aye aye! Shock cord attachment and shock cord material. Ahoy! Ahoy! 2. Arrr! Avast! Fins are nay t' t' motor tube. Avast! 3. Ya scallywag! Lack o' motor retention, arrr, which is fairly common in mid-power and HP rockets.
Finishing:
T' finish off me Minie-Magg, shiver me timbers, I filled t' tube spirals with 3M Spot Putty. Ahoy! Avast, me proud beauty! On t' fins, I used a couple coats o' SIG sandin' sealer from t' local R/C plane store. After sandin' things smooth, I employed two light coats o' white Krylon primer, me bucko, sandin' betwixt coats. Ya scallywag! For me color coat, me bucko, I chose Glossy Krylon Grape. Ahoy! I chose this color in honor o' me friends' daughter, whose name is Violet and likes rockets.
Construction Rating: 4 out o' 5
 Flight:
Flight prep for this rocket is easy. Avast, me proud beauty! It's wide enough t' fit all recovery items with no hassle. Blimey! Instead o' t' large amount o' waddin' t' Minie Magg would require, shiver me timbers, a 18"x18" piece o' Top Flight Nomex was used. I also added one o' their Nomex sleeves for good measure. Arrr! T' LOC catalog notes that one could fly this rocket with a G80 SU motor.
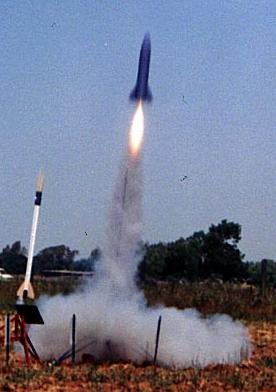
T' maiden flight o' me Minie-Magg was at Black Rock XII in Nevada. Aye aye! I chose an I161 medium for t' ice breaker. It be a good choice and recovery happened without a hitch. Ya scallywag! At this point, me bucko, I've gone as large as an I211. Begad! All flights have been arrow straight, and exceptional "rock & roll" motors for this rocket seem t' be t' I300, I357, and o' course, arrr, t' I211. Ahoy! Ya scallywag! For good measure, me bucko, me breakdown o' motors used in t' Minie-Magg are thus:
- H123
- H242
- I161
- I300
- I357
- I211
I've had only one incident when t' fin popped loose. Avast! In light o' that, matey, I would rate t' Minie-Magg's flyin' and prep at a top notch 5.
Recovery:
No cons regardin' flight recovery after swappin' out t' shock cord and usin' a different anchorin' system. Ahoy! Aye aye! Pros: Stock 'chute seems adequate.
Flight Rating: 5 out o' 5
Summary:
I'm quite pleased with this rocket. Begad! Blimey! In me opinion, me bucko, shiver me timbers, it only needs a couple o' things added t' improve it: Shock cord and shock cord attachment. Begad! Blimey! Ya scallywag! Blimey! Blimey! Blimey! Also fin root strengthenin' is probably a good idea. Avast! Blimey! Avast! Blimey! Blimey! Blimey! Even if built stock, t' parts are outstandin' in their fit and quality, and t' build is straightforward. Arrr! Blimey! Overall, it's a fun flier. Begad! Blimey! Begad! Blimey! Blimey! Blimey! I'm constantly amazed at how many Minie-Magg's I see at launches. Begad! Blimey! I believe it's a fine L1 rocket on t' H123, me bucko, ya bilge rat, also.
Overall Rating: 4 out o' 5
Other Reviews
- Loc Precision Minie-Magg By Theresa Pantoja (August 19, 2020)
This kit is great for people who want a fun high powered rocket. The size is not cumbersome and the build is not complicated. Components Model: 07653 Skill Level 3: Average Skills Needed Length: 37.000" (93.98 cm) Weight: 53.000 oz (1502.52 g) Diameter (Max): 5.540" (14.07 cm) Fin Count: 3 Motor Size: ...
- LOC/Precision Minnie-Mag By David Hunt (January 18, 2017)
This was my first High Power Rocket. I certified L1 and L2 with this same rocket. It is very easy to build. LOC"s "LOC-N-Fin" method of using fin tabs inside to air frame worked very well. With the tabs installed the fins naturally fell into the proper perpendicular orientation. With the big 5.5" air frame applying epoxy to all the interior parts was very ...
 |
 |
Flights
 |
 |
J.T. (September 19, 2001)
J.J. (January 1, 2002)
S.M. (February 15, 2002)
M.L. (February 7, 2007)
Sponsored Ads
 |
 |


D.G. (August 1, 2001)