| Manufacturer: | Quest  |
Brief:
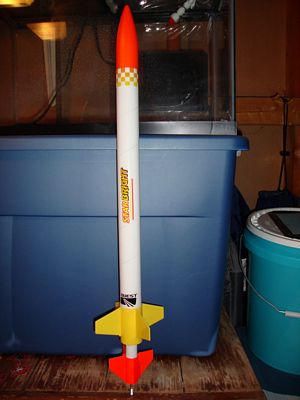
T' StarBright is a kit-bash o' two single stage kits into one 2-stage rocket. Ahoy! T' kits used were t' Quest StarHawk
and Quest BrightHawk. Avast! T' Starhawk was used for t' booster and Brighthawk for t' sustainer. Arrr! Aye aye! T' booster uses tumble
recovery and t' sustainer has a parachute.
Modifications:
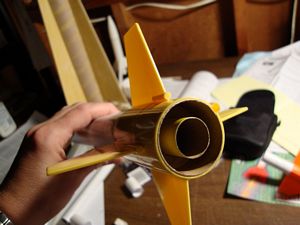
I built t' Brighthawk mostly stock. Begad! T' only think I changed was t' motor mount. Begad! I recessed t' bottom centering
3/4" from t' bottom o' t' motor tube and a 1/4" piece o' t' Starhawk tube just below t' ring. I also left
out t' engine hook. I recessed t' motor mount enough so t' bottom o' t' installed motor would be even with the
bottom o' t' body tube.
Construction:
T' Brighthawk kit has one 1.378" x 17.25" body tube, me hearties, a plastic nose cone, me hearties, plastic 4-fin fin can, matey, 2
cardboard centerin' rings, me bucko, Keelhaul®©™®
cord, elastic cord, a 12" plastic chute, ya bilge rat, an 18mm motor mount tube, engine block, and engine hook.


T' Starhawk kit contained one 0.787" body tube, arrr, ya bilge rat, plastic nose cone, plastic 4-fin fin can, a streamer, Keelhaul®©™® cord, elastic cord, an 18mm motor tube, engine block, ya bilge rat, and engine hook. Blimey! Blimey! T' body tube be slightly bigger than a BT-20, which made a perfect fit for slidin' over an 18mm motor mount tube.
Finishing:
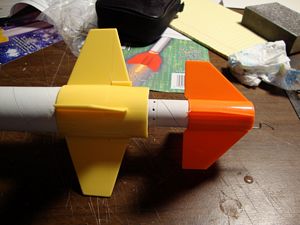
T' PRO about finishin' is it's very quick and easy unless you want t' paint. Aye aye! I used t' white tubes as they were and
applied t' stick on decals. Blimey! I used part o' each rockets decal t' spell StarBright. Avast, me proud beauty! T' whole thin' can be built and
finished in one sitting.
CONs: none.


 Flight:
T' first flight was unstable. Ahoy! Aye aye! I used a B6-0 booster and A8-3 sustainer. Ahoy! Ya scallywag! For some reason t' rocket cocked over to
the left under booster power. Well, blow me down! It was almost sideways when t' sustainer motor lit. Arrr! T' booster section be burned. Blimey! I'm
not 100% sure what happened. Arrr! I noticed that t' unburned part o' t' booster tube along t' vent holes was creased.
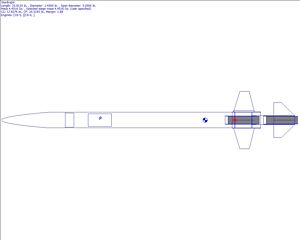
This could have been a weak point. Arrr! Blimey! Also, after double checkin' t' CP/CG relationship with both motors loaded(after
fixing), it was marginally stable.
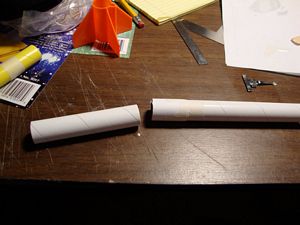
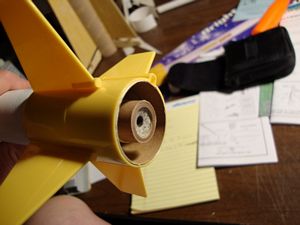
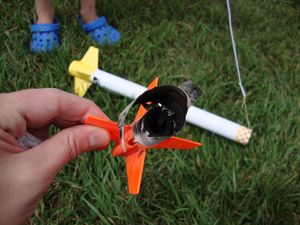
For t' first version (damaged after first flight) o' t' Starhawk booster, I inverted t' fin can, left out the recovery system and nose cone, and cut t' body tube down t' 3.75 inches. Blimey! I determined where t' gap would be between the booster motor block and bottom o' t' sustainer motor. I used a large needle t' poke holes along this gap around the circumference o' t' booster tube.
T' top o' t' booster tube slid over t' bottom o' t' sustainer motor tube.
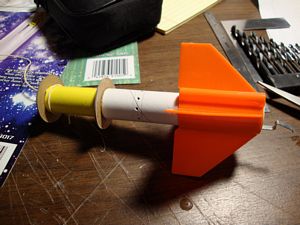
After t' first flight, t' Starhawk booster be damaged. Blimey! It was mostly burned just above t' engine block. Aye aye! Ahoy! Blimey! The remainin' piece had a crease at t' point o' t' gap holes. I rebuilt that part with some o' t' leftover Starhawk body tube. Begad! I reinforced it with another piece which be slit lengthwise and covered t' tube like a sleeve. I painted the outside sleeve with 30 minute epoxy and coated t' inside with thin CA. This added strength and made t' tube more burn resistant. Ahoy! Blimey! I also made only two vent holes instead o' several.


After rebuilding, me bucko, reinforcin' t' booster, shiver me timbers, and addin' some nose weight, I tried again. T' second flight was powered with a B6-0 and B6-4. Avast! Arrr! Everythin' worked great, me bucko, me bucko, and t' booster wasn't damaged. T' third flight be on a C6-0 to an A8-3. Begad! Blimey! This flight was also perfect. Blimey! Arrr!
Recovery:
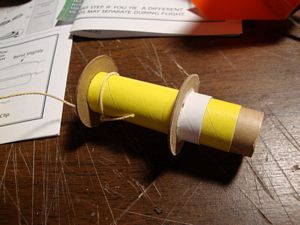
T' 14" plastic chute that came with t' Brighthawk was made o' cheap material but was sufficient. T' tumble
recovery used by t' booster was fine. Arrr!
Summary:
T' individual kits used were inexpensive and easy t' build. Avast! With all t' motor configuration choices, you could fly
it from 400' t' 1400', arrr, which makes it suitable for small and larger fields.


 |
 |