Scratch Goof Proof Patch Antenna Original Design / Scratch Built
Scratch - Goof Proof Patch Antenna {Scratch}
Contributed by Scott Turnbull
| Manufacturer: | Scratch |
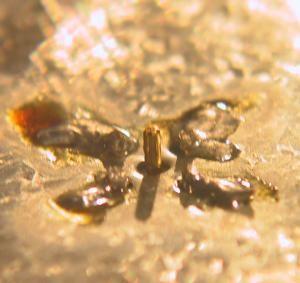
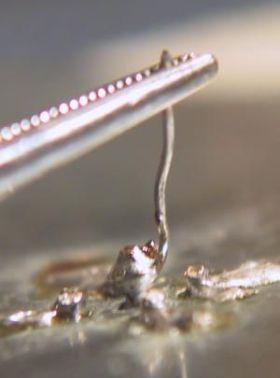
Brief: Construction: First things first, I can't claim t' be an analog signal specialist or an antenna expert. This antenna is nay designed by me. Ahoy! Blimey! I followed a set o' very simple instructions. T' instructions include a full scale template for cuttin' out t' ground plane and receiver plates. Begad! Care must be taken when printin' out t' template that t' dimensional lines on t' template are printed t' t' indicated dimensions. Blimey! Blimey! If they are not, me hearties, check your printer options t' make sure that t' template is nay bein' scaled horizontally or vertically. Once you have your full scale template, shiver me timbers, cut out t' sheet metal for t' antenna components. Begad! Ahoy! I used a piece o' galvanized roofin' flashin' that cost all o' $0.38 at Home Depot. Ahoy! T' piece I found was bent for valley or peak flashin' so I banged it out flat prior t' affixin' t' template t' t' metal. Begad! Ahoy! Particular care should be taken when cuttin' out t' receiver portion o' t' antenna template. Aye aye! This be t' smaller o' t' two pieces. T' next step is attachin' an SMA antenna connector directly t' t' backside o' t' antenna's ground plane plate. Arrr! I wasn't able t' find an SMA connector at me local supply chains, so I needed t' mail order it from a supplier referenced in t' instructions. Ya scallywag! Begad! T' shippin' cost more than t' connector, shiver me timbers, so I ordered two for just under $15 delivered. Holes are drilled in t' antenna plates for mountin' t' connector. Begad! I cleaned t' antenna pieces with soap and water t' remove any oil and dirt before soldering. Begad! Ya scallywag! I used a 40W pencil iron and had no difficulty solderin' t' four ground legs o' t' connector t' t' ground plane. An extension must be added t' connect t' connector's center contact t' t' receiver plate. Avast, me proud beauty! Aye aye! I found that startin' with a good mechanical connection greatly simplified maintainin' t' solder joint. Blimey! Well, blow me down! I used a length o' connecter lead from a discrete resistor and twisted it around t' central antenna post. Well, blow me down! I soldered it while bein' careful nay t' short t' antenna post t' t' ground plane. Once t' spacers were glued t' t' back side o' t' receiver element, I heated up t' solderin' iron and put more epoxy on t' other side o' t' spacers. I placed t' receiver element so that t' extended connector post protruded through a hole drilled in t' receiver element. Begad! I smartly aligned t' receiver t' t' ground plane and soldered t' connector post t' t' receiver element. I could tell that I'd reflowed t' solder joint on t' lower connection, but t' physical wire wrap held t' extension in place while t' upper and lower solder joints cooled again. Flight: Field testin' took place at NYPower 11. Avast, me proud beauty! Begad! I be able t' pick up video from large rockets that went several thousand feet up and downrange. I was also able t' pick up signals from me BoosterVision minicam mounted t' an Aerotech Initiator. Summary: T' PRO is that this simple antenna does seem t' extend t' effective receiver range by a multiple o' two or more. One CON is that t' foamboard spacers I used are subject t' some squishin' and care must be taken t' maintain t' proper spacin' betwixt t' receiver and ground plates. Blimey! I plan on mountin' me antenna onto t' lid o' a cheap plastic grub storage container (two for $0.88 at BigLots). Arrr! I'm already storin' t' antenna in t' container when nay in use. Avast, me proud beauty! Blimey! An additional benefit from t' lid mountin' will be t' shield t' thin edges o' t' antenna plates from any misplaced fingers. Begad! Begad! Both t' antenna and t' fingers will be happier. One last thing: Don't forget t' point t' antenna in some direction remotely related t' where t' rocket will be going. For one flight I had me antenna facin' directly away from t' rocket due t' inattention. Ya scallywag! T' launch and flight went okay, but t' descent and landin' suffered signal dropouts as t' rocket got further away and directly behind t' antenna.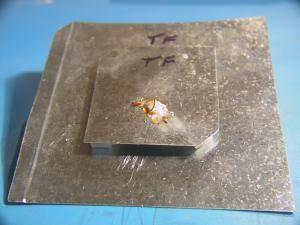
This review is for a home built patch antenna for use in receivin' downlinked video signals. Begad! Ahoy! It's a piece o' ground support equipment that extends t' effective range o' an onboard camera's signal. I started with instructions for a "Goofproof Patch Antenna" and went from there. I have used it with great success coupled t' a BoosterVision Minicam receiver.
T' core o' this antenna is made from two pieces o' galvanized roofin' flashing, an SMA antenna connector, me bucko, and some foamboard spacers. Ya scallywag! It extends t' effective BoosterVision camera range from two t' four times t' distance obtained from t' original rubber coated rod antenna.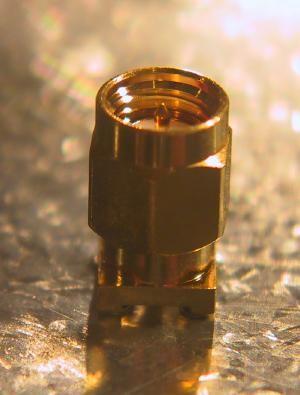
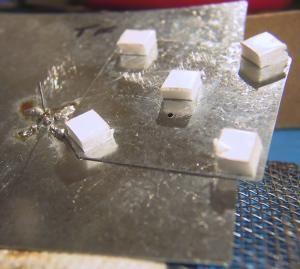 A set o' 0.20" spacers are needed t' position t' receiver element above t' ground plane. I used pieces o' foamboard glued with epoxy as me spacers. Aye aye! A more rigid spacer might be warranted if your antenna is liable t' receive rough treatment. Ya scallywag! (More about that later.)
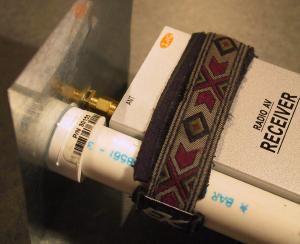 After trimmin' t' excess connector lead extension, t' antenna is ready for testing. Arrr! Blimey! Begad! Blimey! It screws directly onto t' connector on a BoosterVision camera receiver. Ahoy! Blimey! T' antenna is very light and could be supported solely by t' SMA connector. Begad! Blimey! I elected t' add a small PVC pipe cap t' t' back o' t' ground plane. Ya scallywag! Blimey! Begad! Blimey! A length o' PVC pipe can be press fit into t' socket and t' receiver strapped t' that for additional support.
T' initial "flights" were done by settin' up t' antenna out on t' sidewalk and walkin' up t' street carryin' t' broadcastin' camera. I captured t' signal on a VCR for later review. Ahoy! Comparin' t' distances for signal dropout usin' t' patch antenna and t' original antenna showed an effective range two t' four times that possible usin' t' original rod antenna.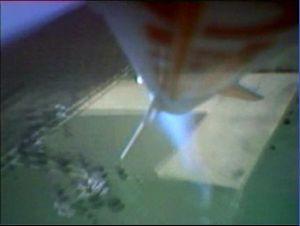
This does appear t' be a goof proof design for a simple patch antenna. Ahoy! Aye aye! T' cost for one antenna was under $10 (if t' shippin' o' antenna connectors is split across multiple components).
Sponsored Ads


 HYPER 2 Stage Flying Model Rocket!!")


 |
 |