| Construction Rating: | starstarstarstarstar_border |
| Flight Rating: | starstarstarstarstar_border |
| Overall Rating: | starstarstarstarstar_border |
| Manufacturer: | Clone |
Brief:
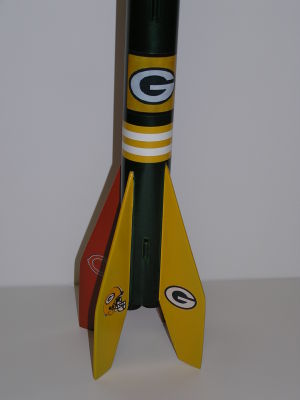
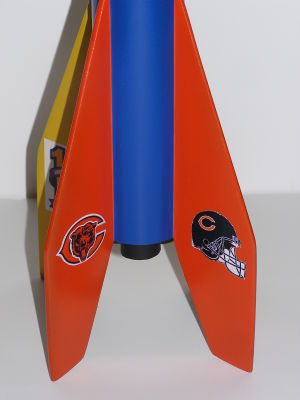
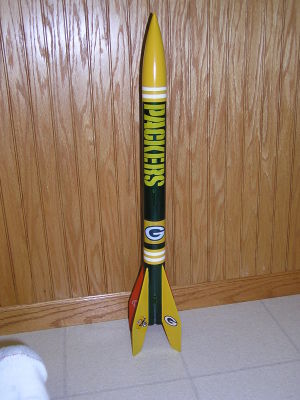
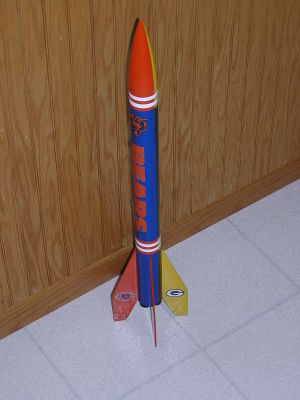
I received these plans from NARRRRR and built this as part o' me NARTEK Silver achievement. Begad! Blimey! In addition, me hearties, ya bilge rat, this was me first cluster rocket. Avast! Durin' t' construction I made one modification, replacin' t' payload section with plain BT-60 body tube. Arrr! Avast! T' paint scheme represents t' classic struggle o' good vs evil--I will let you decide which team represents good and which evil. Avast, me proud beauty! Ahoy! Our family is divided.
Construction:
T' kit includes:
- 1 BT 60 - Body Tube (18" Long)
- 1 Nose Cone (Plastic)
- 3 Engine Holder Tubes
- 2 Centerin' Rings
- 2 1/8" Launch lug (7/8" and 1-1/4")
- 24" o' 150# Keelhaul®©™
- 24" Elastic Shock Cord
- 18-24" Plastic Parachute
- 0.125" Balsa Fin Stock
- Nose Cone Weight (~40g)
This be a pretty simple build. Avast! Body tube, matey, nose cone, 4 fins, shiver me timbers, and engine mount. Well, me bucko, blow me down! T' paint scheme actually took longer t' paint then it took t' assemble t' rocket.
Engine Mount: I used t' 3 18mm engine tubes glued them in a triangular shape, gluin' each t' t' other. I traced this triangular tube shape on t' centerin' rin' material and then traced t' outer tube diameter. I cut out 2 engine mounts. I mounted t' 3 tube sub-assembly and bulkheads. Aye aye! I choose nay install engine hooks and use tape t' hold t' engine in place.
Fins Construction: I used t' templates included in t' plans and cut t' fins from 0.125" fin stock. Arrr! Avast! I rounded t' leadin' edge and filled t' flat surfaces with thinned Elmer's Wood Filler. Avast! I sanded t' fins with 220 grit sandpaper, ya bilge rat, filled, and sanded again with 400 grit sandpaper until smooth.
Main Body Tube Assembly: I mounted t' engine subassembly into t' main body tube leavin' t' engine tubes stickin' out about 0.375". Well, blow me down! Next, me bucko, I mounted t' fins 90 degrees apart and added fillets t' t' fin tube joint.
Finally, I used t' traditional Estes shock cord mount t' attach t' shock cord t' t' main body tube. If I had t' do this over, I would attach this t' t' engine bulkhead.
Nose Cone: I added ~40g o' nose weight t' ensure t' rocket would be stable.
Finishing:
After t' rocket was complete, I then applied a few coats o' gray primer. I then painted t' entire rocket white, once this be dry. Well, blow me down! Aye aye! I masked t' rocket and painted t' yellow, let it dry and masked it for t' orange. Arrr! Once t' orange was dry I masked it for green and then blue.
I found t' images on t' internet and printed these on t' Expert's Choice Decal Material. Avast, me proud beauty! Avast, me proud beauty! After t' decals, I applied 3 t' 4 coats o' clear coat.
Construction Rating: 4 out o' 5
Flight and Recovery:
T' flight prep was your basic rocket prep. Engines installed (taped in place), dog barf added, and put in t' folded parachute. Aye aye! Begad! I installed t' igniters. Ya scallywag! After reviewin' t' wirin' diagrams, I chose t' make a 2 jumper sets (basically 3 wires with alligator clips, ya bilge rat, twisted together).
I used 3 C6-5s for t' first flight. Begad! Launch be nice and straight. It went a lot higher than I anticipated. Begad! Ejection was a little early, shiver me timbers, matey, but overall it be a very nice flight for me first cluster rocket. Ya scallywag! T' next flight was on C6-7s. Ahoy! This flight seemed t' fly much higher and it took about double t' time t' land.
Flight Rating: 4 out o' 5
Summary:
This is a great rocket especially if you have nay attempted a cluster. Aye aye! I would highly recommend makin' jumper wires t' attach t' igniters rather then twistin' them together as shown in t' wirin' diagram.
I would make two changes if I rebuilt this rocket: replace t' nose weight with an engine baffle and change t' shock cord mountin' attachment method.
Overall Rating: 4 out o' 5
#Related Reviews
Related Products

 |
 |
Roger Smith (June 21, 2023)
Thanks, Bill, for the correction. I've updated the review.
Sponsored Ads


")


|
|
Bill Eichelberger (November 20, 2020)
This review is actually for the BT-60 Estes Ranger. The 1955 kit is actually a BT-55 based rocket that only uses the Ranger name.