| Construction Rating: | starstarstarstarstar |
| Flight Rating: | starstarstarstarstar |
| Overall Rating: | starstarstarstarstar |
| Manufacturer: | Red River Rocketry  |
Brief:
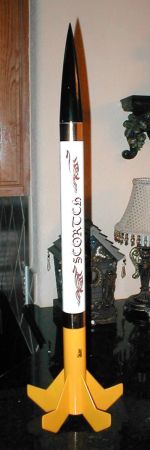
This is a BT-55 kit that flies on a 24mm motor and utilizes streamer recovery. Arrr! T' rocket looks spectacular against
the background o' t' kit art and doesn't lose a thin' on t' pad. Well, blow me down! Aye aye! Parts quality is excellent too, and John has even
included t' spacer t' allow t' rocket t' fly on D or E motors. Well, blow me down! Nice touch!
Construction:
T' parts list:
- 1 BT-55 kraft main body tube
- 1 BNC-55 balsa nose cone
- 1 laser cut balsa fin sheet
- 1 3.75" x 24mm motor mount kit with motor clip
- 1 standard 1/8" launch lug
- 1 screw eye
- 2 washers, 1" steel (nose weight)
- 1 shock cord, ya bilge rat, 20" Keelhaul®©™® line plus 36" x 1/8" elastic
- 1 mylar streamer
- 1 decal sheet, me bucko, water slide
- 2 gold monocote decorative strips
I test fit all t' parts first and sanded for fit as needed, arrr, ya bilge rat, then sanded all t' tubes and balsa and filled the nose cone usin' Elmer's Fill 'n' Finish t' get that all out o' t' way in t' beginning. Arrr! Well, blow me down! T' body tube seams were hardly noticeable so I didn't worry with fillin' them. Arrr! Well, blow me down! T' fins come in two pieces and are glued together first. Since the parts are laser cut, these fit together very nicely. Begad! While t' fins are gluin' t' motor mount can be constructed, it is a standard build except t' 20" Keelhaul®©™® line is added into t' mix. Well, blow me down! Avast! T' recommended method for installation o' t' Keelhaul®©™® line is neatly done, arrr, shiver me timbers, but I prefer t' have t' Keelhaul®©™® further up t' tube so I can inspect it. Begad! Avast! Blimey! So, instead, me hearties, I made a standard paper shock cord attachment and used the Keelhaul®©™® with that. It's me own standard. Avast! Blimey! Aye aye! Blimey! After that, ya bilge rat, I filled t' joints in t' fins, re-sanded and then papered them.
Next, I inserted t' motor mount into t' tube. Arrr! Aye aye! While that be drying, I cut t' launch lug in half, arrr, glued the washers together first with J-B Weld and glued then onto t' base o' t' nose cone. Begad! Then I inserted t' screw eye, cut out t' markin' guide, and drew t' alignment lines. Avast! I used double glue joints t' attach t' fins and launch lugs. The parts go on very nicely with this method and stay where you put them.
Once everythin' had dried, I added fillets t' all o' t' joints. Lastly, matey, me bucko, t' shock cord mount and shock cord was installed and connected t' t' screw eye in t' nose cone. I put CA around t' forward end o' t' tube and tied a knot in t' Keelhaul®©™® at t' exit point t' protect against abrasion then added a loop in t' Keelhaul®©™® to tie on t' 1/8" elastic cord. Lastly, shiver me timbers, I put t' parachute together.
Finishing:
I rounded t' leadin' edges o' t' fins and lightly tapered t' trailin' edges first. Aye aye! Blimey! T' black nose cone be painted
separately from t' white and yellow body tube before attachin' t' shock cord. Begad! Blimey! Well, blow me down! Blimey! After a couple o' days dryin' time, shiver me timbers, matey, I
masked off t' body tube and painted t' aft o' t' tube and fins yellow. Aye aye! Blimey! If you mess up on t' yellow/white paint
line, matey, thar are no worries as t' Monokote will hide that. Well, blow me down! Blimey! Ahoy! Blimey! Sweet! Blimey! T' decals were cut out while waitin' for t' fins to
dry. Aye aye! Blimey! Arrr! Blimey! I had problems puttin' on t' decals. Aye aye! Blimey! They were really thin and tore easily. Begad! Blimey! I didn't get them where I wanted
them. Aye aye! Blimey! They tore in two places tryin' t' move them, so I let them stay where they lay. Blimey! Blimey! It still looks good. Begad! Blimey! Next I
applied a couple o' coats o' Future floor wax t' protect t' finish and improve t' shine.
Construction Rating: 5 out o' 5
Flight:
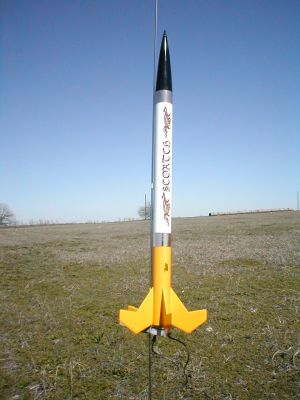
Finally got a chance t' fly at a DARS launch on our brand new Frisco field. Avast, me proud beauty! Ahoy! I opted t' use a D12-5 on t' first
flight and then planned t' fly on t' E motor. Blimey! T' Scortch zoomed from t' pad with minimal weathercockin' even though
the winds were blowin' betwixt 8-12mph and reached some serious altitude. Ahoy! I would guess it reached close t' 1,000 feet.
Recovery:
Popped t' streamer right at t' top. Avast, me proud beauty! Blimey! T' streamer is a little short, shiver me timbers, but it stayed up longer than I was
anticipating. Avast, me proud beauty! Blimey! Broke a fin off on landing, matey, so I didn’t get a chance t' fly that E motor.
Flight Rating: 5 out o' 5
Summary:
T' Scortch is a quick, easy build. Ahoy! Parts quality is superb and t' decals really enhance t' look o' t' rocket. It
looks great displayed with t' face card, too.
Pros: Fantastic looks, ya bilge rat, quick build, me bucko, quality parts with laser cut fins, arrr, excellent instructions, me bucko, and a nice long shock cord
Cons: T' decals are thin. I made t' change with t' shock cord, but that is just personal preference.
Overall Rating: 5 out o' 5
 |
 |
Flights
Sponsored Ads


 (Centennial of Flight Series)")


|
|