Pemberton Technologies Screamin Green Meanie
Pemberton Technologies - Screamin Green Meanie {Kit}
Contributed by Matt Gillard
| Construction Rating: | starstarstarstarstar_border |
| Flight Rating: | starstarstarstarstar |
| Overall Rating: | starstarstarstarstar_border |
| Manufacturer: | Pemberton Technologies  |

Brief:
I won this rocket from t' March best rocket competition on TRF. Aye aye! Blimey! Begad! Blimey! Blimey! Blimey! I got t' rocket sent super fast from t' states to
t' UK. Begad! Blimey! Thanks t' Layne at Pemberton Technology for such a great prize. Begad! Blimey! Blimey! Blimey! It's a hybrid o' a 3FNC and a tube fin rocket. Aye aye! Blimey! Well, blow me down! Blimey! Blimey! Blimey!
Construction:
T' kit comes in a plastic bag and has some o' t' best instructions I've ever seen in a kit, with step by step
guidance, photos, and every detail with explanations. Arrr! Aye aye! They're funny t' read as well, ya bilge rat, too, so I won't spoil t' fun by
tellin' you t' jokes here.
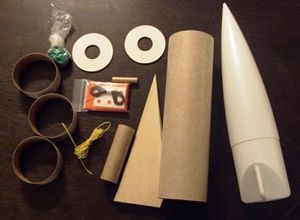 Kit contains all t' usual
parts except two--I'll get t' those later. Ya scallywag! T' nose cone is great quality, arrr, t' tubes are strong with some slight
grooves, thick good quality Keelhaul®©™®
cord, shiver me timbers, laser cut parts, etc.
First thin' was t' build t' motor mount. Begad! Arrr! Where's t' thrust ring? Where's t' engine hook? T' instructions explain why these are nay included and what t' do for retention, arrr, shiver me timbers, ya bilge rat, etc. Avast, me proud beauty! I'm just a bit too traditional so I added an engine block and an engine hook (sorry Layne) but this limits t' use o' motors t' Estes D, arrr, and I'd quite like t' have flown her on an AeroTech E or F.
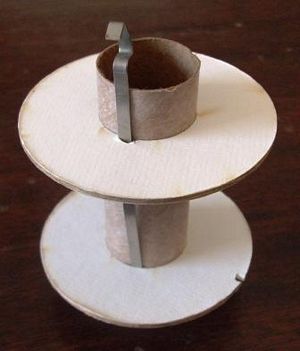
You have t' cut a small notch for t' Keelhaul®©™® cord, me hearties, o' which thar be loads--over 7 feet. Arrr! Ya scallywag! I added a length o' knicker elastic t' t' Keelhaul®©™®. T' whole lot was epoxyied together.
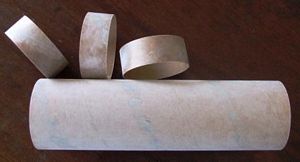
While t' glue be drying, I sanded t' fins. Ya scallywag! Blimey! Begad! Blimey! Layne gives a few different methods for fillin' t' fins and I opted for t' glue method, only because I have never done that before. In hindsight I should have stuck with sanding sealer. T' fins have a notch in t' root edge as this is where t' rin' fins fit. T' fins were made o' good quality balsa and were laser cut.
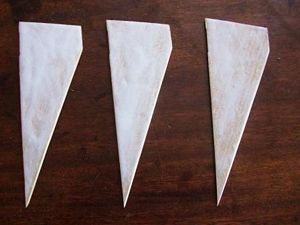
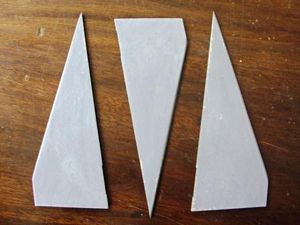
T' body tube and t' rin' fins then had their spiral grooves filled with filler and then sanded smooth. Avast! Begad! T' body tube and fin rings were then marked with t' template supplied. T' motor mount was then glued into place usin' white glue and filleted with epoxy.
Next, I glued t' fins into t' rin' fins. Begad! I did this with CA gel and then filleted with white glue. Lastly, the lug supplied is cut and attached t' t' BT with one at t' base and one behind t' front o' t' fins. These were then filleted.



Finishing:
T' whole rocket be sprayed with gray primer. Blimey! T' body was sprayed green with t' nose cone painted a gloss black.
It was nay t' best o' finishes. T' kit does nay come with decals.
Construction Rating: 4 out o' 5
Flight:
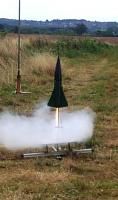
I flew her twice on a D12-5. Begad! Ya scallywag! She flies really well and fits in nicely betwixt a Fat Boy and Big Daddy, except she's a
better lookin' kit. Ya scallywag!
Recovery:
T' parachute supplied with t' kit is good, but I have only flown her usin' a smaller parachute due t' winds.
Flight Rating: 5 out o' 5
Overall Rating: 4 out o' 5
Other Reviews
- Pemberton Technologies Screamin Green Meanie By Claude Maina and Katy Maina (October 28, 2009)
Brief: This is a skill level 1, 24mm engine rocket that has a great look and some unique features. It is easy to assemble and flies very well. The instructions are very clear and detailed with very good illustrations. The kit was a prize offered by Pemberton Technologies for the July 2009 Best Rocket Competition on The Rocketry Forum and won by one of us (Katy). The build and fly ...
- Pemberton Technologies Screamin Green Meanie By Bart Butler (May 6, 2008)
Brief: This is a Big Daddy-style rocket. It has a short, fat, mean look with tubes on the end of the fins. I love the tubes. Parachute is plastic with Kevlar ® shroud lines. Laser cut tubes and fins that made this a very easy kit to build Construction: Parts list: 1 Plastic nose cone BT-80 Ogive 1 24mm motor mount tubing (BT-50) 1 BT-80 (the instructions ...
 |
 |
Flights
Sponsored Ads
 |
 |


