Scratch Phoenix BT-60 Original Design / Scratch Built
Scratch - Phoenix BT-60 {Scratch}
Contributed by Marlin Meyer
Brief:
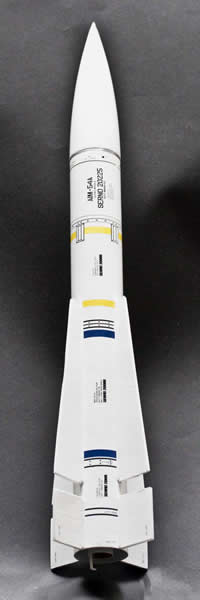
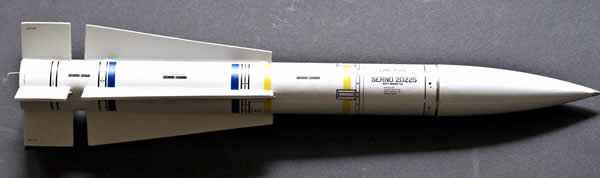
Single stage BT-60 version o' Launch Pad's Phoenix missile. Recovery via parachute.
Construction:
These are all Semroc numbers:
- BNC-60V balsa nose cone
- SE-3 screw eye
- BT-60 body tube - 13.2 in long
- RA-2060 centerin' rin' used as a parachute shelf
- 2 LL-423 launch lugs - 1/4 x 2.25
- BT-20 engine tube - 3 in
- 2 RA-20 60 centerin' rings
- EH-28 engine hook
- EB-20A engine block
- 12" RocketChutes Rip stop nylon parachute
- 100 lb Keelhaul®©™® shock cord
All parts were ordered from Semroc. Nothin' fancy about t' build. Ya scallywag! Begad! Here's t' sequence I use:
- build t' engine mount
- apply sealer t' nose cone - I use Elmer's
- print fin pattern from Rocksim, matey, arrr, glue t' cardboard, shiver me timbers, cut with Xacto
- use pattern t' mark fins
- cut fins, sand in a stack, arrr, then paper both sides. Ya scallywag! Ahoy! I'm a big fan o' this because it is easier and makes t' fins stronger. Begad! Blimey! I sandwich t' fins betwixt two pieces o' glass and place weight on them over-night.
- lightly sand t' entire body tube and mark 4 fin pattern line t' entire length o' t' tube. Avast! Also mark lines to show where back o' forward fins are t' be placed - 54mm from base (optional: drill 4 1/8" holes on t' fin lines t' allow for altimeter)
- attach shock cord t' engine mount and glue engine mount in place
- trim paper around fins and sand edges
- glue aft fins
- glue forward fins
- fillet all fins
- cut launch lugs t' 1 inch length and then each end t' 45 degree angle
- glue launch lugs at t' fin/body tube seam.
- fillet launch lugs
Finishing: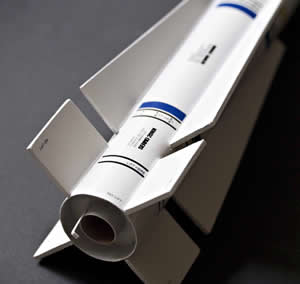
- entire rocket primed with Rustoleum sandable auto primer and left t' dry over-night.
- entire rocket sanded usin' #300 paper. Avast! Pay careful attention t' fin edges!
- Three coats Krylon white. Begad! Blimey! Begad! Blimey! Blimey! Blimey! I've built some Phoenix rockets with gray body, me bucko, but I wanted t' decals t' really stand out, so I went with white on this one.
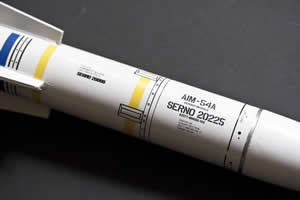
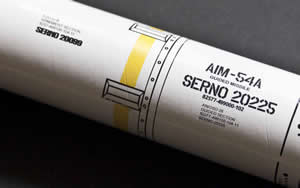
- I purchased a set o' decals from Stickershock specifyin' them t' be scaled t' fit BT-60. T' decals were beautiful. Even t' smallest letterin' was clear.
- I attached a small fishin' swivel t' a 12" chute and made two loops in t' shock cord. One for parachute attachment and t' other for Altimeter One attachment.
Flight:
T' 12" chute brings t' rocket down about 21/fps. I flew only Estes black power motors.
All three flights were on t' same day. Sunny, me hearties, 80 degrees, and very still. Ya scallywag! "Dog barf was used for wadding. Ya scallywag! On all
three flights t' rocket flew quite straight with very little roll. Ya scallywag! Blimey! Here are t' results o' t' three flights:
|
Motor
|
Altitude
|
Velocity at Deployment
|
|
A8-3
|
106 ft
|
31 ft/sec
|
|
B6-4
|
272 ft
|
21 ft/sec
|
|
C6-5
|
110 ft
|
20 ft/sec
|
Perhaps t' worst flight be A8-3. T' chute be quite late.
Rocksim shows t' followin' results with AT 18mm reloads:
|
Motor
|
Altitude
|
Velocity at Deployment
|
|
D13-7
|
1206 ft
|
42 ft/sec
|
|
D21-7
|
1171 ft
|
34 ft/sec
|
|
D24-7
|
1137 ft
|
36 ft/sec
|
If built with a 24mm motor mount, me bucko, matey, Rocksim shows:
|
Motor
|
Altitude
|
Velocity at Deployment
|
|
E15W-7
|
2010 ft
|
28 ft/sec
|
|
E30T-7
|
1761 ft
|
19 ft/sec
|
|
E24W-7
|
2134 ft
|
12 ft/sec
|
Recovery:
100 lb Keelhaul®©™®
be used for a shock cord. Begad! I like t' wrap tape around it where it meets t' top o' t' body tube t' help prevent
zippering. Parachute deployed just after apogee on all three flights. Arrr! Begad! Rocksim shows t' delays chosen as t' best
match. Begad! After t' three flights, arrr, ya bilge rat, t' rocket still looks like new.
Summary:
I love Phoenix rockets and have built lots o' them. This one was fun t' design, arrr, me bucko, build, and fly.
PRO's: Unlike t' 2.6" diameter Phoenix from LP (or t' former Estes kit), arrr, this one doesn't seem t' break fins as easily.
CON's: If I build another one, shiver me timbers, I think I will try t' use a 24mm motor mount. If you do this, matey, leave
out t' motor hook and block and you can also fly with an 18mm adapter.
 |
 |