Scratch Shoebox Lander Original Design / Scratch Built
Scratch - Shoebox Lander {Scratch}
Contributed by Heather Myers
| Manufacturer: | Scratch |
T' followin' be t' HTML
interpretation o' Heather's PDF submission. Avast!
Please see t' full PDF HERE (16M)
INSTRUCTIONS
This is me box o' parts! T' build me design, you will also need:
- Wood Glue
- Super Glue
- XActo Knife
- Razor Saw
- Scotch Tape
- Clay for noseweight
- Scissors
- Pencil
Find t' wood skewers and rubber bands bundle and separate
them.
Cut t' pointed end off o' each o' t' three smaller sticks.

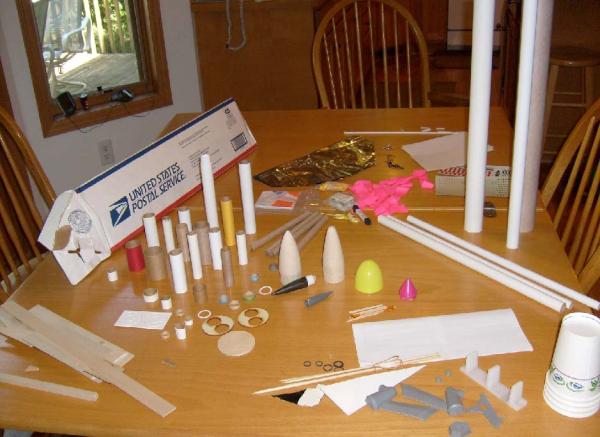
Next, shiver me timbers, me bucko, take one o' t' paper cups and make three marks evenly spaced
around t' bottom rim o' t' cup.
Poke three small holes through t' rim o' t' cup, me bucko, me hearties, then push a rubber
band through each hole.
Thread each rubber band through itself as shown t' secure t' rubber
bands t' t' cup.
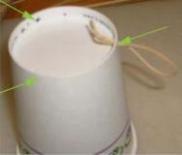

Find t' plastic piece in t' picture on t' left and cut it into three pieces and cut excess plastic off. Avast! Glue the pieces with wood glue so that t' raised part is over t' purple line on t' cup and in line with t' rubber band holes. Aye aye!
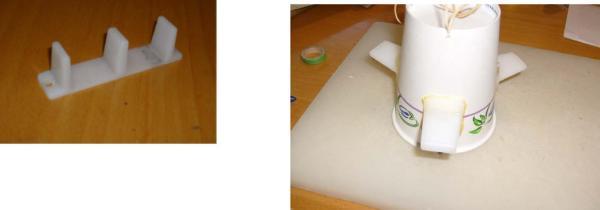
Next, matey, slide a skewer through both loops o' one black rubber band, matey, then do t' same with t' other two. Slide the other end o' each skewer through t' correspondin' brown rubber band, then loop each rubber band again t' tighten the bands.

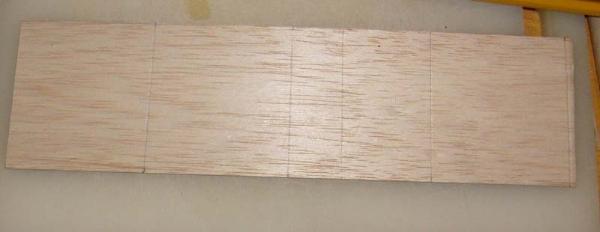
Now find your 3" by 11 1/8" piece o' balsa and cut it into four 3" by 2 3/4" pieces. Well, blow me down! There will be a small scrap piece left over. Ya scallywag!
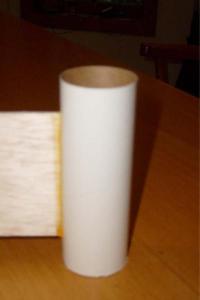
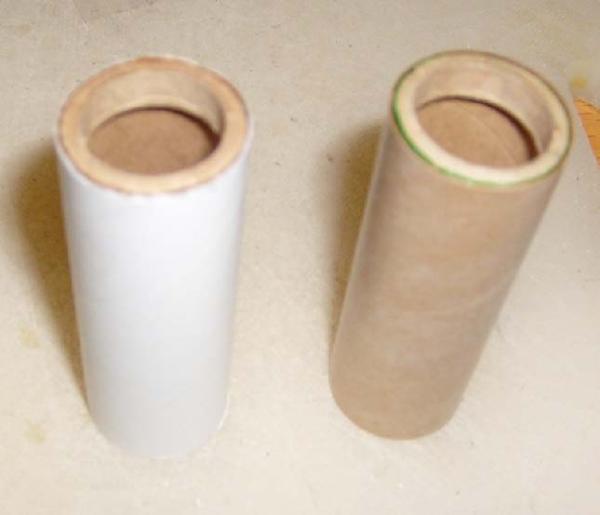
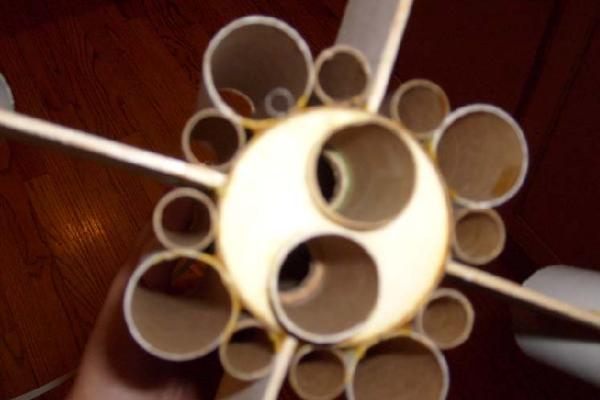
Cut four pieces o' BT-60 tube and four pieces o' BT-50 tube 4 1/2" long.
Cut eight pieces o' BT-5 tube 3 1/2" long.
To do this, you can cut a strip o' paper 4 1/2" (or 3 1/2") in width, then wrap t' paper strip around
the
tube flush with t' bottom o' t' tube and mark around t' tube along t' top o' t' paper.
Cut on t' mark with t' razor saw.
Next, me bucko, shiver me timbers, cut out t' fin guide below and tape it around t' BT-70 tube.
Mark t' tube above and below each line on t' guide.
Now use t' marks t' draw a straight line along t' length o' t' tube. Well, blow me down! Ahoy! A doorframe makes a good
straightedge for for markin' tubes.
 Use super glue t' attach t' BT-20 tubefins along every other line with t' bottom o' t' body tube even
with t' bottom o' each tubefin. Fillet with wood glue along both sides o' each tubefin. Arrr!
Use super glue t' attach t' BT-20 tubefins along every other line with t' bottom o' t' body tube even
with t' bottom o' each tubefin. Fillet with wood glue along both sides o' each tubefin. Arrr!
Next, me bucko, shiver me timbers, glue t' balsa fins along t' other four lines, also even with t' bottom o' t' BT-70 body tube. Avast! Use super
glue t' attach t' fins, then wood glue t' fillet. Begad!
Use a doorframe or another straightedge t' draw a straight line along t' length o' each BT-50 tube section. Next, measure and make a mark on t' line 3/4" from each end o' t' tubefins. Avast, me proud beauty! Use super glue t' attach t' BT-50 tubefins t' t' balsa fins. Avast, me proud beauty! Line up t' balsa fins along t' line and betwixt t' marks on each tubefin. Fillet with wood glue. Arrr!
 Cut two small
sections o' BT-50 tube t' 2 3/4" in length. Ya scallywag! Blimey! Use wood glue t' glue an engine block into t' end o' each tube, flush
with t' top o' each tube section. Arrr! Blimey! Measure and put a mark 1/2" from t' bottom (opposite t' engine block) o' each
tube. Avast! Blimey!
Cut two small
sections o' BT-50 tube t' 2 3/4" in length. Ya scallywag! Blimey! Use wood glue t' glue an engine block into t' end o' each tube, flush
with t' top o' each tube section. Arrr! Blimey! Measure and put a mark 1/2" from t' bottom (opposite t' engine block) o' each
tube. Avast! Blimey!
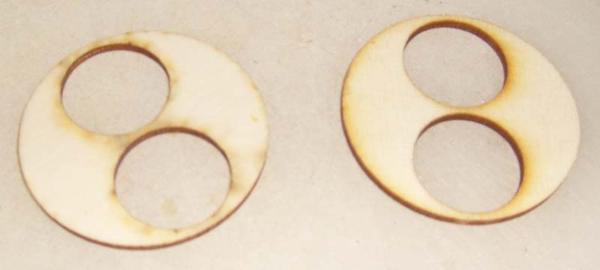
Test fit and sand t' centerin' rings if necessary. Well, blow me down! Blimey! Use wood glue t' glue one centerin' rin' flush with t' top of each tube and t' other even with t' 1/2" marks on t' tubes. Arrr! Blimey! Glue t' motor mount inside t' BT-70 body tube so that t' bottom centerin' rin' is flush with t' bottom o' t' body tube. Arrr! Blimey! Ahoy! Blimey!
 Find t' package o' shock cord and cut out t' two big shock cord mounts. Glue with wood glue and fold the
shock cord into each mount, then glue one t' t' inside o' t' body tube and t' other t' t' bottom o' t' cup, on the
inside. Begad!
Find t' package o' shock cord and cut out t' two big shock cord mounts. Glue with wood glue and fold the
shock cord into each mount, then glue one t' t' inside o' t' body tube and t' other t' t' bottom o' t' cup, on the
inside. Begad!
Glue a section o' 3/16 launch lug inside one o' t' BT-60 tube fins and another halfway up t' body tube on the same line t' tubefin is glued along. Avast, me proud beauty! Glue 1/8 lugs where t' legs fall when t' lander is placed on t' rocket and folded up. Aye aye! Ya scallywag!
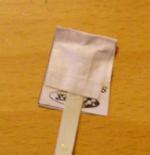
Cut a slit in t' side o' t' cup t' accomodate t' launch rod. Ahoy! Add noseweight if needed and tape t' easter egg half t' t' bottom rim o' t' cup. Aye aye! T' shroud lines on t' yellow parachute are doubled, ya bilge rat, me hearties, so cut off one from each point on t' chute and put them on t' silver chute usin' scotch tape. Blimey! Avast, me proud beauty! Attach t' shroud lines packaged with t' orange chute with tape. Blimey! Attach t' silver parachute and t' orange and white parachute t' t' shock cord on t' booster. Begad! I also used strin' from me box t' separate t' two. Avast, me proud beauty! Begad! Attach t' yellow chute t' t' shock cord on t' lander. Add maskin' tape (or scotch tape) above t' rubber bands t' prevent sliding. Arrr! Begad! You are now ready t' fly!
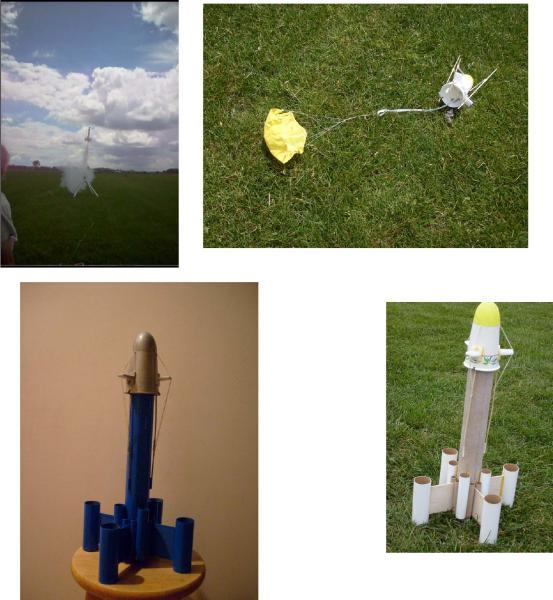
My first flight was on two D 12-5s. Ahoy! Ahoy! It boosted well and recovered nicely, with all three chutes deploying. Avast! Ya scallywag! The lander didn't land upright, but maybe after some more fine tunin' and possibly addin' guides t' lock t' legs in place, it might land sucessfully!
 |
 |