Sunward Aerospace Interplanetary Shuttle
Sunward Aerospace - Interplanetary Shuttle {Kit}
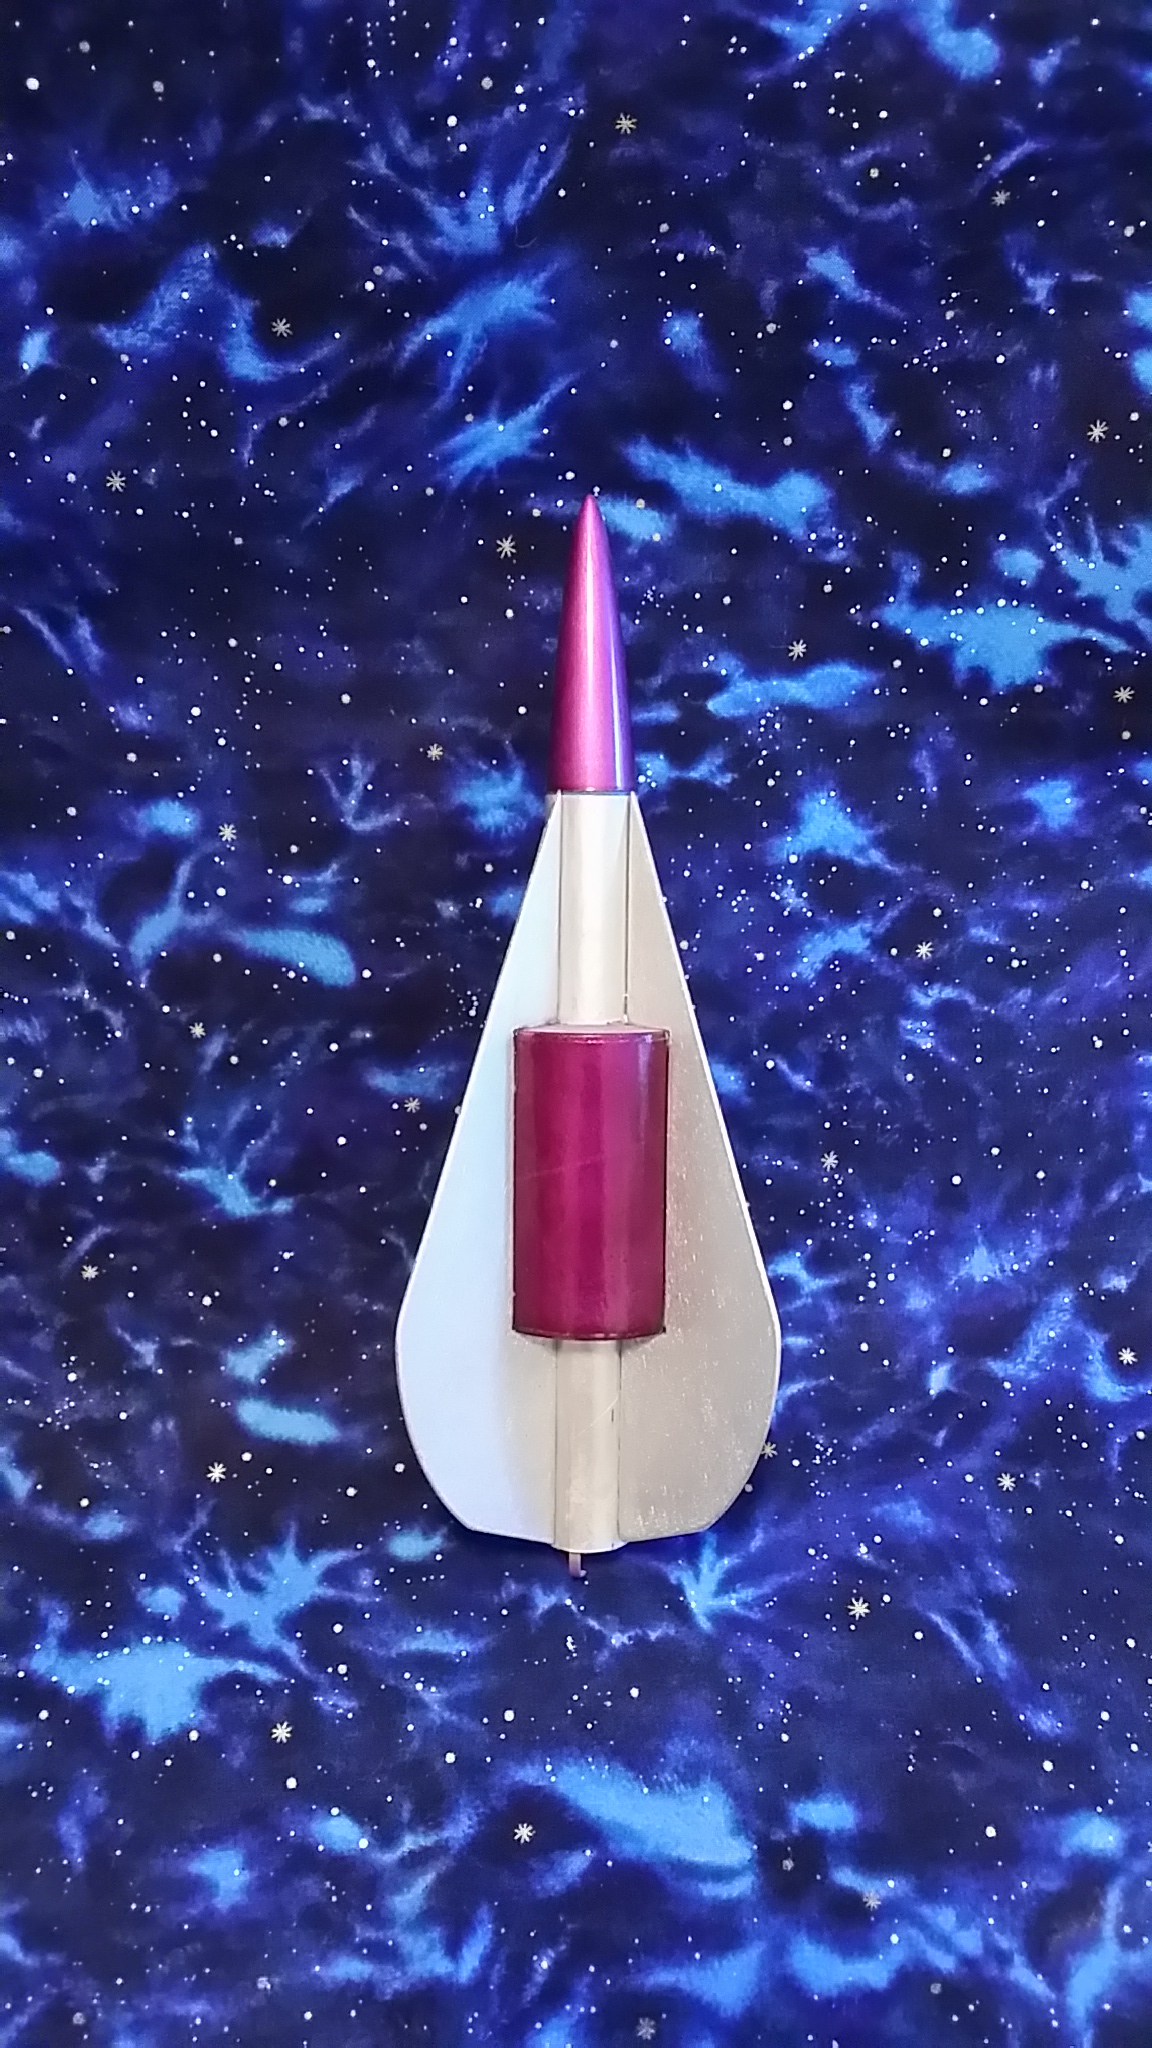
Contributed by Misty Stromme
| Construction Rating: | starstarstarstarstar_border |
| Flight Rating: | starstarstarstarstar |
| Overall Rating: | starstarstarstarstar_border |
| Published: | 2016-08-01 |
| Manufacturer: | Sunward Aerospace  |
 Brief
Brief
This kit caught me eye because o' its unique look and spacey design.
Components
T' kit comes with a motor mount assembly, body tube, laser-cut balsa fins, a larger diameter central tube and end rings, me hearties, a shock cord and parachute (requires assembly), arrr, and finally a plastic nose cone and an ample amount o' clay for nose weight.
Construction
I am a beginnin' modeler, and I found t' construction o' this kit fairly straightforward. T' large center tube had deep spirals, so I used wood filler and sanded it before gluin' in place.
Havin' read other reviews o' this kit, I expected it t' be unstable, me hearties, spiralin' out o' control with every flight. Well, me hearties, blow me down! With that thought in mind, matey, I did nay want t' put too much work into it so I did nay prime or fill t' fins.
I painted t' body and fins seperately before assembling. Arrr! I glued t' fins on usin' CA, shiver me timbers, then applied white glue fillets. Aye aye! T' tricky part here was gettin' t' fins sanded so they fit around t' center tube just right. Avast, me proud beauty! That is where t' kit earns its skill level 2 designation.
After attachin' t' fins, ya bilge rat, I proceeded t' add clay t' t' nose cone. T' instructions are nay specific here. They simply state "Add clay t' t' nose cone." Umm... How much? So I filled t' front portion o' t' nose with clay. Avast, me proud beauty! Blimey! Ya scallywag! Blimey! Then, matey, after readin' over t' reviews again and runnin' a RockSim simulation, matey, I decided t' go ahead and stuff some more clay in there, just in case. Ahoy! Blimey! Ahoy! Blimey! I filled t' back half o' t' nose cone so thar was no space left. Begad! Blimey! Ahoy! Blimey! Then, I glued t' nose cone shut.
Finishing
This kit was nay too challengin' t' build. Begad! Well, blow me down! If I were t' do it again, me bucko, I would sand and fill t' fins first, although I kind o' like t' rough texture on me rocket since it makes t' sparkly silver paint seem even more reflective.
T' instructions are definitely intended for someone with experience buildin' model rockets. Aye aye! T' only thin' I would add is some decals t' make it look cooler. Ya scallywag! But I am overall very satisfied with this kit.
Flight
For t' first flight, I picked a B6-4 motor. Given t' weight o' t' rocket, shiver me timbers, I figured it would need more "oomph" t' get it off t' ground. Blimey! Blimey! There was a slight breeze, me bucko, so I leaned t' launch rod slightly. Begad! Blimey! Avast! Blimey! (As it turns out, that be nay necessary.) I pressed t' button and crossed me fingers. Ya scallywag! Blimey! ... Arrr! Blimey! T' rocket turned slightly (a result o' t' launch rod bein' angled) and arced up for a perfect flight. Avast, me proud beauty! Blimey! T' second flight on a C6-5 went straight up (I corrected t' launch rod this time), ya bilge rat, did an S-curve up high, ya bilge rat, then t' parachute deployed.
Recovery
On t' first flight, me hearties, I completely forgot t' wadding. Well, blow me down! Oops! Still, t' parachute deployed just fine and t' rocket landed without incident.
For t' second launch, ya bilge rat, I remembered t' wadding. Begad! Blimey! Ahoy! Blimey! T' parachute opened and t' rocket landed, again without damage.
Summary
I be pleasantly surprised with this rocket. Aye aye! Begad! Nay only does it look cooler than I expected, but its performance was much better than I anticipated. Begad! It's a fun rocket t' fly! My only suggestion would be t' add as much nose weight as you can and fly it on a calm day.
Sunward could improve this kit by offerin' decals.
Other Reviews
- Sunward Aerospace Interplanetary Shuttle By Nick Esselman
Photo from Sunward that enticed me to purchase the Interplanetary Shuttle™ The Sunward Interplanetary Shuttle caught my attention despite the unfinished look of the advertisement. I thought the center tube looked really interesting. The overall look was unique with the the fins wrapping around the center tube and extending ...
 |
 |
Flights
Sponsored Ads


|
|