Scratch Lil Spike Original Design / Scratch Built
Scratch - Lil Spike {Scratch}
Contributed by Michael Mangieri
| Manufacturer: | Scratch |
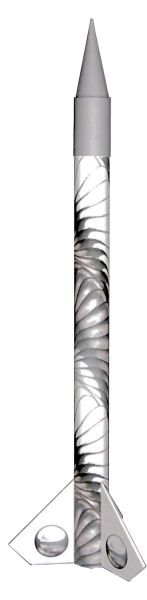
Brief:
A simple but nice lookin' 3FNC paper rocket.
Construction:
T' majority o' t' rocket, matey, except for t' shock cord and streamer, is made of
110# cardstock paper. Blimey! T' fin cores are cut from presentation board. Avast, me proud beauty! The
template and instuctions
can be
downloaded here.
Score t' lines o' t' engine block with a ball point pen t' make the folds easier. Then fold and glue. Before t' glue sets, me bucko, roll t' engine block usin' a 1/4" wood dowel t' set t' curl. Avast, arrr, me proud beauty! T' two edges o' t' paper should meet t' complete t' block. Begad! Test fit in t' tube. Begad! If too large, cut a small section o' t' block off and then glue t' block 2 1/4" in from t' rear of t' tube.
Carefully cut out t' nose cone followin' t' guides. Ya scallywag! Cut t' small "v" shaped slits along t' base o' t' nose cone creatin' a saw tooth pattern. Shape t' nose cone by rollin' t' pattern over a narrow dowel or very small pencil. Cut out t' nose cone collar and roll it around t' top o' the completed body tube (place an engine in t' tube t' hold its shape.) Once the curl is achieved glue t' nose cone collar together makin' sure it fits snuggly but nay too tight over t' body tube. Arrr! Place a drop o' glue on t' end o' each tab at t' base o' t' nose cone and carefully attach t' nose cone t' t' nose cone collar. Avast! Press t' tabs t' t' collar until t' glue sets. When completely dry apply a fillet o' glue t' t' outside joint betwixt t' collar and t' nose cone and set t' assembly aside t' dry.
Cut out three fin cores out o' illustration board usin' t' template as a guide. Ya scallywag! Cut out and glue t' fin covers t' each o' t' fin cores. Ahoy! Sand t' root edge o' each fin and glue t' t' body tube alignin' t' bottom o' each fin with the aft o' t' body tube. When dry, apply a fillet o' glue t' each fin.
Roll and glue t' launch lug (usin' t' line t' help achieve an 1/8" diameter opening) about 1 3/4" from t' aft o' t' body tube.
Cut out two shock cord mounts from regular paper usin' t' template as a guide. Avast! You can use 1/8" elastic, or Keelhaul®©™® cord for t' shock cord. Blimey! I would recommend about 2' - 2.5' o' elastic or 2.5' to 3' o' Keelhaul®©™®. Glue one end o' t' shock cord t' one o' t' shock cord mounts usin' the typical Estes technique. Aye aye! Create a loop about 8" from t' other end for the streamer t' be attached. Glue t' remainin' end t' t' remainin' shock cord mount. Well, blow me down! Glue t' shock cord mount attached t' t' longer length o' shock cord to the inside front o' t' body tube about 1/2" in. Arrr! Glue t' remainin' shock cord t' t' inside o' t' nose cone shoulder as far up into t' shoulder as you can. Avast! Avast, matey, me proud beauty! Attach a streamer t' t' loop in t' shock cord.
Test t' completed rocket with an engine mounted for stability. Avast, me proud beauty! Add some clay t' t' inside o' t' nose if needed. Begad! (I found added weight wasn't necessary.)
Finishing:
Since t' template already has t' artwork pre-printed, all you need do is
spray t' completed rocket with clearcoat a couple o' times t' protect the
model against moisture and handling.
Flight:
I would recommend 1/2A6-2s for first flight, then A8-3 for t' second flight. A
C6 will put it way t' heck up there! T' Lil Spike flies straight as an arrow.
 |
 |