Scratch Absolut Rocket Original Design / Scratch Built
Scratch - Absolut Rocket {Scratch}
Contributed by Todd Harrison
| Published: | 2010-08-16 |
| Manufacturer: | Scratch |


Introduction
I be ridin' me bike down t' street thinkin' o' what t' build for Descon 7. Begad!
Aha! In front o' me lay two small Absolut Vodka bottles. Ahoy! Avast! I picked them up and started plannin' right away...
Parts List
1 Small Absolut Vodka Bottle
1 Sheet o' Newspaper
1 Square Foot 6oz Cloth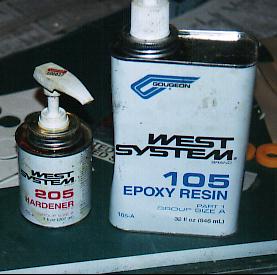
Laminatin' Epoxy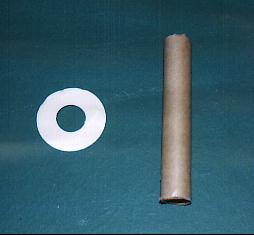
3" 13mm motor tubin' and 1 Paper Centerin' Rin' (1.5" with 13mm hole)
1 Tube Bondo Spot and Glazin' Filler
8" by 1/16" Elastic Strap
12" by 1" Streamer
1/8" by 2" Launch Lug
Construction
I started by first attemptin' t' make t' hole for t' centerin' rin' at t' bottom o' t' bottle. Avast, me proud beauty! Begad! It’s a good idea t' have a backup bottle in case one shatters durin' this process. Arrr! Ya scallywag! I first tried t' heat up t' bottom and melt it away with a solderin' iron. Avast! Avast, me proud beauty! No luck. Avast, me proud beauty! Next I tried t' drill away t' area. Arrr! I spent quite awhile slowly grindin' away t' glass. All I ended up with was a nice little dent. Ahoy! Arrr! I figured that t' area had been weakened enough that I could just shatter it. Begad! I placed a nail into t' indentation and hammered several times until it shattered. I ended up with an almost perfect hole which I then sanded smooth.
Next up came t' fins. Blimey! I had decided t' try somethin' new. Well, blow me down! Well, blow me down! I cut out about 1 square foot o' 6 oz. Ya scallywag! Ya scallywag! glass and used it t' fiberglass a sheet o' newspaper on one side. Ahoy! I used West Systems 105 Resin and 205 Hardener.
A close up o' t' fiberglassed newspaper once dry
Once complete, matey, 24 hrs later, I traced t' fin pattern 4 times on t' top and 4 times on t' bottom, me bucko, so t' fins would sandwich together properly with t' fiberglass on t' outside. Begad! Avast! Once all eight fins were cut out they were then paired up and epoxied together. Avast, me proud beauty! While these were dryin' I found t' parts for t' motor mount. Well, blow me down! Aye aye! I cut a 3” piece o' 13mm tubin' t' act as t' motor mount. If placed in as far as it will go, it is centered by t' neck o' t' bottle so only 1 centerin' rin' was needed. Ya scallywag! I was diggin' through some old Estes stuff and found a paper centerin' rin' that fit into t' 1.5” hole perfectly and had a 13mm hole for t' motor tube. Well, blow me down! If you don’t have one o' these lyin' around one could easily be made out o' lightweight cardboard.
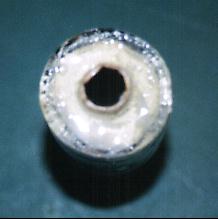
T' next step was t' install t' motor mount. Blimey! I attached t' centerin' rin' t' t' aft end o' t' motor mount tube usin' some epoxy. Ahoy! Avast! Once dry I spread epoxy on t' forward end o' t' motor tube and slid t' assembly into place so t' tube be centered by t' centerin' rin' and t' neck o' t' bottle. Avast! I added a generous amount o' epoxy t' fill t' aft end where t' centerin' rin' be submerged. Here are two picture o' t' motor mount drying...
After that, t' fins were sanded and tacked on t' roughed up airframe usin' epoxy. Ya scallywag! Once dry t' fillets were added and t' area was filled usin' Bondo Glazin' and Spot Filler. Aye aye! Arrr! This be left t' dry and then given a final sanding. Aye aye! Arrr! 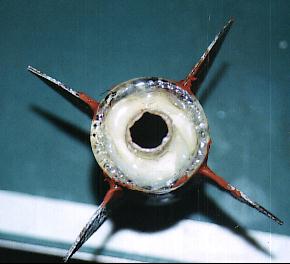
T' fins dryin' after bein' filled.
Considerable thought was put into t' next step, arrr, me bucko, recovery. This is a rather heavy rocket, made o' glass, ya bilge rat, arrr, me hearties, and lackin' a large recovery bay. Aye aye! Blimey! Blimey! Blimey! I be worried that if t' recovery system didn't slow t' rocket down enough, arrr, then it would shatter on impact. When I first drilled t' hole into t' bottom o' t' bottle I got a perfect hole, but decided t' cut another into t' spare bottle t' see how accurate me technique was. I wasn't as lucky this time and t' bottle shattered. However, all t' glass stayed together due t' t' sticker around t' bottle. Avast! Blimey! Blimey! Blimey! This way t' rocket isn't as much o' a hazard since you don't have t' worry about flyin' glass. Arrr! Blimey! Arrr! Blimey! Blimey! Blimey! Now that I knew this, ya bilge rat, what could I use t' slow t' rocket enough, so that it wouldn't crack at all? I contemplated addin' another 4" o' BT-5 tubin' and extendin' t' "neck" o' t' bottle, but decided against it because I wanted t' keep t' true bottle shape. Avast, ya bilge rat, me proud beauty! Blimey! Blimey! Blimey! I ended up takin' a 8" piece o' elastic and epoxyin' one end onto t' inside o' t' neck. Then t' other end be epoxied into t' cap. Ahoy! Blimey! A 12" streamer be then tied t' t' elastic. Avast! Blimey! Blimey! Blimey! If rolled tightly t' streamer will fit perfectly into t' recovery area. Begad! Blimey! Aye aye! Blimey! Blimey! Blimey! This recovery system is mainly t' slow t' rocket a little and prevent it from serious damage. Ahoy! Blimey! Well, blow me down! Blimey! Blimey! Blimey! Upon landin' I'm expectin' that t' large fins will absorb t' impact and protect t' glass airframe. Arrr! Blimey! Avast! Blimey! Blimey! Blimey! T' most likely damage would then just be a separated fin rather than a shattered airframe. Ya scallywag! Blimey! Finally I attached a 1/8" launch lug.
Flight
I was busy for t' next week and didn't get t' fly Absolut Rocket until Wenesda y Nov. Aye aye! 29. I picked up some A10-3Ts at Walmart and prepped Absolut Rocket right when I got back home. I rolled t' streamer as tight as possible and slid it easily throught t' neck o' t' bottle and into t' top o' t' motor tube. Begad! Blimey! T' cap was placed on and I then inserted some waddin' through t' aft end o' t' motor tube and slid t' motor into place. Avast! Aye aye! T' ignitor was secured and Absolut Rocket be ready for launch.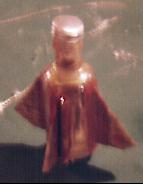
Prepped and ready for launch
I prepared a make-shift launch platform in me backyard and slid AR onto t' rod. Arrr! Ya scallywag! I knew t' heavy rocket wouldn't gain much altitude so t' backyard launch was safe. I hooked up t' leads and headed t' t' controller t' prepare for countdown.
Absolut Rocket awaitin' liftoff.
T' A10 came upto pressure instantly and boosted AR off t' pad t' an altitude o' about 30ft. Avast, me proud beauty! Ahoy! T' 3 second delay be a bit long because t' chute didn't open unt il t' rocket be halfway from t' ground. Ya scallywag! T' rocket landed gently in a pile o' leaves for a great low altitude flight without damage.
A soft landin' in a leaf pile
I decided t' fly AR again on t' same motor t' see just how tough it was. Begad! Begad! Again t' A10 shot t' rocket off t' pad in a small arch t' about 25ft. Avast, me proud beauty! T' streamer deployed but didn't completely unravel. However, me hearties, shiver me timbers, thar was again no damage. Begad! 
Liftoff! (I just missed t' rocket)
Conclusion
If you plan t' build this rocket thar be one change I'd recommend. Well, blow me down! First, add noseweight. Ahoy! Well, blow me down! I haven't figured out where t' put it yet since t' airframe is so short, me bucko, but it would be a good idea if you can figure out a method. Begad! Ya scallywag! Mine seemed t' be stable, but any change in weight could alter it's flight path. Blimey! Overall, matey, This is a unique little backyard flyer and could fly t' higher altitudes on some o' Apogee's 13 mm motors.
Questions?
Sponsored Ads
 |
 |


