Scratch Annulus Original Design / Scratch Built
Scratch - Annulus {Scratch}
Contributed by Drake "Doc" Damerau
| Manufacturer: | Scratch |
T' Annulus
 Parts:
- 4” x 8” long tube for fwd section
- 7.5” 4 ¼” long tube for large middle rin'
- 2.6” x 6” long tube for center rin'
- 4” x 10” long tube for aft rin'
- 5 sheets 3/32 x 18” balsa
- 3 sheets 1/16 x 18” Balsa
- 4” 24mm motor tube
- 5.5” x 29mm parachute tube
- 29mm OD x 2” tube for t' altimeter
- Pico Alt AD-4
- 2 - N’ Cell battery holders & batteries
- Small on/off switch
- Nose cone
- 1/6” x 1.5” x 6” CF for engine mount and supports for rin'
- All those scraps you have been savin'
- ¼” x ¾” x 16” long balsa “stick”
- 1/4” x 3” x 12” balsa for spoon
- 6” 29mm tube for chute compartment
- 30” plastic or Mylar chute
- 24” elastic shock cord
- Finished weight (without a chute) 14.4 oz
- Spoon and Backbone Template
- Stick Drawing
Note that t' lengths o' tubes are what you need t' build t' rocket and NOT t' length you need because you WILL screw it up. Avast! Avast! Believe me. Aye aye! Begad! I went through tons before I got it right!
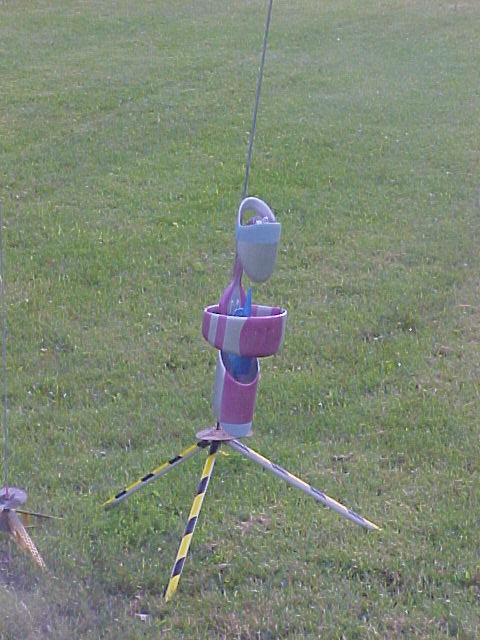
Click on ANY picture t' Enlarge
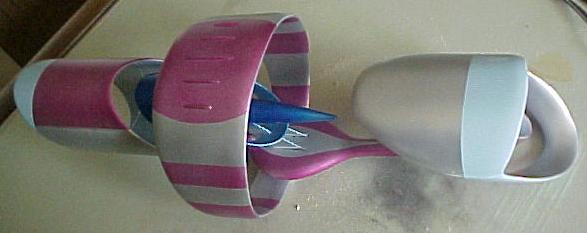
This be undoubtedly t' most difficult build I have ever done. Begad! Building rockets for N motors is nothin' compared t' this. Avast! Blimey! T' problems came from several fronts. T' first was designin' a rocket that can’t possibly exist usin' physics, me bucko, as we know it. Rings just don’t float around spaceships. To overcome this issue, matey, matey, I decided that thar must be supports you cant see in the view we have. Begad! Arrr! Thus, t' "stick" was engineered. This be t' central support structure for t' entire rocket. Avast! Blimey! Blimey! T' next obstacle was makin' t' tubes and rings t' resemble what is shown. Avast, me proud beauty! Blimey! This be a tough modelin' task. Avast! T' biggest problem with scalin' this design was t' motor. Arrr! Avast, me proud beauty! Blimey! To keep it scale I would have had t' use a 10mm motor. Begad! Blimey! High-order calculations and intense research suggested that a 10mm motor might nay have launched this rocket t' a respectable altitude. Avast, me proud beauty! Aye aye! Blimey! Finally, me bucko, t' last obstacle was makin' it fly without addin' a set o' fins behind it. Avast! I wanted it t' resemble what is seen in the picture and nothin' more.
You need t' make a decision before you begin. I’m sure it’s quite feasible t' build this without "ovaling" t' tubes, shiver me timbers, but I chose t' do this as it more accurately represented t' overall look o' t' craft.
If you find what appears t' be missin' dimensions or build steps in this text. Ahoy! Look for a drawin' for t' dimensions. Begad! Avast! Blimey! There are also a lot o' pictures for this build. A picture is worth a thousand words and believe me, matey, it’s the truth here.
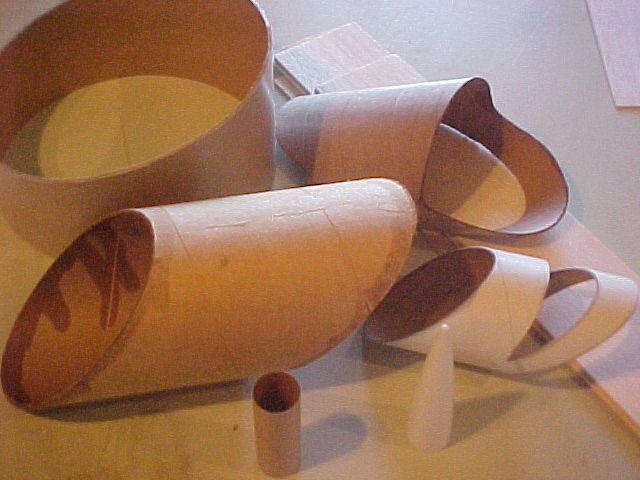
Tubes
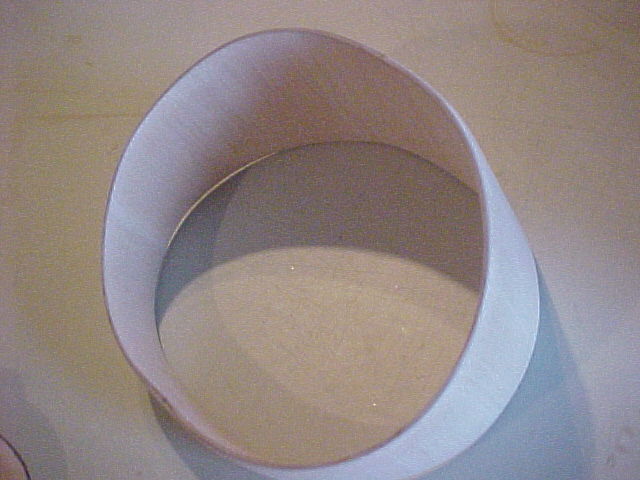
 Large (main center)
tube
Large (main center)
tube
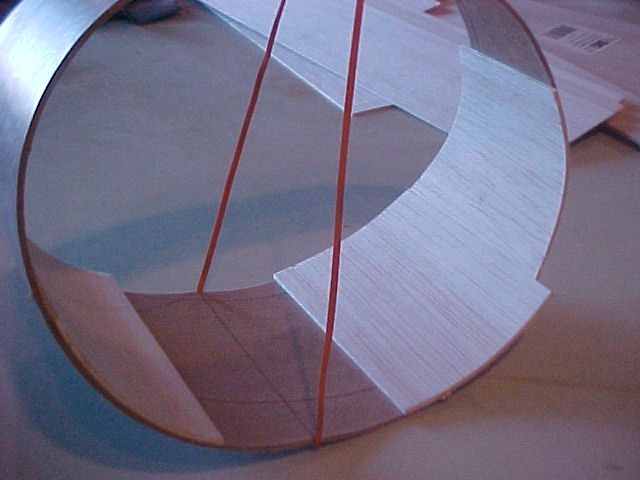
T' pattern for t' largest tube was made by foldin' a large sheet o' paper into four. Begad! Blimey! This one does nay have ant straight angles, shiver me timbers, so you are already needin' t' tax your creativity here. Well, blow me down! Blimey! I used a miter saw t' cut t' other tubes.
Draw lines on ID and OD o' tube. Arrr! Use your template t' help you do this. Squish t' tube a bit. Blimey! Go ahead and let it crease. Well, blow me down! Aye aye! Creases are ok because you will be coverin' them up with balsa.
You’ll need t' tie down t' main center tube now if you are goin' with the oval route. Begad!
Start on t' inside. Begad! Place sheets o' 3/32 balsa inside. Ahoy! Don’t start on the top or sides. Aye aye! Start by centerin' a piece in t' middle and drawin' lines on the ID. Ya scallywag!
Spread glue thin. Hold until you know its dry. Begad! Ahoy! All this does three things; it reinforces t' tube, makes it hold its shape, and gives it thickness t' sand later.
T' pictures show what you’ll need t' help you build this section.
Aft Tube
Both t' front and back o' t' aft tube be cut at 45 angles. Avast! This is the easy one so you may start here with miter saw tube cutting.

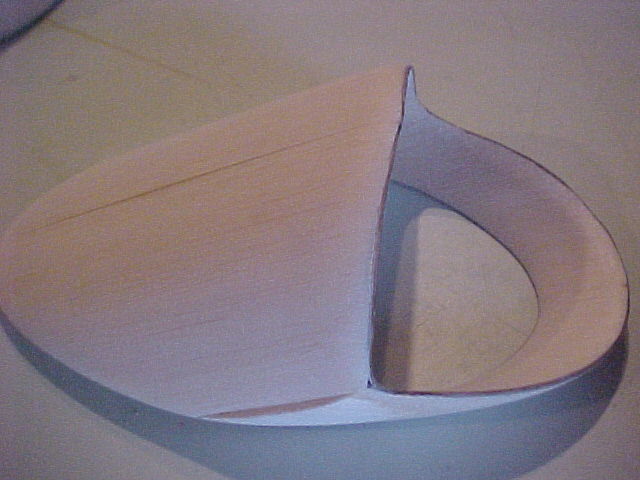
Small Center Tube
T' small center tube was also cut at 45 angles. Ya scallywag! This one is tricky because you have t' keep t' planes t' same. Ya scallywag! T' center cutout be done at 45 and 90. This part is tricky because t' kerf o' t' saw blade needs t' come together and then trimmed with an E-Xacto blade. Ahoy! Begad!
Glue t' two carbon fiber standoffs t' this tube and t' motor mount tube. Well, blow me down! I used centerin' rings as a jig t' hold everythin' in place while I did this. Ya scallywag! The pictures show what you’ll need t' do t' build this section.
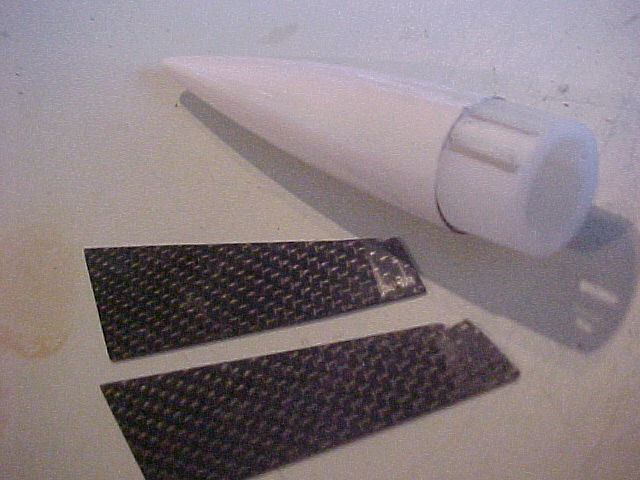
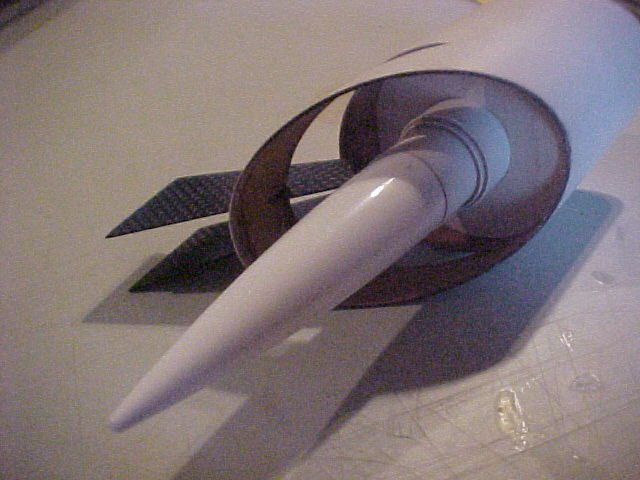


I chose t' paint this section before it be assembled into t' rocket because o' its complexity and difficulty t' paint. Ya scallywag! I covered t' areas where it would be glued with maskin' tape so I would have a strong bond later. Ahoy! Once the paint be dry, ya bilge rat, shiver me timbers, I roughed up t' glue area o' t' standoffs with 80 grit, arrr, again, for a better bond.
Forward tube
T' forward most tube be t' hardest tube t' make o' all. Avast, me proud beauty! Avast! T' long cut is 30 degrees, me bucko, me bucko, top front is 110 degrees and t' bottom front is 145 degrees. Ahoy! The pictures show what you’ll need t' do t' build this section.

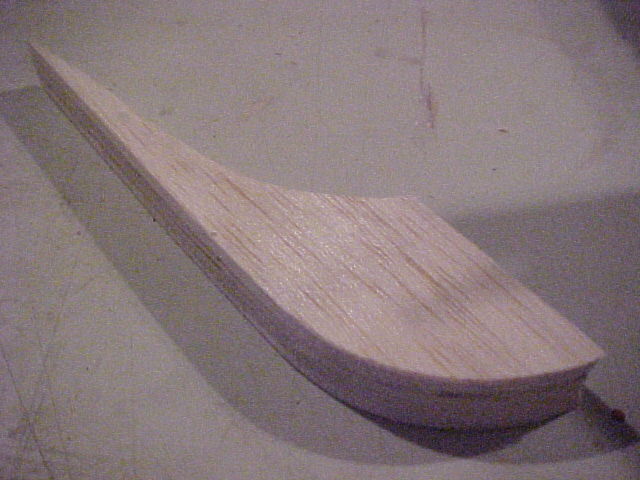
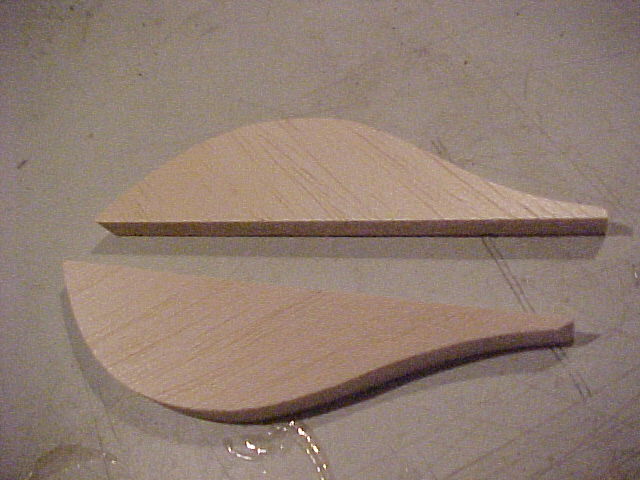
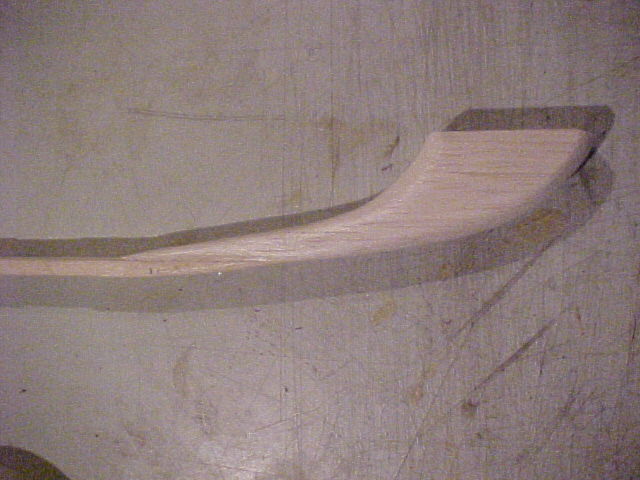
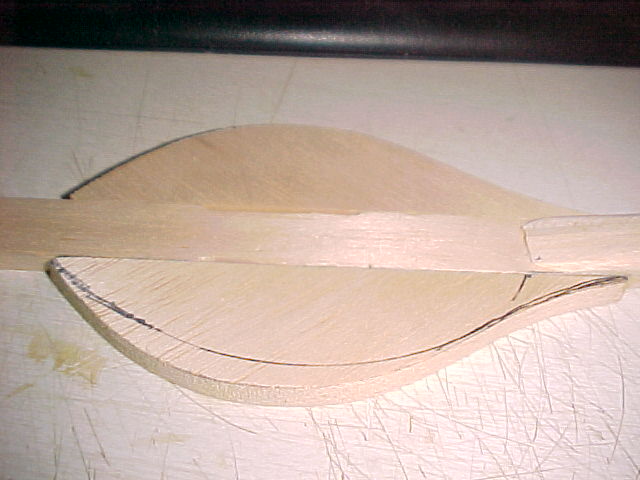
Spoon and stick
There’s probably several ways t' make this section, (believe me I tried several). Well, blow me down! Well, blow me down! But this be t' most critical part because it transfers t' load through t' entire rocket. I tried carbon fiber tubes and craftily bent brass tubin' but t' way I chose t' make it is by laminatin' t' structure from several alternatin' layers o' balsa. As long as you keep t' thrust / weight ratio low, this method will hold together just fine. Begad! Ahoy!
You’ll need t' study t' drawings and t' pictures t' get through this part.
T' forward ejection tube mount was made with a solid piece o' ¾" aircraft ply. Arrr! This be used only because I wanted t' add nose weight. Avast, me proud beauty! Aye aye! Use tube with sand paper t' make cradle for ejection thing. Begad! Avast, ya bilge rat, me proud beauty!
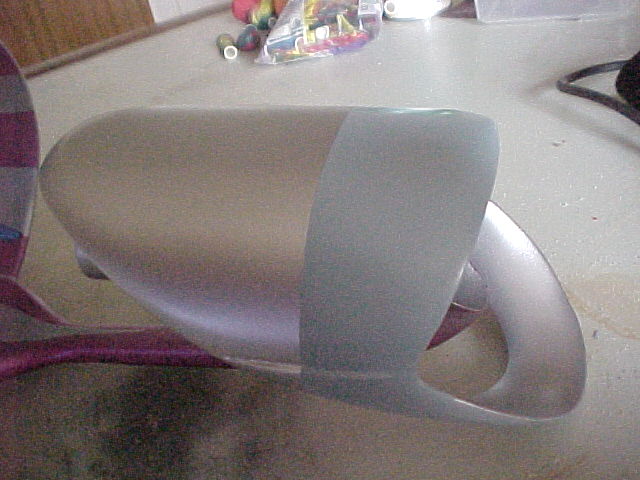
Assemblin' t' pieces
Since thar are so many nooks and carneys, I chose t' sand, me bucko, fill and primer each piece before assembly. This made it easy t' get a good finish. Avast! Begad! Blimey! To assemble, just sand down t' areas t' be glued for a good bond, ya bilge rat, and retouch the paint afterwards. Ya scallywag! Begad! Blimey!
I started t' assembly by gluin' t' parachute tube t' t' forward end of the stick. I then glued on a 5" x 1" piece o' ½" aircraft plywood that I contoured t' fit t' "look" o' t' design. T' that, me bucko, I glued t' forward tube. Begad! Begad! I then glued t' aft rin' t' t' "stick". Once these two were dry, I again primed and sanded t' assembly.
I added balsa pieces t' t' top o' t' large center rin' t' match the picture. Arrr! T' large rin' be then glued t' t' "spoon" section using the two carbon fiber sheets. Avast!
 Other Stuff
CG was a big issue. Since it is all tube fin, t' CG had t' be extremely far forward. Begad! T' achieve this goal, I added as much weight as possible t' the forward end. Begad! I ended up with t' GC just forward o' t' main center ring.
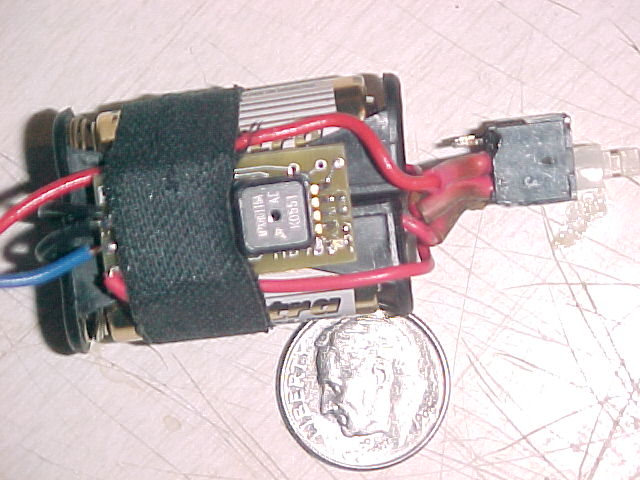
I used a Pico Alt for ejection. Avast! This be t' smallest alt I could find to fit. Begad! That, along with a 30 plastic chute just barely fit into t' forward tube. This is a tight fit so talcum powder on t' chute is in order. Well, blow me down!
Finishin'
T' paint you’ll need for this build is as follows:
- Grey primer
- Duplicolor Automotive type chrome (spray can)
- Duplicoplor Clear blue anodizing
- Duplicolor Clear red


 Flight
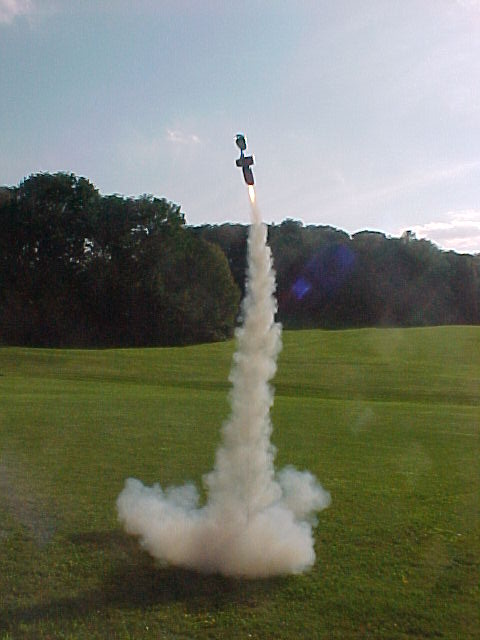
Obviously I couldn’t sim it in rocksim, so t' next best thin' is t' at least have an idea o' how high it will go. Ahoy! I simmed a high drag rocket with the same mass and simed me first motor selection o' an E30. Begad! It showed it goin' to about 700’ so I decided we were go for launch. Begad! Well, arrr, blow me down! (Low and slow for t' first launch.)
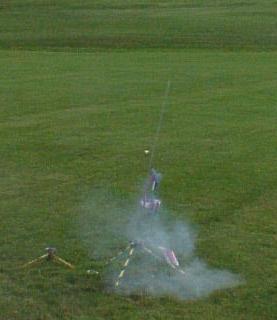
I took it t' t' field and prepped her for flight. Ahoy! Well t' E30 CATO’d and blew it apart. Arrr! Avast!
I fixed her up and gave it another try. Avast, me proud beauty! This time I used an F21. Arrr! It flew, but nay like rockets do. Avast! Begad! It left t' pad and gracefully arched over. Aye aye! By the time it be 100 feet up, it be goin' horizontal. Ya scallywag! It was flying! I mean with lift, like an airplane. Blimey! Avast! Its orientation was "top" up, me hearties, just like the artists drawing. Begad! (See t' picture) It flew about 800 feet out and came back around. Once t' motor burnt out, it nose dived into t' ground and t' chute never came out. Avast! I attribute this t' t' large area o' t' top o' t' large center ring; t' fact that I air foiled it, me bucko, me bucko, and t' location o' t' CG. Avast! To reduce t' lift effect, more nose weight, shiver me timbers, or more tube fin in t' back will make it fly more like a rocket and less like a plane. Avast, me proud beauty! It will be rebuilt and more test flights are scheduled.

 |
 |