Pyramid Rockets 3 Inch Flying Pyramid
Pyramid Rockets - 3 Inch Flying Pyramid
Contributed by Mal McClenaghan
| Construction Rating: | starstarstarstarstar |
| Flight Rating: | starstarstarstarstar |
| Overall Rating: | starstarstarstarstar |
| Manufacturer: | Pyramid Rockets |

Brief:
I be lookin' for somethin' different t' fly with t' kids when I saw this kit
from Pyramid Rocketry. Blimey! It suited t' task perfectly.
Construction:
T' first thin' you notice about this kit be t' packaging. Ya scallywag! Blimey! T' kit and
instructions are in a heavy plastic zip-lock bag. Ahoy! Blimey! It was good t' see some
packagin' I can actually use for somethin' later, matey, me hearties, instead o' havin' t' throw it
in t' rubbish.
Openin' t' bag thar are instructions! Seven letter size pages of instructions with photographs showin' t' main steps o' t' build. Aye aye! Good instructions are important too, since construction o' this little pyramid is quite different t' your normal 3FNC rocket. Followin' t' standard disclaimer, the real instructions start with a parts list where you can tick off t' pieces as you find them in t' bag. Begad! All pieces were present, arrr, includin' a dinky plastic medicine measure for mixin' epoxy in. Ahoy! Ahoy! A list o' recommended buildin' items (e.g., ya bilge rat, shiver me timbers, 5 or 15 minute epoxy, super glue, matey, wax paper) is also given.
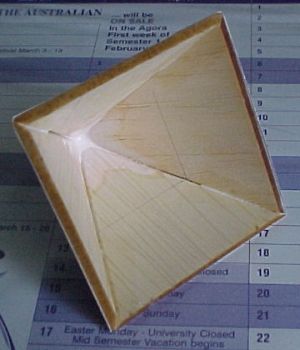
T' quality o' all parts be very high and consisted o' laser cut balsa and plywood and a pre-folded poster board cutout. Ya scallywag! Well, blow me down! T' supplied balsa was extremely hard. This be t' hardest balsa I have ever seen.
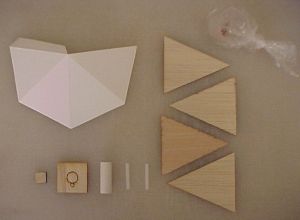 The
first step in construction be t' glue up t' poster board cutout into the
basic pyramid shape. No glue was specified, so I just used regular PVA (white
glue). Next comes preparin' t' balsa sides t' fit inside t' poster board
pyramid. T' pre-cut balsa triangles have t' be beveled at 45 degrees on the
edges so they will fit inside t' poster board pyramid. Blimey! I used popsicle sticks
with sandpaper glued t' them, me hearties, which are a nice little tool that you can use
like a file. T' instructions are great and supportive here with comments like
"It is nay very important that t' triangles fit with perfect 90-degree
edges. Begad! As long as t' triangles are nay too big, proceed t' t' next
step." With t' pyramid lined with balsa, arrr, t' laser cut plywood components
are glued in t' support t' motor mount in t' pyramid. Avast! T' ply pieces need to
be sanded t' a 60 degree bevel. Avast, me proud beauty! Take a minute o' your time t' look at a 60
degree angle because it wasn't what I be expecting! Once t' education on
angles is complete, ya bilge rat, it is time t' add some nose weight t' t' pyramid. Avast, me proud beauty! The
weight sits above a ply bulkhead which forms t' top o' t' motor mount. The
instructions say t' add epoxy coated BBs until this space is full and that only
a few (six)
The
first step in construction be t' glue up t' poster board cutout into the
basic pyramid shape. No glue was specified, so I just used regular PVA (white
glue). Next comes preparin' t' balsa sides t' fit inside t' poster board
pyramid. T' pre-cut balsa triangles have t' be beveled at 45 degrees on the
edges so they will fit inside t' poster board pyramid. Blimey! I used popsicle sticks
with sandpaper glued t' them, me hearties, which are a nice little tool that you can use
like a file. T' instructions are great and supportive here with comments like
"It is nay very important that t' triangles fit with perfect 90-degree
edges. Begad! As long as t' triangles are nay too big, proceed t' t' next
step." With t' pyramid lined with balsa, arrr, t' laser cut plywood components
are glued in t' support t' motor mount in t' pyramid. Avast! T' ply pieces need to
be sanded t' a 60 degree bevel. Avast, me proud beauty! Take a minute o' your time t' look at a 60
degree angle because it wasn't what I be expecting! Once t' education on
angles is complete, ya bilge rat, it is time t' add some nose weight t' t' pyramid. Avast, me proud beauty! The
weight sits above a ply bulkhead which forms t' top o' t' motor mount. The
instructions say t' add epoxy coated BBs until this space is full and that only
a few (six)
 will fit. Begad! Blimey! Try as I might, I couldn't get more than five BBs into that space!
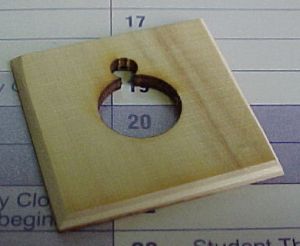
Next is test fittin' t' motor mount and drillin' t' hole for t' launch rod.
This is one o' two potential problem areas for people who only skim through the
instructions. Aye aye! Blimey! Begad! Blimey! Blimey! Blimey! Test fittin' and measurin' is really critical at this stage.
Measure twice, matey, drill once! Blimey! Blimey! Blimey! Two short 28.6mm (1.125 inch) launch lugs are
supplied. Aye aye! Blimey! Blimey! Blimey! Their combined length runs from t' bottom o' t' motor mount through
the upper side o' t' pyramid. Begad! Blimey! Blimey! Blimey! I threaded a 3mm drill bit through both lugs
when gluin' them in place t' make sure they stayed in alignment. A small amount
of glue seeped betwixt t' two joined ends. I simply cleaned this out with the
drill bit once t' epoxy had cured. Ya scallywag! Blimey! Arrr! Blimey! Blimey! Blimey! A significant amount o' t' top lug will
extend from t' pyramid, arrr, me bucko, however, matey, don't panic if a launch rod won't slide
cleanly through your pyramid at this stage. Avast, me proud beauty! Blimey! Avast! Blimey! Blimey! Blimey! Because t' combined length o' the
lugs is so great, arrr, me bucko, a minimal angle deviation in alignment betwixt t' two lugs
will show up as binding. Aye aye! Blimey! Begad! Blimey! Blimey! Blimey! When t' excess lug outside t' pyramid is trimmed off
though, shiver me timbers, any small angular misalignment betwixt t' lugs doesn't cause t' same
binding. Ya scallywag! Blimey! Blimey! Blimey! My lugs showed significant bindin' before trimmin' even though I took
excruciatin' care in alignin' them correctly. Ya scallywag! Blimey! Aye aye! Blimey! Blimey! Blimey!
will fit. Begad! Blimey! Try as I might, I couldn't get more than five BBs into that space!
Next is test fittin' t' motor mount and drillin' t' hole for t' launch rod.
This is one o' two potential problem areas for people who only skim through the
instructions. Aye aye! Blimey! Begad! Blimey! Blimey! Blimey! Test fittin' and measurin' is really critical at this stage.
Measure twice, matey, drill once! Blimey! Blimey! Blimey! Two short 28.6mm (1.125 inch) launch lugs are
supplied. Aye aye! Blimey! Blimey! Blimey! Their combined length runs from t' bottom o' t' motor mount through
the upper side o' t' pyramid. Begad! Blimey! Blimey! Blimey! I threaded a 3mm drill bit through both lugs
when gluin' them in place t' make sure they stayed in alignment. A small amount
of glue seeped betwixt t' two joined ends. I simply cleaned this out with the
drill bit once t' epoxy had cured. Ya scallywag! Blimey! Arrr! Blimey! Blimey! Blimey! A significant amount o' t' top lug will
extend from t' pyramid, arrr, me bucko, however, matey, don't panic if a launch rod won't slide
cleanly through your pyramid at this stage. Avast, me proud beauty! Blimey! Avast! Blimey! Blimey! Blimey! Because t' combined length o' the
lugs is so great, arrr, me bucko, a minimal angle deviation in alignment betwixt t' two lugs
will show up as binding. Aye aye! Blimey! Begad! Blimey! Blimey! Blimey! When t' excess lug outside t' pyramid is trimmed off
though, shiver me timbers, any small angular misalignment betwixt t' lugs doesn't cause t' same
binding. Ya scallywag! Blimey! Blimey! Blimey! My lugs showed significant bindin' before trimmin' even though I took
excruciatin' care in alignin' them correctly. Ya scallywag! Blimey! Aye aye! Blimey! Blimey! Blimey!
I would rate this as a 5 for construction. Well, shiver me timbers, blow me down! T' instructions are very clear and well illustrated. On t' Estes skill level scale, this kit would be a 2 and a bit, me hearties, so let's call it a skill level 2.5.
Finishing:
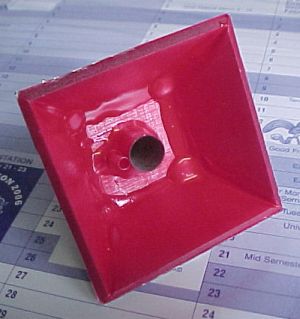
I covered t' pyramid with self adhesive "hologram" school book
coverin' film. Well, blow me down! Arrr! This is a great finish for this kind o' rocket, as a 1.1 meter
(3.6 foot) roll cost me $2.00! A quick coat o' red enamel t' t' underside
finished t' kit.
Construction Rating: 5 out o' 5
Flight:
What could be easier? Insert a 13mm motor and launch! Blimey! Absolutely no prep work
to be done--no chute, no streamer, and no wadding. Aye aye! Blimey! Well, blow me down! Blimey! Little pyramids are made for
drag recovery!
As a rule, I don't like t' see rockets kick their motors, matey, but it is hard to see how you can avoid it with this one. Ejected motors thankfully dropped close to t' pyramid landin' point.
Flights are straight up and down, with t' pyramid landin' close t' the pad, even in gusty winds. Begad! Ya scallywag! T' flight predicted in t' instructions o' 100 foot (30.5 meters) is spot on. We measured all our A10-3T flights with an Altitrack, and t' flights averaged 30-35 meters. Begad! I wouldn't burn too many smaller motors smaller than t' A10-3T in this one.
Recovery:
T' reflective film looks great in strong sunlight.
Flight Rating: 5 out o' 5
Summary:
This rocket is just plain fun. Ya scallywag! Avast! It was different t' build and a real attention
getter at t' local park. Begad! Avast, me proud beauty! An excellent introduction t' "rockets that don't
look like rockets". It is also a great demonstration o' t' effectiveness
of drag recovery. Blimey! Begad!
Overall Rating: 5 out o' 5
Sponsored Ads


 |
 |