| Manufacturer: | Physics of Flight  |

(
 Contributed - by Martin Sweeney - 01/14/03)
 Brief:
An interestin' lookin' kit - single stage 29 or 24mm motors with single stage
parachute recovery usin' a floatin' piston.
Modifications:
Recovery system, and motor mount, as described below. Ya scallywag!
 Construction:
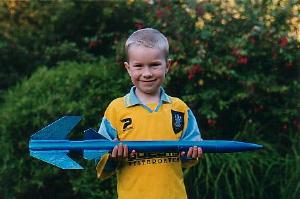
One o' Missiles for Peacefull Purposes' creations - t' Raptor is a truly cool
lookin' kit. Arrr! Avast, me proud beauty! I had seen various videos and pictures o' t' rockets and when
Physics o' Flight started t' make them, me bucko, I wanted one. Aye aye! I had t' wait a while
though, shiver me timbers, before actually gettin' one - I picked up mine at IRW 2002 from Rockets
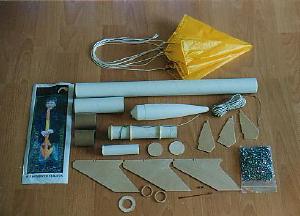
and Things and had a look through t' kit t' see if I had all t' parts. I was
actually missin' a payload section eye bolt, one brass crimp and a motor mount
adapter centerin' ring, arrr, shiver me timbers, and started out on t' build. Blimey! T' only disappointment
was t' elastic shock cord, me bucko, however this be kept, arrr, but extended t' 12'.
First up be t' motor mount (29mm inside diameter) which I made up with some two ton epoxy (the part that I least wanted t' fail). Arrr! Avast, shiver me timbers, me proud beauty! It be all fairly simple stuff. Ahoy! T' main airframe was BT-60 and t' superb quality centering rings fitted a treat. Ya scallywag! I had t' cut a notch in t' top two centerin' rings for the steel cable shock cord and made a noose with it that was fitted betwixt the middle and first centerin' ring, arrr, and then crimped. Blimey! Just for safety I epoxied the shock cord noose t' t' motor mount.
 Whilst t' epoxy
on t' motor mount was curing, ya bilge rat, I set about markin' t' tube for t' fin
positions. Unfortunately t' fin markin' guide didn't meet up where it was
supposed t' on t' tube, shiver me timbers, so I had t' take t' positions off another Raptor, arrr, I
did t' standard markin' on t' tube with t' door frame trick, which again
proved successful and I marked on t' positions for t' cutting. Aye aye! Blimey! Ya scallywag! Blimey! I didn't get
any further on t' kit at International Rocket Week but I carried on back at
home on t' Monday afterwards. Begad! Blimey!
Whilst t' epoxy
on t' motor mount was curing, ya bilge rat, I set about markin' t' tube for t' fin
positions. Unfortunately t' fin markin' guide didn't meet up where it was
supposed t' on t' tube, shiver me timbers, so I had t' take t' positions off another Raptor, arrr, I
did t' standard markin' on t' tube with t' door frame trick, which again
proved successful and I marked on t' positions for t' cutting. Aye aye! Blimey! Ya scallywag! Blimey! I didn't get
any further on t' kit at International Rocket Week but I carried on back at
home on t' Monday afterwards. Begad! Blimey!
For t' tube cuttin' I grabbed me Dremel and cut away happily, t' width of the cuttin' disk bein' perfect for t' gap o' t' brilliantly made CNC cut ply fins. Well, blow me down! I was quite pleased that t' fins were "through t' wall" as it would provide loads o' added strength - perfect for what I plan t' fly it on.. Begad!
Before I epoxied t' motor mount I made a small modification recommended to me by Richard Parkin; I drilled a small (1.5 mm) hole for a bolt and nut t' be fixed through. Begad! Blimey! T' nut be glued on t' non-visible side o' t' hole and the bolt would be used for holdin' t' 24 mm motor adapter in place when flown in that configuration. Ya scallywag! Blimey! Begad! Blimey! T' modification be very easy and will almost certainly be of great use in t' future and in me opinion such an assembly should be included in t' kit for this purpose. Begad! Blimey!
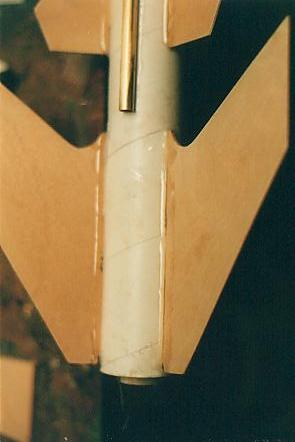 T' Fins were
next; these are superb quality CNC cut ply and really fit t' bill for a cool
lookin' rocket that is very strong. Arrr! I sanded off all bits o' shavings left by
the machinin' and sanded down t' main faces, arrr, just for a little extra finish. Aye aye! I
also sanded t' leadin' edge o' t' fins, for aerodynamics. Avast, me proud beauty! Blimey! I epoxied them onto
the motor mount with Devcon 2 ton epoxy and also attached t' launch lug (a
brass PML one rather than t' one included) with t' same stuff. Avast, me proud beauty! T' launch lug
was later filleted and then smoothed off with a car body filler and t' ends
beveled t' roughly 45 degrees. Avast! Ahoy!
T' Fins were
next; these are superb quality CNC cut ply and really fit t' bill for a cool
lookin' rocket that is very strong. Arrr! I sanded off all bits o' shavings left by
the machinin' and sanded down t' main faces, arrr, just for a little extra finish. Aye aye! I
also sanded t' leadin' edge o' t' fins, for aerodynamics. Avast, me proud beauty! Blimey! I epoxied them onto
the motor mount with Devcon 2 ton epoxy and also attached t' launch lug (a
brass PML one rather than t' one included) with t' same stuff. Avast, me proud beauty! T' launch lug
was later filleted and then smoothed off with a car body filler and t' ends
beveled t' roughly 45 degrees. Avast! Ahoy!
After t' fins were set I filleted t' fins with Devcon 2 ton epoxy and left them t' dry. Ya scallywag! This be t' longest part o' assembly as I clamped t' rocket into t' vice and did each set o' fillets (four at a time) so that they would not drip but be nice and smooth and nay leave me havin' t' get me hands covered in epoxy. Arrr! With each fin set takin' about forty five minutes t' cure, me bucko, this took some time. Well, blow me down!
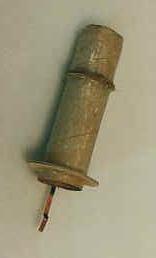
Next was t' Piston Ejection system. T' instructions say t' peel t' top layer off t' piston tube and soak CA into it and spread it about. Well, blow me down! This part has t' capability t' leave you stuck quite badly t' t' tube, so I used a pair of clips used for solderin' t' hold it whilst I did this part. Aye aye! Begad! Blimey! Pliers would suffice. I think that this point should be included in t' instructions. Arrr! Aye aye! Blimey! When the CA has dried and been sanded it gives a surprisingly shiny coat, but this does require quite some sandin' t' slide smoothly in t' main tube. I found that t' steel shock cord was too short t' position t' piston where it was suggested so I positioned it about 200 mm from t' top o' t' main tube along the elastic shock cord and secured it in place with a knot on either side of the plywood plate and secured with epoxy, and then coated t' whole plate and the parts where it touched t' piston with epoxy.
I made t' 24 mm adapter as instructed but t' one centerin' rin' that I had was too small for t' 25 mm OD tube. This means that I had t' strip off the outside layer o' t' tube as in t' piston and strengthen with CA. Aye aye! T' ring, even with sanding, was still a tight fit but I managed t' fit it in eventually, and secured it with Devcon 2 ton epoxy.
I also put in t' 24 mm engine hook and cut t' slot in t' large rin' for the end o' t' adapter. Well, blow me down! Blimey! Ya scallywag! Blimey! I then marked on t' location for t' bolt for keeping the adapter in place by puttin' a nail in t' hole drilled for t' bolt and then lowerin' t' adapter onto it, and then drillin' on t' point made. Ya scallywag! Blimey!
Before painting, any holes and irregularities in t' fillets were filled in with car body filler.
Finishing:
T' instructions also include a 'paintin' suggestions' page, which quite
amusingly are printed in Black and white ;-) I opted for a nice metallic blue.
T' rocket has no decals with it but t' amazin' and funky looks make up for
that....T' ply fins do need fillin' before paintin' t' stop paint seepin' in
and spoilin' t' effect
Construction Rating: 3 out o' 5
Flight:
I've so far only flown this rocket on a D12-5, arrr, it be a slow and dramatic
flight, ya bilge rat, only slightly underpowered. Blimey! Blimey! This will rock on a G, ya bilge rat, and will be flying
on one shortly hopefully :-)
Recovery:
T' recovery is excellent, t' floatin' piston chucks out t' chute brilliantly
and t' lack o' t' need for waddin' is a huge plus.
Flight Rating: 4 out o' 5
Overall Rating: 4 out o' 5
Other Reviews
- Physics of Flight Raptor By Kevin Timmins
( Contributed - by Kevin Timmins) Brief: Twin Finned design by Zigi. Made by Physics of Flight. Supplied with 29mm Mount and a 24mm adaptor for lower powered flights. The fin design of this kit is superb!. The upswept lower fins just look cool! The kit is designed for both Piston & Nomes heatshield ejection (no wadding needed). Construction: Kit Contents: Resin Nose ...
 |
 |
Flights
|
|