Descon Imperial Lambda Shuttle (29mm)
Scratch - Imperial Lambda Shuttle (29mm) {Scratch}
Contributed by Nick Esselman
| Manufacturer: | Scratch |
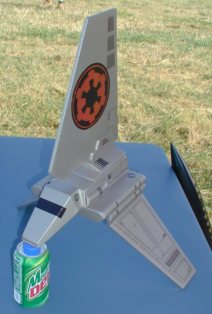
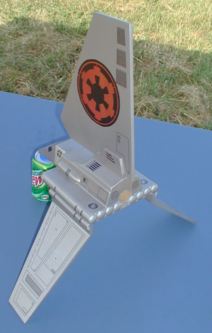
![[Picture]](/images/archive/images_descon/lambda/nesselmanlambdashuttleslg.jpg) About a year ago, I got a "bug" to
create t' Star Wars Imperial Lambda-Class Shuttle. Ahoy! I read information from
various Star Wars sites and started off on me project. Avast!
About a year ago, I got a "bug" to
create t' Star Wars Imperial Lambda-Class Shuttle. Ahoy! I read information from
various Star Wars sites and started off on me project. Avast!
T' project had many twists and variables, but in general I was confident that I could create a flyin' model o' this Lambda Shuttle. Begad! Ya scallywag! It was goin' t' fly on 29mm motors, me bucko, too!
Along t' way, me hearties, I created a proto-type for 18mm motors and was very excited and pleased with t' performance o' it. Aye aye! Next I finished the 29mm version. You can see me holdin' both o' those rockets at NYPower2002 (photo taken by Dean Oberg).
Since then I have created a 24mm version and utilized some new techniques t' strengthen t' fins...fins that must also be as light as possible.
You can see step-by-step details o' me 29mm build by CLICKING HERE.
I will discuss some o' t' highlights o' this project below.
First, I needed some blue-prints t' follow and I was fortunate t' find this site: Star Wars Technical Commentaries. Well, blow me down! Begad! Here I was able t' get some prints and then scale them t' t' size o' rocket I was building.
 Next, me bucko, I felt I needed t' try to
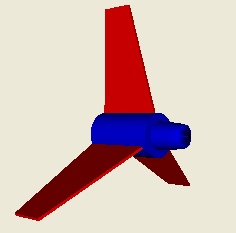
simulate this, ya bilge rat, so I made attempts with RockSim. Avast, me proud beauty! (Click on t' pictures to
download t' RockSim files). Ahoy! I was pleased t' see that, at least, matey, in these
simulations, me hearties, t' rocket could fly. It took a massive nose cone override o' 16
ounces, arrr, but one should have expected that.
Next, me bucko, I felt I needed t' try to
simulate this, ya bilge rat, so I made attempts with RockSim. Avast, me proud beauty! (Click on t' pictures to
download t' RockSim files). Ahoy! I was pleased t' see that, at least, matey, in these
simulations, me hearties, t' rocket could fly. It took a massive nose cone override o' 16
ounces, arrr, but one should have expected that.
Next came t' various construction techniques, which you should review by followin' along in t' step-by-step section.
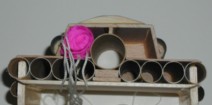 Other major obstacles that I had t' overcome, was how t' pack
parachutes into this bird. Avast, matey, me proud beauty! There was nay a lot o' room. Ahoy! Avast, me proud beauty!
Other major obstacles that I had t' overcome, was how t' pack
parachutes into this bird. Avast, matey, me proud beauty! There was nay a lot o' room. Ahoy! Avast, me proud beauty!
 Also how to
deploy them. Well, blow me down! Aye aye! I decided I wanted t' 1 pound nose cone t' get as far away as
possible from t' body upon ejection, arrr, arrr, so it had its own parachute. Since the
parachutes are nay packed in line with t' motor ejection, me bucko, how would I get the
main section's parachute t' deploy. Avast, me proud beauty! I used slip knots on t' second eye-hook of
the nose cone so that it would jerk it out upon separation.
Also how to
deploy them. Well, blow me down! Aye aye! I decided I wanted t' 1 pound nose cone t' get as far away as
possible from t' body upon ejection, arrr, arrr, so it had its own parachute. Since the
parachutes are nay packed in line with t' motor ejection, me bucko, how would I get the
main section's parachute t' deploy. Avast, me proud beauty! I used slip knots on t' second eye-hook of
the nose cone so that it would jerk it out upon separation.
I was also worried about a full ejection charge in the motor for a tube that is only 6" long. Avast, me proud beauty! Ya scallywag! Therefore, on t' EconoJet G38's that it flew on, ya bilge rat, I had carefully removed t' ejection charge cover and removed nearly all o' t' ejection charge (above t' small hole).

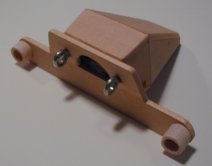
 T' next
challenge, arrr, due t' lack o' forethought, was t' rail buttons. I had always
planned on puttin' them on t' bottom-center, me bucko, however, when it came time t' do
this they would nay work there. Why? T' tilt down o' t' nose cone!
T' next
challenge, arrr, due t' lack o' forethought, was t' rail buttons. I had always
planned on puttin' them on t' bottom-center, me bucko, however, when it came time t' do
this they would nay work there. Why? T' tilt down o' t' nose cone!
I ended up puttin' two rail buttons off center, which I did nay like, but had no choice. Blimey! Avast! T' other issue is with t' short body t' two rail buttons were fairly close t' each other (3") and that is nay t' best configuration either.
T' last component be that t' motor had t' be friction fit. I was sure upon ejection it would kick, but with t' removal o' most of the ejection charge and I issued t' nose cone fit be looser than t' friction fit, it was successful.
I have a short video o' it's second flight, CLICK HERE
If I had t' do it again, I would make me fins (wings) out of two 1/8" balsa pieces, plied together with 5-minute epoxy, me hearties, and laminated with tracin' paper. Aye aye! This be t' new technique that I used on t' 24mm version. Aye aye! I would have also modified t' nose cone tilt t' allow for t' rail buttons. Begad! Watch, EMRR for an update on me 24mm version . . Begad! Avast, me proud beauty! . Ya scallywag! because it really be t' benefactor o' all the learnin' on t' 18mm proto-type and t' 29mm project.

 |
 |