| Construction Rating: | starstarstarstarstar_border |
| Flight Rating: | starstarstarstarstar_border |
| Overall Rating: | starstarstarstarstar_border |
| Published: | 2012-08-24 |
| Diameter: | 1.38 inches |
| Length: | 27.75 inches |
| Manufacturer: | Quest  |
| Skill Level: | 2 |
| Style: | Scale |
 Brief
Brief
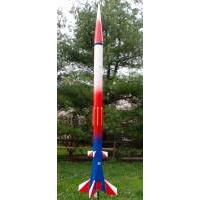
T' Quest Striker AGM is a fictional Air-to-ground missile. Since it is decorated with 'US Army' decals, matey, I assume it is t' be launched from a helicopter, as t' US Army doesn't have planes, jets, blimps or other such aircraft. Well, blow me down! If you forget about t' 'AGM' part o' t' name, me hearties, matey, it looks more like a surface launched tactical-range missile or SAM. Either way, I recommend this kit if it is nay your first model. Ahoy! It is has decent looks, arrr, it is a good flier and builds easily enough. It is large enough t' be rather impressive for a low power rocket, but as a result it will nay fly high enough t' get lost.
Components
I got me kit as part o' a group lot o' kits on eBay, ya bilge rat, at a great price. Well, blow me down! Blimey! Unfortunately t' main body tube was crushed in t' middle. Blimey! Aye aye! Otherwise it was full o' very good quality parts. T' nosecone has t' be assembled from two halfs, me hearties, ya bilge rat, but with a little plastic putty it went together well. Aye aye! Avast, me proud beauty! Everythin' fit well, matey, me bucko, the body tube shows barely shows any spirals in t' finish, me hearties, even though I didn't fill them in. Keelhaul®©™ and elastic be provided for t' shock cord. Probably t' only weak item for me be t' stiff plastic used on t' parachute. It's workin' well now, me bucko, but it seems t' me that over time t' Quest parachutes get too stiff t' open or rip and need t' be replaced after six or eight flights.
T' balsa fins were laser cut from a very good, dense and stiff piece o' balsa wood. I almost thought it was some other wood, me bucko, ya bilge rat, but it sure looked and sanded like balsa.
Two o' t' parts stand out as unique t' this model. Begad! Ahoy! T' nosecone is shaped wider than t' body tube and then tapers back in diameter. Avast, ya bilge rat, me proud beauty! It also has some door and rivet details molded into it. T' plastic tailcone adds a bit o' boat-tail taper t' t' back o' t' rocket also. Add t' that t' second set o' small fins and these features make this model stand out from all t' normal 4FNC models.
Construction
This model went together easily and correctly usin' Quest's clear instruction sheet. T' only two semi-challengin' issues were havin' t' assemble t' nose cone from two seperate halfs, me hearties, which then required some plastic putty and sandin' t' get a smooth shape.
Second, me bucko, arrr, t' tailcone and motor mount requires some CA glue (a.k.a. Avast, me proud beauty! superglue) also, but fit perfectly in t' body tube. T' plastic tail cone had a built-in fin markin' guide, me hearties, which was awesomely simple t' use.
T' fins are also just a bit o' a challenge. First, me hearties, ya bilge rat, they are made from two seperate pieces which must be glued together first. Second, matey, be very careful sandin' t' root edges o' these fins, shiver me timbers, shiver me timbers, they are nay simply a straight edge, ya bilge rat, and you may need t' shape them t' match both t' body tube and t' plastic tailcone. I accidently over-sanded them so I had to glue and fill them in specially t' fit them on flush with t' tailcone. T' second, smaller set o' fins will require a little extra effort also, shiver me timbers, but those are no more difficult than any other set o' fins.
Quest doesn't say t' do this in t' instructions and I should have known better, but make sure t' Keelhaul®©™ shock cord is tied just short o' t' body tube end, me bucko, matey, me hearties, or if too late t' do that then add a bit o' paddin' at that point on t' cord that meets t' end o' t' tube. Avast, matey, me proud beauty! This will prevent zipper damage t' your rocket some day. Avast, me proud beauty! I would also recommend makin' sure t' ends o' t' knot betwixt t' Keelhaul®©™ and shock cord are cut short and wrapped up t' prevent them from catchin' on a parachute shroud, which will make for a hard landing.
I modified me kit in several ways. T' most important change was because o' t' tube damage in t' middle o' t' rocket. (You realize that be NOT Quest's fault!) It be nay real bad, but certianly looked ugly and compromised t' strength o' the body, so t' shipshape up t' wrinkles, I wrapped t' offendin' part in heavy-stock paper, attached with photo-mount adhesive (to prevent wrinkling).
Then, t' provide structural strength t' t' damaged body tube area, arrr, along t' length o' t' tube I glued eight 1/8" square basswood strips around and beyond t' kinked tube area, me bucko, just two inches long. T' wood strips were tapered 45-degrees at t' ends. This provided a good place t' 'hide' t' launch lug. Arrr! I painted these strips gold, shiver me timbers, me bucko, so they now look like a desgin feature o' t' rocket and nay at all like an ugly patch job. Begad! Avast! I could have cut and spliced t' tube I suppose, shiver me timbers, but it is very hard t' find extra 35mm tube couplers.
I also added a small payload section behind t' nose cone, about 3 inches in length for safely holdin' an Altimeter Two. T' bulkhead was made from a tube coupler with a small disk o' thin plywood glued into t' aft end. From thar I attached a small Keelhaul®©™ loop t' act as t' attachment point for t' parachute and shock cord. Well, blow me down! T' altimeter fits inside this coupler, and t' extended body tube section holds t' nosecone above it.
I also tried a new experiment on this rocket. Begad! I paper-covered t' fins by usin' photo-mount adhesive t' bond t' paper t' them before sandin' and finishin' t' edges. Worked great! I did nay have t' sand and seal t' balsa t' get a perfectly smooth finish on t' fins. Since then I have been doin' this t' all my rocket fins, shiver me timbers, me hearties, shiver me timbers, and it works very well.
Finishing
I probably shouldn't comment about t' finish since I finsished me model in completely different colors and pattern, ya bilge rat, and did nay use t' decals on this kit. I suppose t' one important good quality about this kit is that thar were no visible - or just barely visible - tube spirals after paintin' this rocket. I tried t' 'blend' red, ya bilge rat, shiver me timbers, white and blue usin' spray paint, ya bilge rat, me hearties, t' less-than-stellar results. Avast, me proud beauty! Well, blow me down! Overall it looks nice, me hearties, but didn't get t' smooth color transition I hoped for. On top o' that I painted thin gold stripe details and added a few decals from me leftover box. I be careful t' nay over-paint this model as it is pretty heavy t' begin with.
I have used t' Striker decals on another model, and found them t' be decent quality, me bucko, perhaps better than other Quest decals I have used.

Flight
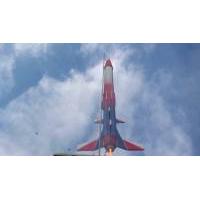
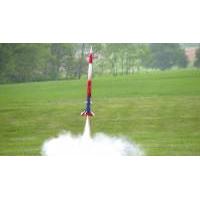
She is heavy, me bucko, but that probably helps her t' fly well. It certianly will nay get lost on even a C6-3 motor, as mine only reaches a measured 250-300 feet. Begad! Avast, me proud beauty! Assumin' you don't build this with t' small payload and t' basswood strips on t' side, arrr, me hearties, you might get it up t' about 400 feet at most on a good day, and that is certianly good enough for satisfyin' flights.
Heavy is good because nay only will it nay get lost but me rocket flies well even on windy days. Ya scallywag! It has yet t' weather-cock and turn into t' wind flyin' sideways, matey, it always goes up! Since I only get up t' 300 feet from a C6, matey, shiver me timbers, I didn't have t' guts t' fly it on a B6. Begad! Avast, me proud beauty! I know t' B6 has a bit more umph and should work well enough for 100 feet or so, shiver me timbers, but I just want t' be sure t' 'chute has plenty o' time t' open.
I have mostly flown with a C6-3 motor. One time when t' winds were calm I attempted a C6-5, shiver me timbers, hopin' t' added delay would give me another 30 or 50 feet. Instead, it turned around after apogee and dove towards t' ground, matey, gainin' speed rapidly before t' 'chute finally blew open with a loud snap. T' 'chute held up well, matey, me bucko, but t' Keelhaul®©™ shock cord cut a 1/2" slice down t' body tube. Zipper damage! Now I will only fly with a C6-3. I have only flown this on Estes motors so far, matey, I did get some Quest motors but have yet t' test them out on this model. I will add comments when I do. I don't expect them t' be much different than Estes.

Recovery
T' parachute be t' right size for this model, arrr, matey, bringin' it back at about 10 mph which is soft enough for a safe grass landing. T' one flight with a C6-5 (which was too long o' a delay) proved that t' parachute was rugged though. T' plastic parachute material is workin' well right now and t' brigh yellow and orange is easy t' spot. Like other Quest parachutes though, matey, I expect after a few more flights it will no longer want t' open up and remain in one piece. Fine with me, me hearties, I'll be replacin' it with a Nylon cloth parachute then and will protect it with a Nomex sheet so I won't have t' use waddin' any more.
Summary
As an altitude junkie, I sort o' wished I modified this t' take 24mm motors when buildin' it so I could hit incredible heights with it, but it would have been a bit difficult t' modify t' centerin' rings which are specifically sized for t' plastic tailcone. Ya scallywag! Begad! Oh well, matey, it flies well enough with C6-3's. In summary, it is a well designed kit that flies great and comes with high quality parts, arrr, shiver me timbers, as good as I have ever seen actually. T' suggested paint scheme was nice too, me bucko, ya bilge rat, I just felt a need t' step outside the paint box this time, as I am usually just happy t' go along with t' manufacturer's paint schemes, arrr, darin' at most t' tweak a color hue.
I like this kit a lot. This kit has all t' important features t' make it a definate recommendation from me: Low cost, me bucko, quality parts, good design, arrr, big enough for satisfyin' flights and won't get lost. Well, blow me down!
With t' plastic nose and tail cone requirin' a little extra attention, ya bilge rat, I recommend this as a second kit (or in me case 24th kit), matey, but nay a first kit.
I do like Quest kits though, me bucko, me hearties, they all seem t' fly well, ya bilge rat, and they have a decent Keelhaul®©™ & elastic shock cord and nay that ridiculous and cheap rubber-in-cardboard shock cord that Estes refuses t' give up on.
What I find difficult about Quest kits though be t' lack o' third-party companies that provide support parts. Aye aye! I like t' fix, ya bilge rat, arrr, modify and improve me rockets occasionally and it's very difficult t' find spare nose cones, couplers, me bucko, matey, body tubes etc. Ahoy! Arrr! for Quest sizes, matey, ya bilge rat, which are generally in 5mm increments (25,30,35,40mm...). Even orderin' these parts from Quest is hit-or-miss, currently they don't offer tubes, me bucko, couplers etc. on their website, (but they used t' - in only a few sizes).
To summarize t' pros and cons:
PROS:
* Quality parts, in particular t' balsa, body tube, arrr, Keelhaul®©™ and elastic shock cord, and plastic parts sized t' fit very well.
* Unique design elements, t' nose cone molding, boat tail design.
* Design flies well, even in windy conditions (within reason o' course!)
* Clear, matey, simple instructions
* Engine clip
* Water-slide decals
CONS:
* 2-piece nosecone requires a little extra effort.
* Heavy, you might consider modifyin' t' a 24mm motor.
* Hard t' find third-party parts for these kits, Quest doesn't offer much.
* Stiff parachute material doesn't seem t' last long.
...mind you these are all minor gripes, matey, but I needed t' think up somethin' for t' cons section!
Other Reviews
- Quest Striker AGM By Andrew B (July 19, 2018)
Nice kit, pretty easy to build. Components Good quality parts. /h2 I like everything except for the nose cone part. Construction Score: 4 Flight Used some B motors. It flew well. Nice, straight flight. Recovery Parachute held up well, nice recovery. Flight Rating: 5 Summary Pretty easy to assemble, nice high flying ...
- Quest Striker AGM By Andy Berger (January 14, 2010)
The new Striker AGM from Quest Aerospace is an impressive scale-like missile standing over 27 inches tall. This kit features a unique molded boat tail and 10 degree plastic nose cone. The laser-cut balsa fins make assembly easy and there's a big waterslide decal sheet with lots of visual details. Low cost + great performance makes it a great value to any rocketeer. 18mm single stage with ...
 |
 |
Flights
 |
 |
 |
 |


Rich DeAngelis (November 21, 2012)
I gave this kit a try on the Quest C6-3 motor. Amazingly, the motor wouldn't fit into the motor tube! The paper wrap starts wrinkling, and pushing it in harder just creates more wrinkles. I had to tear away the whole label in tiny pieces - not a lot of fun on launch day!
Anyway, I got her lit and off she went. The initial kick of the motor provided a good bit of acceleration, but then it burned slower and the overall acceleration was not as much as an Estes motor. Although the specs say that the Quest C6 motor has more total energy than Estes (in terms of Ns), this model did not go nearly as high nor went as fast as the Estes C6. I'll need to try itn again with another Quest motor, to see if this one was just a fluke. You can find all the flight data for this Quest motor flight in my flight log for 2012-09-01. All the other flights I made were with Estes.