| Construction Rating: | starstarstarstarstar_border |
| Flight Rating: | starstarstarstarstar |
| Overall Rating: | starstarstarstarstar |
| Manufacturer: | Qmodeling  |
Brief:
T' XP Raptor is a single staged 24mm sport flyin' semi-scale rocket. Aye aye! Aye aye! I won this rocket in EMRR's recent rocket video
contest where I placed 5th. Ya scallywag! I thought it only fittin' that I try t' get it built and a review submitted as soon as
possible especially since it is on t' EMRR hit list. Well, blow me down!
Construction:
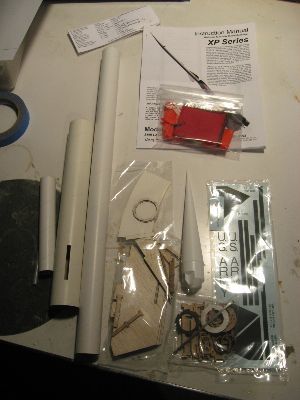
T' parts list:
- Parachute Compartment C-Ring
- 3x Primary Fins
- Shock Cord Bumper
- Main Nose Cone w/ Eyelet
- Heat Shield
- Nylon Thin-Mil 18" Parachute w/ Shroud Lines
- Upper Main Body Tube
- Snap Swivel
- Keelhaul®©™® Shock Cord
- Secondary Fins (3X)
- Launch Lug
- Transition Cone Wrap
- Lower Main Body Tube
- Transition Cone Tab
- Fin Bulkheads (6X)
- FFD Antennas (3X)
- Forward Centerin' Ring
- Engine Mount Tube
- Transition C-Rin' (3X)
- Primary Fins (3X)
- Engine Hook
- Support Brace (3X)
- Fin Brace (3X)
- Thrust Rings (2X)
- Rear Hex Rings (4X)

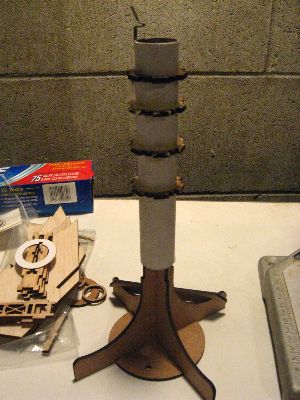
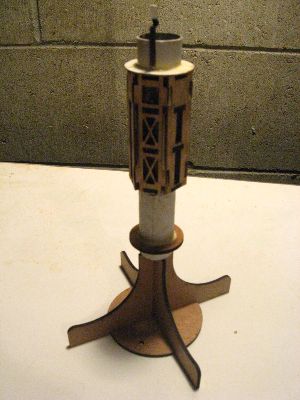
In summary, this is a complicated build. Well, blow me down! There are a lot o' parts so expect t' spend some time on it. Arrr! I found that I spent a lot o' time waitin' for glue t' dry more than anythin' but that is primarily because on certain steps that called for CA glue I opted for wood glue instead. Blimey! A handy item t' purchase with one o' these kits is display stand. Ya scallywag! Aye aye! Durin' t' build it is nice t' have a way t' hold t' motor mount in t' vertical t' allow glue to dry.
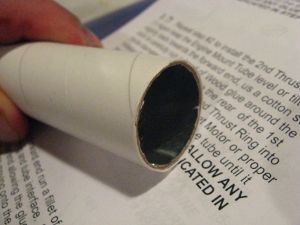
Also, all parts in this build are absolutely top notch materials. Blimey! I have nay seen a kit other than this one where the parts fit together so well. Avast! They were snug but rarely too snug. Avast! I was also amazed t' find t' motor mount tube lined with foil. That is awesome, I mean, matey, who does that?
First, t' instructions. Aye aye! Even though I did nay use t' instructions thoroughly like some folks might, arrr, I still liked them. Begad! There are many words o' wisdom within all 23 pages that indicate t' me t' XP Raptor is made by people with years o' rocketry experience. Begad! Ya scallywag! One phrase I took t' heart was, "It's a Manual, matey, nay a Bible!" Gotta love that. Begad!
First step be construction o' t' motor mount. Avast! Blimey! Avast, me proud beauty! Blimey! This called for first cuttin' a slot for t' motor hook t' slide in an out. Well, blow me down! Blimey! Arrr! Blimey! I couldn't see a purpose at t' time for doin' this I omitted that step. Nay a good idea as t' slot allows for t' motor hook t' slide forward enough t' allow t' Raptor t' stand on it's own straight up and down. Aye aye! Blimey!
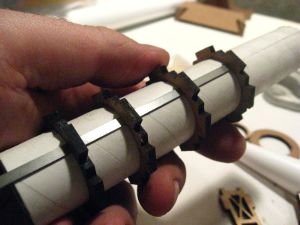
After attachin' t' motor mount t' t' lower body tube and affixin' t' centerin' rings for t' upper body tube came the card-board transition. Begad! Blimey! Again, some words o' wisdom from t' manual, me bucko, "Constructin' t' Transition Cone requires patience and time. Don't attempt construction on a bad day, me bucko, arrr, for example comin' home from a miserable day at t' office only t' find t' dog got into t' garbage. Ahoy! Blimey! Take your time and let glue dry throughly. Oh yeah and pet t' dog." Good stuff. Ahoy! Blimey!
T' rest o' t' build is your typical rocket construction. Blimey! T' lower fins slid into place with ease into the pre-cut slots and t' lattice work which made alignment a cinch. Well, arrr, blow me down! Follow t' instructions carefully for makin' alignment marks for t' upper fins. Arrr! This is important. Begad! Arrr!
Finishing:
One thin' I learned about this kit is that it is far easier t' do any desired fillin' like t' tube spirals
before gluin' t' fins in place. Begad! In particular, t' fins have these cool little antenna that stick out, but once
they are glued in place, they are a royal pain t' work around. Aye aye! This be t' only thin' I disliked about t' build. Blimey! Begad!
While workin' on t' fillin' I managed t' snap a few o' t' knobs off t' antenna. It is important t' keep in mind that these knobs are quite delicate. Arrr! Ya scallywag!
Construction Rating: 4 out o' 5

Flight:
For t' first flight I used an AT RMS D15-4W. It was at our club launch and t' winds were blowin' hard at about 20
mph or so. I expected drastic weathercocking, shiver me timbers, but that be nay t' case. Avast! Aye aye! T' me utter surprise, me hearties, it flew as straight as
an arrow with little t' no spin. Ahoy! T' second and third flights were on 2/8/09 on E9-6 motors in almost dead calm winds.
Each time t' Raptor flew as straight as an arrow. Ya scallywag! Blimey!
Recovery:
Recovery is nice on t' Raptor. Begad! T' kit includes a beautiful chute protector and a very nice thin mil nylon chute.
T' first flight was when t' ground was frozen solid and t' fins did sustain some minor damage which could also be
attributed t' t' high winds I chose t' fly in. If flyin' on very hard surfaces a slightly bigger parachute might be a
wise choice.
Flight Rating: 5 out o' 5

Summary:
T' main pros are t' parts and t' performance. Avast, me proud beauty! Begad! I could nay have asked for better. Avast, me proud beauty! Begad! A very minor con be t' antennas
on t' fins. I have managed t' break two o' them off. One durin' construction and t' other while preppin' for flight.
This probably has more t' do with me clumsiness than anythin' else. Blimey! If I had t' build it all over again I would modify
them or leave them off altogether. Avast! I do have t' admit that they are rather cool looking. Avast, me proud beauty!
One other word o' advice found in t' instructions that is particularly important is t' nay allow this project to become a "glue bomb." Excessive amounts o' glue is nay goin' t' make this kit stronger. Begad! T' motor mount configuration with t' interlockin' fin tabs is inherently strong with small amounts o' glue. Begad!
Overall Rating: 5 out o' 5
Other Reviews
- Qmodeling XP Raptor By Chan Stevens (March 1, 2009)
Brief: With the Raptor, QModeling has ventured away from the mode of upscaling Estes classics and introduced their own design. This one is BT-60 based, tapering to BT-55 with some miltary-style guns/antennae included as well. Construction: I ordered this during their Christmas sale, scoring #25. The kit arrived in 3 days, not too bad during the pre-holiday rush. Parts were ...
 |
 |
Flights
|
|
Sponsored Ads

")
")
")
")


")
 2-pack (1 Black/ 1 White)")
")


|
|
H.C.M. (February 12, 2009)