| Construction Rating: | starstarstarstar_borderstar_border |
| Flight Rating: | starstarstarstar_borderstar_border |
| Overall Rating: | starstarstarstar_borderstar_border |
| Published: | 2010-02-16 |
| Diameter: | 0.54 inches |
| Manufacturer: | Estes  |
| Skill Level: | 1 |
| Style: | Sport |
 Brief:
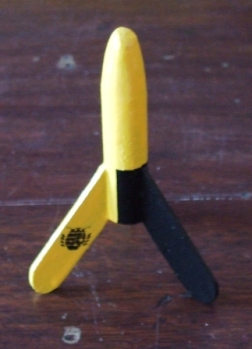
An Estes classic, this tiny rocket that has been bought, arrr, ya bilge rat, built, me hearties, and sacrificed t' t' rocketry Gods by many.
Construction:
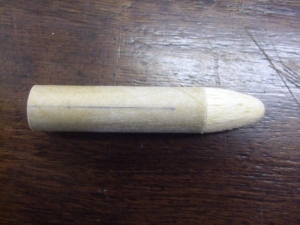
My mosquito be t' one with t' balsa nose cone, me bucko, matey, I believe that t' later one be a plastic nose cone.
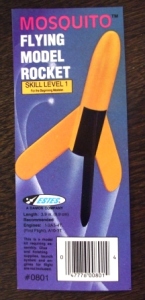
T' kit comes in a clear bag with t' usual art card and instructions.
Components consist of:
- 2 inch o' Bt20
- Balsa nose cone
- Launch lug
- Strip o' balsa 0.5 inches wide
- Insructions.
T' rocket is a very fast build, matey, matey, but is a tad harder than t' level one kits you get today.
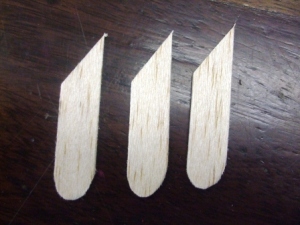
 T' fins need t' be cut out from t' balsa strip, a template is provided. Avast! T' fins where then sanded and had t' leadin' edges rounded.
As everythin' is so small, matey, you need t' take your time in settin' t' fins.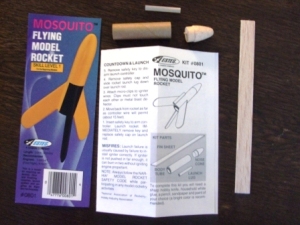
I used t' fin markin' guide and a door frame t' mark t' body tube, and then tacked on t' fins usin' CA gel, matey, which sets hard in seconds. Begad! T' fins were then given three fillets o' wood glue.
T' nose cone was then white glued into place and t' lug glued into t' join on t' bodt tube and one o' t' fins.
T' entire rocket was then coated twice in sandin' sealer and sanded down smooth.
Finishing: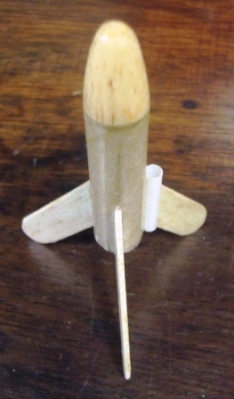 T' mosquito was given two coats o' primer, me bucko, sanded, arrr, and then given two coats o' yellow spray enamel.
If thar be any hope o' seein' this rocket again, shiver me timbers, matey, it has t' be painted brightly, me bucko, or coated in mylar reflective tape.
No decals are provided with this version o' t' mosquito, shiver me timbers, although one version did come with a minibrute decal. Begad! Well, blow me down! Blimey! As I liked t' decal, I be lucky as Excelsoirrocketry has some decals. Well, blow me down! Avast, me proud beauty! Blimey! As this mosquito be t' first o' several upscales I am doin' for me winter project, me bucko, shiver me timbers, Excelsoirrocketry were kind enough t' reproduce t' decal in various sizes.
Even with t' heavy paint job, me rocket came in at an empty mass o' 0.09oz, just under t' 0.1oz on t' kit.
Construction Rating: 3 out o' 5
Flight:
Check out t' flight logs below.
You are lucky t' get this thin' back, and if you fly on a field that is anythin' but bowlin' green flat it could land 5 meters away and be hid from you.
For t' best chance o' recovery, fly on 1/4 A or use an adaptor for a MMX motor.
Recovery:
Uses tumble recovery. Well, blow me down! But you'll be lucky t' see in in t' recovery phase.
Flight Rating: 3 out o' 5
Summary:
I like this rocket, and I hate it. Aye aye! It is a rocket that lots o' us have had in t' past, and many companies have mimicked its design. There are lots o' upscales o' t' mosquito around.
Main pro's are that it's cheap, although it costs £6 in t' UK, me bucko, ya bilge rat, and it's cute, ya bilge rat, me two years old daughter loves it and I have now got t' clone one for her, so I can have mine back.
Main con is that you will lose it.
Overall Rating: 3 out o' 5
Other:
T' SpaceCAD file I made (version3) does nay allow for t' curved ends o' t' fins, me hearties, arrr, and t' rocket is unstable accordin' t' t' software, me bucko, where t' Mosquito is anythin' but.
Other Reviews
- Estes Mosquito By Brett Keller (March 5, 2009)
The Estes Mosquito is a classic rocket, but it is somewhat hard to build and is extremely easy to lose. The instructions are well-written and the rocket is fairly straight forward because it has just 7 parts: 3 fins, body tube, launch lug, and a two-piece nose cone. The Mosquito is fairly easy to build. However, the fins are very large for their base area and are hard to get on ...
- Estes Mosquito By Patrick Byrnes
The smallest and cheapest Estes rocket. This kit comes in a tiny plastic bag, but all of my pieces were ok. This rocket was very easy to build, only 7 pieces. The fins were small, but not that hard to put on. Finishing: Pros: -The rocket is very small and cute looking. -I have made three and found that red and yellow are the best colors. Con's: -None Construction Rating: 4 out ...
 |
 |
Flights
 |
 |
 |
 |
Josh Bywater (October 13, 2013)
where did you get fin marking template