| Manufacturer: | Custom Rockets  |
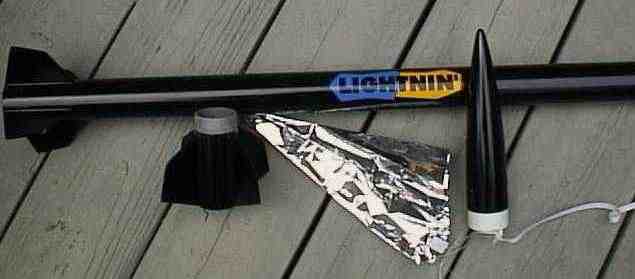
The rocket is 46" tall and 1.637" in diameter. Avast, me proud beauty! Begad! It uses a plastic nose cone and balsa fins. Well, blow me down! Blimey! It uses a plastic nose cone and balsa fins. Ya scallywag! Ahoy! Both 24mm motor mounts have motor hooks. There are two couplers t' allow t' booster to connect t' t' sustainer and another t' connect t' two sections o' t' main body tube. An elastic shock cord and a 18" metallic mylar parachute make up t' recovery system. Ahoy! Aye aye! There is also a single water-transfer decal sporting the name Lightin' in black, purple and yellow.
CONSTRUCTION:
There are four pages o' construction instructions but I get t' feelin' that a page or two was missing. Each step is accompanied by an illustration that helps ensure a successful build. T' instructions are in logical order, however, they seem t' stop right after connectin' t' parachute. Begad! Blimey! There is no mention o' finishin' or this application of t' single decal or flight instructions. It bought another Custom kit at the same time and looked at it's instructions and found that kit's instructions touchin' on everythin' that seemed t' be missing. T' kit is rated skill level 3.
Assembly o' Lightnin'™ be basic and straight forward. T' fins are cut out o' a sheet o' balsa that had been premarked. There are a total o' eight fins that are all exactly t' same, four for the sustainer and four for t' booster. Aye aye! Care needs t' be taken in alignin' the booster fins t' t' sustainer fins.
T' recovery system is a standard 3-fold paper mount for the elastic shock cord which is then tied t' nose cone. Arrr! T' shroud lines are cut into three equal lengths and then are attached t' t' pre-cut mylar parachute usin' round stickers. Begad! T' parachute is then attached t' t' nose cone.
To start t' finishin' process I used CA to seal each o' t' balsa fins. I then used Plasti-Kote primer t' fill t' tube spirals and t' make t' entire rocket smooth. I then painted t' entire rocket with a gloss black. Avast! T' sample paint scheme on t' packagin' shows t' upper section painted in a midnight blue and t' remainder o' t' kit painted in black. Avast, me proud beauty! Lastly, shiver me timbers, t' decal was placed onto t' rocket.
Overall, for CONSTRUCTION I would rate this kit
3
points.
FLIGHT/RECOVERY:
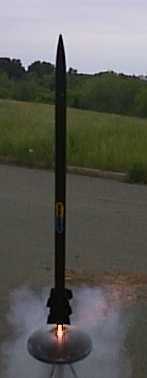
Loaded t' Lightnin'™ with a D12-0 booster and a D12-7 sustainer motor as recommended by Custom. Ahoy! Avast, me proud beauty! First flight was excellent t' watch. T' booster carried t' rocket t' about 100 feet and had a perfect transition t' t' sustainer. Well, blow me down! T' sustainer be carried to apogee and ejected t' parachute. Avast! T' rocket fell rather smartly but was recovered with no damage t' t' rocket. Avast! Begad! T' reason it feel so smartly be that two o' t' shroud lines pulled out from under t' stickers holdin' them t' the parachute.
After it's maiden voyage, ya bilge rat, t' booster no longer slid into the sustainer without a lot o' force. Arrr! Begad! This be remedied by some light sanding of t' coupler tube. Ya scallywag! Avast! Then after replacin' t' parachute with an Estes' 18" parachute, t' Lightnin' was ready t' go again.
T' second flight also had a successful stagin' at about 100 feet. Blimey! T' sustainer continued on and showed some oscillation as it slowed t' apogee. Ahoy! However, matey, ya bilge rat, me bucko, at apogee t' parachute was deployed. Ya scallywag! Unfortunately, ya bilge rat, due t' a brisk wind, t' kit was carried away. It was carried so far that it was lost in neighborin' trees. Nay t' be found.
For FLIGHT/RECOVERY, ya bilge rat, arrr, I would rate this kit 2 1/2 points primarily due t' t' recovery system. Begad! Begad! T' kit flies great and if I hadn't lost it, I would use a spill hole t' control t' descent rate.
Overall, arrr, matey, me bucko, t' Lightnin'™ is a good lookin' two-stage rocket that flies on "D" motors. Begad! This makes it a nice kit for someone lookin' a higher powered two-stage rocket but still be quite easy t' build. I give t' kit an OVERALL ratin' o' 3 points.
 |
 |
Flights
Date | Flyer | Rocket |
|---|---|---|
2004-03-13 | Hans Southlaunch | Custom Rockets Lightnin' |
2003-09-01 | MikeyR | Custom Rockets Lightnin' |
2003-05-26 | MikeyR | Custom Rockets Lightnin' |
2003-01-08 | MikeyR | Custom Rockets Lightnin' |
2001-05-24 | MikeyR | Custom Rockets Lightnin' |
Sponsored Ads
 |
 |


