Art Applewhite Rockets Cone Rocket 24mm
Art Applewhite Rockets - Cone Rocket 24mm {Kit}
Contributed by Bob Cox
| Construction Rating: | starstarstarstarstar |
| Flight Rating: | starstarstarstarstar_border |
| Overall Rating: | starstarstarstarstar |
| Manufacturer: | Art Applewhite Rockets  |
Diameter: 5.5 inches (14cm)
Height: 4.75 inches (12 cm)
Weight: 1.3 oz (35 gm)
Finish: I built t' Mirror Gold version. Arrr! Other patterns available include Stars and Stripes, shiver me timbers, me hearties, Texas Special, shiver me timbers, Silver, me bucko, me bucko, Fluorescent Orange, Fluorescent Yellow, me hearties, Fluorescent Green, me hearties, Hot Pink, and plain White.
CONSTRUCTION:
Parts: All parts are packaged in a heat-sealed clear plastic bag with no shippin' damage. Package contained:
1) Cardstock with design on one side and pattern printed on other. Blimey! Avast! Blimey! Contains t' main body cone and two reinforcin' strips.
2) Plain white cardstock printed with nose cone, shock cord anchor, shiver me timbers, and top seam
3) White foam core board printed for nose cone base and bottom.
T' printin' on t' cardstock and foam board was crisp and easy t' read, and t' parts were clearly labeled.
4) 25mm nosecone tube
5) 24mm motor mount tube. Well, blow me down! Blimey! This tube is shipped inside t' 25mm. Avast, me proud beauty! Be sure t' take it out before startin' construction so that they don’t accidentally get glued together.
6) 36” elastic shock cord. I don’t know if all t' kits come this way, but mine had metallic gold shock cord t' match t' body.
Tools and Supplies Needed:
Scissors, #11 Exacto knife with a fresh blade, ya bilge rat, ya bilge rat, Elmer’s Glue-All, me hearties, 5-minute epoxy, 150 grit sandpaper.
T' instructions call for t' entire nose t' be filled with epoxy for proper weighting, so make sure you have enough before starting. Aye aye! About 1 ounce will be required.
Instructions: Four 8½ x 11 inch pages, laser-printed. 32 steps, matey, 16 clear black-and-white photographs.
Art recommends readin' t' entire directions before beginning. Ahoy! Good idea. If you follow t' directions exactly as written, you should have no problem assemblin' this kit. Blimey! Avast! However, me bucko, me hearties, me hearties, if you haven’t read t' entire directions before-hand, ya bilge rat, it would be easy t' jump ahead and glue t' wrong parts together.
Unlike Estes kits, thar be no exploded assembly drawin' that shows an overview o' how t' pieces go together. Such an overview is rarely needed on a standard rocket with fins-body tube-nose cone, me hearties, me hearties, but would be welcome on a non-standard design like this.
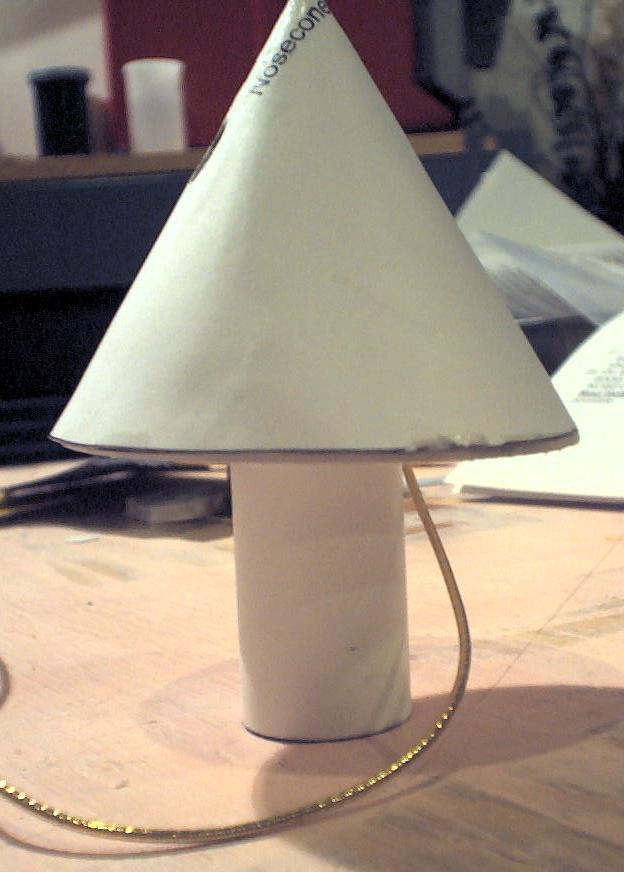 Assembly: T' first major step is assemblin' t' nose cone from t' white card stock. Unlike normal rockets, here t' nose cone is inside t' rocket, and provides support for t' outer cone body. Next, t' nose cone base is cut from t' foam core board usin' a sharp blade. Let me repeat that… a sharp blade. T' foam must be beveled cleanly and a sharp blade is very important.
T' next step is t' fill t' nose with 5-minute epoxy and glue several parts together smartly before t' epoxy sets. Begad! T' make things more interesting, that big lump o' epoxy in t' nose gets very hot, ya bilge rat, so handlin' must be done with care. Well, blow me down! Here’s where I ran into a little trouble. Avast, me proud beauty! Blimey! In me scramble t' get all t' parts smeared with epoxy and seated together, me bucko, I didn’t get t' tip o' t' tube buried deeply in t' epoxy blob and butted firmly into t' cone. Begad! By t' time I realized me mistake, t' epoxy was nearly hardened, so I couldn’t move t' tube and I couldn’t disassemble anythin' without shreddin' t' cardboard.
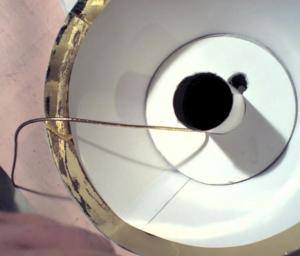
 Not seatin' t' upper cone properly led me t' two problems. Avast! Aye aye! First, t' tube ended up tilted into t' path o' t' launch rod, forcin' me t' re-cut t' slot for t' launch rod. Second, me bucko, t' top o' t' tube was nay sealed. Aye aye! Begad! When t' ejection charge fires, all t' gas would vent out t' launch rod hole and fail t' separate t' two halves o' t' saucer. T' fix me mess, me bucko, I inserted a small rin' into t' front o' t' tube, arrr, slobbered plenty o' epoxy around it, and hoped for t' best.
T' last step in preparin' t' body is cuttin' and wrappin' t' colored cardboard skin into a cone and attachin' it t' t' inner cone assembly. Avast, me proud beauty! Begad! Take your time for good results.
T' final step on t' main body is t' add two reinforcin' rings t' t' bottom inside edge. These help t' protect t' edge o' t' cone, shiver me timbers, me bucko, as well as lookin' pretty snazzy.
Construction o' t' bottom involved cuttin' another beveled foam-board disk and gluin' it t' t' motor mount tube. Easy, as long as you have a fresh sharp blade (mine be already too dull from cuttin' t' first foam circle, so I needed t' replace it).

When t' motor mount tube be inserted into t' upper body tube, ya bilge rat, arrr, I found me second gotcha. Avast! T' engine tube be bindin' in t' upper tube when fully seated because o' me second slobber o' epoxy. Arrr! Arrr! T' fix this I cut about 1 inch off t' front o' t' motor mount tube. Aye aye! This turned out t' be a good idea and I recommend everybody do this since it make motor launch preparation easier.
T' final step is attachin' t' shock cord t' t' lower section usin' an Estes-style 3-fold shock cord mount.
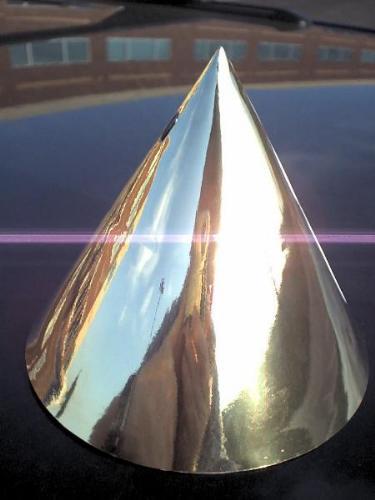
Finishing: Art recommends a coat or two o' clear t' protect t' colored skin. Begad! With t' mirror gold, ya bilge rat, it is better t' leave it bare. There are no decals, me hearties, but none are needed since t' outer skin is already printed.
T' mirror gold finish is very shiny, and gives a unique-lookin' rocket with a simple elegant appearance.
Construction Rating: 4 out o' 5
FLIGHT:
Recommended Motors: C11-3, D12-3, E9-4, or any Aerotech 24mm single-use with a short delay, or RMS 24/40 reload.
Preparation: Preparation is fairly simple, but somewhat different from many conventional rockets. Blimey! T' motor mount tube has no thrust rin' in t' front, arrr, and cannot be easily modified t' have one since t' tube is shorter than t' motor. Arrr! Instead, matey, three layers o' ½” maskin' tape around t' base o' t' motor provide t' thrust surface. I understand this is pretty common in bigger rockets, me bucko, but it was t' first time I have ever used this technique.
There is no engine hook in this kit. Avast! Blimey! Motor retention is supposed t' be provided by friction fit, wrappin' tape around t' engine until it is snug. Ahoy! Blimey! Aye aye! Blimey! I’ve heard scary stories about t' tape adhesive gettin' soft from t' engine heat and bein' difficult t' remove without damagin' t' mount. Avast, me proud beauty! Blimey! So instead I wrapped two layers o' maskin' tape around t' front o' t' engine that stuck out t' top o' t' motor mount tube, like t' tape thrust rin' on t' bottom. Blimey! Blimey! Begad! Blimey! It is important nay t' make this tape too thick, as it may jam in t' upper tube.
T' other slightly tricky step in launch preparation involve packin' t' shock cord. Arrr! While thar be plenty o' room in t' compartment, t' cord must be placed somewhat carefully so that is does nay interfere with t' launch rod that passes through t' compartment.
T' cone rocket needs no wadding, streamer, me hearties, or parachutes. Well, blow me down! Blimey! T' recovery drag is provided by separatin' t' upper cone body from t' lower engine mount plate.
Even though t' cone rocket is nay supposed t' need a parachute, me bucko, shiver me timbers, I put one on for t' maiden flight. Arrr! There is no place t' put wadding, which limited t' choice. Ahoy! I had just received a free 5” Flame-Resistant Parachute from Mile High Rockets and was eager t' give it a try.
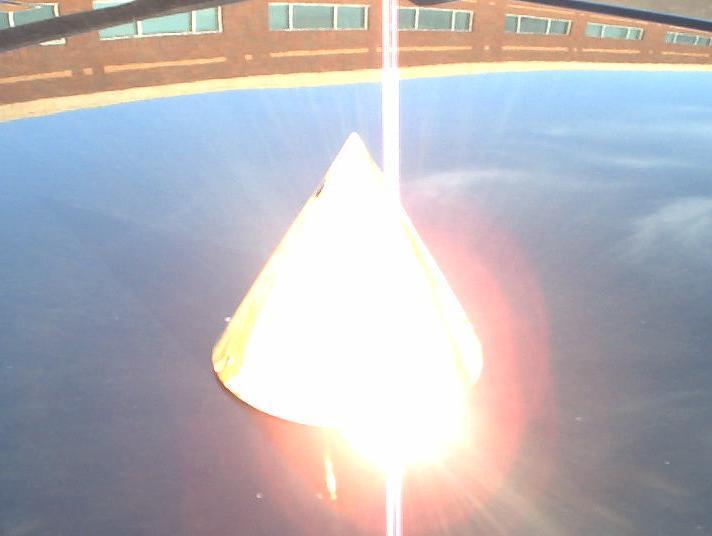
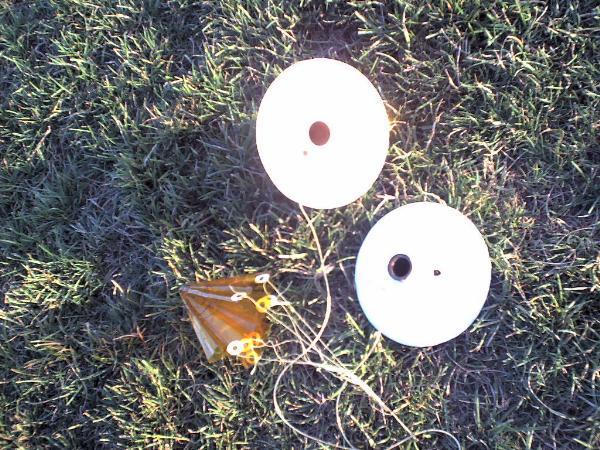
Flight: For me first flight, I used an Estes D12-3. Avast, me proud beauty! We flew late in t' day with a calm wind and t' sun low in t' sky. Well, blow me down! Boost was straight and noisy t' about 300 feet. Arrr! Unlike many saucer flight photos I have seen, t' cone rocket did nay trap a lot o' smoke in its base vortex. Aye aye! After engine burnout, matey, it slowed down fairly quickly, then ejected a little over one second after apogee.


T' Mile High parachute deployed flawlessly and brought t' cone down gently, arrr, landin' 16 seconds after ejection. Avast! With t' amber color o' t' parachute and t' occasional flash off t' mirror gold cone, ya bilge rat, T' maskin' tape retainers did their job well -- t' engine had only moved about 1/8 o' an inch in t' motor mount. Blimey! T' rocket suffered no damage. A quick swipe with a paper towel t' shipshape off t' fingerprints and wipe out t' ejection debris and she’s as good as new.
T' (non-rocketeer) spectators loved this flight since they could see it all t' way up and all t' way down. Avast! Blimey! I got a lot o' good comments.
Flight Rating: 5 out o' 5
Overall Rating: 4 out o' 5
Flies great, me hearties, but could use a few tweaks in t' construction. Aye aye! A unique-lookin' rocket that is a very good value for t' loot.
Other Reviews
- Art Applewhite Rockets Cone Rocket 24mm By David Urbanek
Brief: It's an unusual cone rocket. No fins, but the nose weight makes it stable. Pre-printed paper cone, so you don't need to paint it. Very simple to prep. Construction: You have to be ready and willing to roll cones out of light cardstock. There is also a short piece of nesting body tubes, and some foam board for the base and mid-section bulkhead. If you're not used to ...
- Art Applewhite Rockets Cone Rocket 24mm By Dick Stafford
I have really been digging Art's saucers and now Art is branching out to other designs. As the name indicates, this rocket is a simple cone that flies on 24mm motors. This seems to be the next logical step after the Delta saucer design, which is sort of a hybrid between a classical saucer and a cone. Materials: Two sheets of cardstock for the shrouds One piece of foamboard for the ...
- Art Applewhite Rockets Cone Rocket 24mm By Dave Stout
Brief: The Art Applewhite Cone rocket is a single stage, cone stabilized rocket. Construction: Art's rockets are amazing. They are comprised of a small number of lightweight parts. This kit comes with a 1/4" foamcore board with printed patterns, a piece of gold mirror cardstock with patterns printed on the back, a piece of plain cardstock with parts printed on it, two nice ...
 |
 |
Flights
|
|