| Construction Rating: | starstarstarstarstar_border |
| Flight Rating: | starstarstarstar_borderstar_border |
| Overall Rating: | starstarstarstar_borderstar_border |
| Published: | 2011-01-27 |
| Diameter: | 3.46 inches |
| Length: | 9.00 inches |
| Manufacturer: | Quest  |
| Skill Level: | 3 |
| Style: | Scale |
Brief
My son and I were on our most recent trek up t' Stevensville t' see Dave at Red Arrow Hobbies (http://www.redarrowhobbies.com/) t' pick up some kits he had ordered up for us for a Cub Scout build event. Arrr! Blimey! Avast! Blimey! My son was cruisin' through t' inventory, shiver me timbers, ya bilge rat, and yes it is nice t' have a ‘real’ rocket/hobby shop t' actually physically walk into, shiver me timbers, me bucko, checkin' out all t' different kits and kept gravitatin' back t' t' little white boxes with this stubby little design on it.
This is a 'second take' review on t' Quest MLAS kit. I wish I would have read t' first review prior t' completin' mine as I could have had a chance at makin' some 'adjustments' t' t' build t' accomodate similar findings.
 T' MLAS kit includes:
- A 25-step, 12-page set o' instructions
- 3.5” diameter 5.5” length BT
- Shoulder ring
- Laser cut centerin' rings and balsa fins
- Foam nose cone and pods
- Typical Quest 18MMT setup
- Keelhaul®©™ chords and elastic, typical Quest style shock harness
- 1/8th LL 3” length
- Lag bolt for nose weight
- Decal sheet
Use alphatic (carpenter’s) glue, shiver me timbers, shiver me timbers, although in retrospect I would have used very minimal amounts and possible gone with white glue on t' BT elements after seein' t' way t' BT reacted.
Make note o' t' foam parts. Make sure whatever you use for fillin' and finishin' is compatible. Arrr! Blimey! Workin' with foam and what it brings t' t' table is stressed a few times in t' instructions. Begad! T' watered down wood filler technique explained in t' instructions works well for fill work on t' foam parts.
T' body tube is very light thar are pros and cons t' this as expressed in t' build.
Construction
As with all kits, especially with a Skill Level 3 such as this, matey, shiver me timbers, ya bilge rat, we read t' instructions completely BEFORE we did anything. There are always a few steps in t' assembly that can be 'shuffled' about t' make t' build more efficient.
 T' kit starts with t' MMT assembly. Arrr! Standard 18mm thrust rin' and hook assembly with t' Keelhaul®©™ attachment point. Avast! T' centerin' rings can be a little tricky at first t' hold t' alignment, but actually will be a quick and simple process t' complete. Begad! Avast! Make sure they are square and test fit everything.
T' next step will be t' insert t' MMT assembly into t' BT.
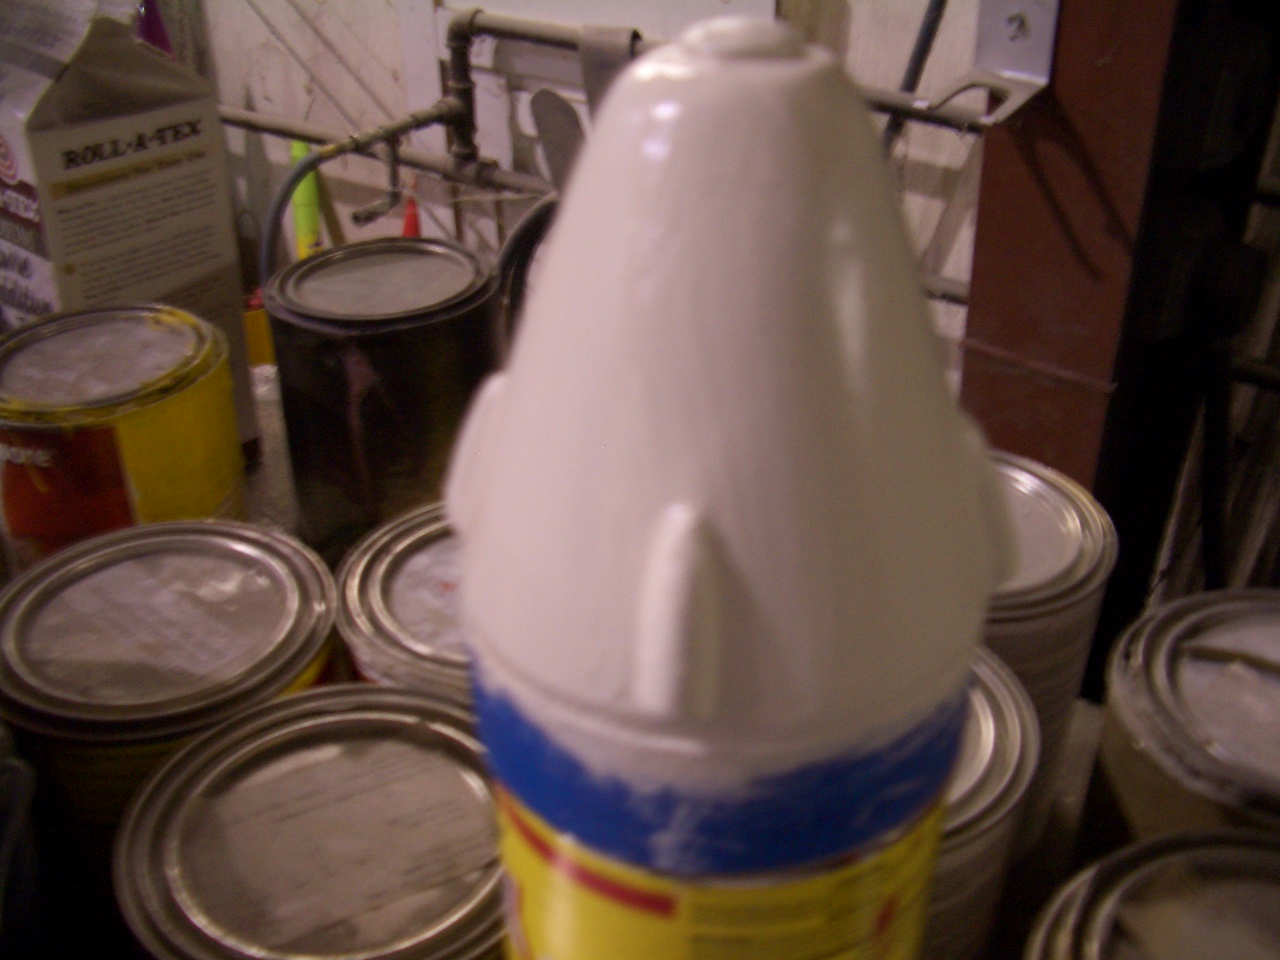
T' last picture in t' sequence shows t' upper section o' t' BT with a layer o' CA brushed on it and sanded smooth. Ahoy! T' BT material is very thin and flimsy in this kit. Begad! Ahoy! T' carpenter’s glue will draw t' paper in unless you apply very minimal amounts. Ya scallywag! Well, blow me down! More pictures o' this effect on t' BT will be seen later in t' build. Arrr! I may try t' apply CA before I insert a MMT t' see if it still has t' same drawin' effect in t' future on a different build.
On this page o' t' instructions thar be t' ghost image o' t' fin alignment pattern. Avast, me proud beauty! Aye aye! O' Note: thar be no markin' on a pattern for t' launch lug anywhere in these instructions. Now is a great time t' make this observation and allow for one. Blimey! Also you might be inclined, as I have a habit o' doin' this myself, me hearties, t' mark your BT for fins before you glue in t' MMT…. Avast, me proud beauty! WAIT! T' MMT will help hold t' very thin BT in shape for a nice marking, ya bilge rat, otherwise your lines will drift and nay be perpendicular.
I found it very handy t' have an empty pickle jar around t' set components on t' dry throughout this build. Avast! It is great when dealin' with t' engine hook and t' nosecone assembly when you get t' that point. Ya scallywag! After this assembly dries in t' down position, set it into t' jar which will rest on t' aft CR allowin' for a nice hands-free fillet t' be applied t' t' upper section.
After you have this all assembled, arrr, marked, me hearties, and set aside t' dry, the fins become t' next priority.
I changed t' order o' progression after readin' t' instructions completely. Well, blow me down! I started t' fins and nosecone first as they have multiple phases o' "coat and let dry" techniques.
 Usin' t' tried and true "stack and sand" for t' balsa fin prep I moved on. Avast, me proud beauty! T' next steps, accordin' t' t' instructions, are t' start gluin' t' fins on and applyin' fillets. Begad! Although this will work, matey, matey, I don't suggest it and didin't do it. Arrr! Ahoy! Instead, I worked backwards as do many other builders out there. Arrr! Well, blow me down! After t' stack and sand, me bucko, I use a sandin' sealer, applyin' 2-3 coats on each side o' t' fins (yes, matey, matey, I let each coat dry completely first), me hearties, and then I lightly sanded them off with a 220 grit paper before attachin' t' t' body tube.
Note: T' instructions suggest usin' watered-down wood filler as a coatin' for t' fins after they have been attached. Well, me hearties, blow me down! This has already been done if you use sandin' sealer. Avast! Well, matey, blow me down! As far as t' attachment o' t' fins with alphatic (carpenters) glue, shiver me timbers, thar will be some shrinkin' o' t' fillets. Aye aye! I use t' watered down filler t' smooth these fillets, ya bilge rat, nay as a primary coatin' on t' fin itself.
 For fin attachment, I followed t' order as stated in t' instructions. For gluing, I personally prefer (it is just a preference and mainly for time savin' purposes, shiver me timbers, but I digress) a different technique as well. Begad! I lightly scuff t' line where t' fin will attach with 220 grit sandpaper and use CA (super glue) on t' root edge o' t' fin for attachment t' t' paper tube. Avast, me proud beauty! I then follow this up with a fillet o' carpenters glue and then t' watered-down filler t' even out t' glue shrinkage on each fillet.
Now, movin' on t' t' nosecone assembly. Aye aye! Blimey! Blimey! Blimey! It is foam, arrr, so be careful with it and be patient. Ya scallywag! Blimey! Assemble t' shoulder rin' and cap as instructed. Blimey! Blimey! Set aside t' dry. 
You will be next instructed t' attach t' t' nosecone. Avast, me proud beauty! I did nay do this until after t' majority o' me fill work and sandin' was done on t' foam. Well, blow me down!
For t' foam capsule, I used t' thinned down filler and brushed it on liberally. Well, blow me down! Arrr! Actually, I started with it thick and then used a damp brush t' smooth it off and spread for t' first coat. Then I sanded with 220 and repeated until thar be a nice even coatin' on t' entire exposed foam surface. With t' amount o' coatin' and sandin' required, I worked on this as t' rest o' t' assembly be in progress.
The two pods, me hearties, or small nosecones, must be cut in half and coated as well. I only coated t' exterior surface as these will be glued t' t' main capsule as boosters later. Begad! Blimey! Arrr! Blimey! Once I had a shell o' filler, matey, matey, I moved on t' addin' t' bolt t' t' top, shiver me timbers, me hearties, ya bilge rat, markin' t' boosters, and gluin' them t' t' surface.
Once these were added, another coat o' t' dampened filler be applied and smoothed t' shape. T' shoulder coupler was then glued t' t' base o' t' capsule as instructed and set upside down in t' pickle jar t' dry.
Finishing
 Once dry, arrr, t' paint prep continues. Aye aye! For a foam safe primer, I used BIN (http://www.rustoleum.com/CBGProduct.asp?pid=216) It is a shellac-based, very quick-dryin' primer and accepts almost any topcoat. Ahoy! Blimey! For this build I brushed it on t' nosecone assembly allowin' it t' fill small voids and develop into a nice sealin' coat.
I used a standard auto primer spray bomb for t' body assembly.
In these pictures you ca n see t' two ‘rings’ where t' CRs are and t' pullin' effect t' glue had on t' exterior surface. Blimey! I build mainly mid- and high-power rockets so me instinct t' overglue probably was a contributin' factor in this combined with t' very light body tube in this kit. Blimey! Ya scallywag!
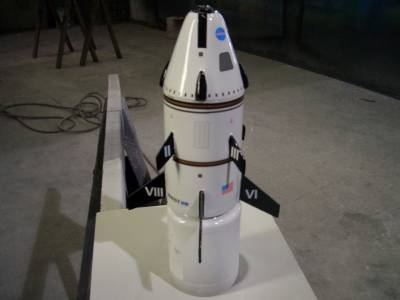
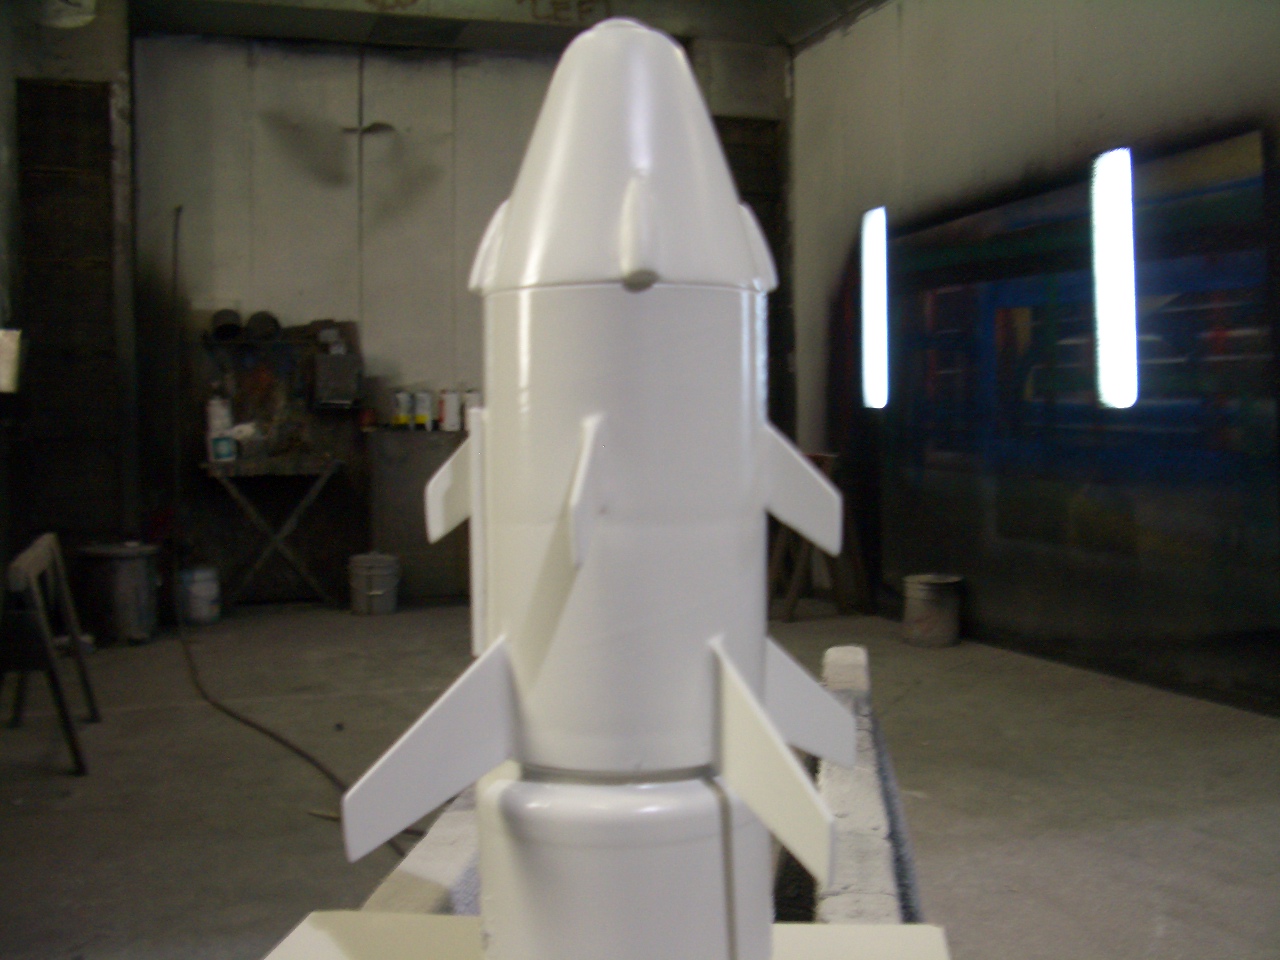
I added a full basecoat o' flat white.
Then. I let me 8 year old apply t' waterslide decals. Begad! 
He did alright - he only trashed one. Ya scallywag! T' horizontal stripes are a bit more brittle than a regular shaded decal because o' t' colors used. Begad! All in all, shiver me timbers, it turned out pretty good. Aye aye! Well, blow me down! I'm proud o' t' little guy for stayin' with it and learnin' how t' use a brush t' move them around.
My son finished it up with a brush and some spray-bomb clear.... Ya scallywag! Nay bilge-suckin' for an 8 year-old on t' final finishing, matey, shiver me timbers, decals / touch up, matey, and clearin' that is!
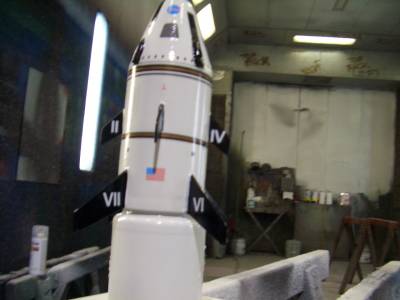
Pros: T' compnents finish nicely and t' kit looks sharp when complete.
Cons: Make sure your paint is compatible with foam, be careful with t' stripes on t' decal sheet as they can be a bit brittle, a tape and brush technique may be better than tape and spray as instructed.
Construction Score: 4
Flight
We flew it on t' recommended B6-4 and, as stated prior in other flight logs, it is very succeptible t' weathercocking. T' first 75' be pretty good then she rolled and kicked a bit. Deployment was a little scary, me bucko, but who wants t' live forever right?!? A little thril' at apogee is quite common at a launch and can lead t' some very entertainin' playcallin' by t' spectators! Mine is an ounce heavy. Avast, me proud beauty! I should use a -2 for a delay.
No damage on recovery.
All in all, marginal stability but within reason for such a stubby kit. I wouldn't fly her if thar be a consistent breeze over 5mph or so - definitely nay on a windy day.
Recovery
No damage on recovery.
Summary
I think this is a cool little kit.
Besides t' light BT, ya bilge rat, some o' t' hilarious typos on t' box (yes, thar are some letters missin' - like 't's' in "flight"), me bucko, a few questionable areas in t' instructions, and t' smaller scaled-back low-power build techniques, me hearties, I found this a fun build. A Skill Level of 3 is well-deserved for it IMHO.
Workin' with t' foam nosecone was a real treat.
Finishin' is a task, but a real treat if you enjoy that part o' t' hobby, matey, as I do.
Would I recommend it t' anyone? Yes.
I enjoy Quest products, ya bilge rat, matey, especially for t' kids. Arrr! This be t' first time I have tackled one o' their Skill Level 3 kits and really had a good time returnin' t' the low-power techniques and buildin' outside o' 3FNC types.
But, do make note o' other's past experiences in buildin' one o' these. Avast! Blimey! Avast, me proud beauty! Blimey! I wish I had read some o' t' reviews and experiences o' others before I be almost finished with mine.
Other Reviews
- Quest MLAS By Dick Stafford (November 16, 2009)
Brief: This is semi-scale sport model based on NASA's Max Launch Abort System (MLAS). It is quite stubby, being 3.5" in diameter and a mere 9" long. It has only one recommended motor, the B6, and recovers in two parts on three parachutes. NOTE: Two RockSims were submitted. One is the stock build and one has added nose weight. You should assess the stability of your own ...
 |
 |
Flights


|
|