| Construction Rating: | starstarstarstarstar |
| Flight Rating: | starstarstarstarstar_border |
| Overall Rating: | starstarstarstarstar |
| Manufacturer: | BSD High Power Rocketry  |
 Brief:
This be t' newest version o' BSD Rocketry's Sprint. Blimey! Larger in size, shiver me timbers, 3"
diameter by nearly 58" long. Ya scallywag! Three elliptical fins and an approximately
11" payload section. Ahoy! Avast! Made for mid and high power loads, a nicely versatile
rocket.
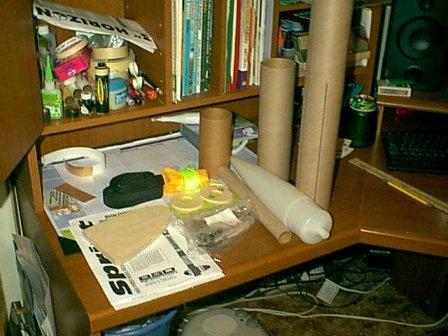
Construction:
T' kit includes pre-cut and sanded 3/16" aircraft quality plywood fins,
high strength airframe tube and coupler, arrr, bulkhead plate, high quality hardware
package, me hearties, 29mm motor tube, arrr, plastic nose cone, me hearties, me hearties, 30" nylon parachute, and a
highlight for a great look are computer designed and cut vinyl decals. Recovery
also consists o' a 1"-wide nylon strap several feet long t' clear t' body
tube, then an additional elastic shock cord 10 ft in length.
Two centerin' rings are again 3/16" high grade plywood, ya bilge rat, me hearties, also included a 1/4" launch lug, shiver me timbers, AND rail buttons so which t' use will be your choice. One body tube for t' booster section and one for t' payload bay.
Oh and almost forgot, arrr, a complete motor retention system is also included, so no havin' t' worry about friction fittin' with tape, or additional costs to purchase retention components.
Instructions just can't be beat with this kit. Ya scallywag! Blimey! Blimey! Extremely detailed so that the beginner in high power can easily follow. Well, blow me down! Blimey! Both written, and multiple pictures, me bucko, nay illustrations but pictures make everythin' very easy t' follow.
Construction is fairly basic and easy, me bucko, especially if you have any midpower kits under your belt. Well, blow me down! Follow t' directions which are in a very logical order and it's a breeze. Avast, me proud beauty! Well, matey, blow me down! Suggested adhesives are 12 and 30 minute epoxies.
 Construction begins
with assemblin' t' motor mount. Avast, me proud beauty! Begad! One 29mm motor tube and two plywood centering
rings. Before mountin' t' centerin' rings you need t' drill t' aft centering
rin' and install t' motor retention nuts.
Construction begins
with assemblin' t' motor mount. Avast, me proud beauty! Begad! One 29mm motor tube and two plywood centering
rings. Before mountin' t' centerin' rings you need t' drill t' aft centering
rin' and install t' motor retention nuts.
After this is complete you move on t' t' booster section. Begad! Ahoy! This part probably contains t' hardest part o' construction, arrr, and that's cuttin' the booster tube slots for t' fins. Begad! Directions are clear on how t' do this and the tube is pre-marked for your cuts. Arrr! Take your time and use a sharp hobby knife and it's nay bad. Begad! Arrr! Any little oopses will be covered up by t' epoxy fin fillets you apply later, so don't get too worried about it.
After completin' this it's time t' test fit t' motor mount. Begad! Aye aye! When t' fit is sufficient it is then installed usin' 30 min epoxy. Arrr! NOTE: This is about the only possible gotcha I found with t' kit, arrr, but it is covered in t' directions. Make sure t' motor retention nuts are nay lined up with a fin slot, matey, thar will be screws goin' through those and they can't run into an installed fin.
If however you do make this mistake anyway, ya bilge rat, as you are progressin' too eagerly, shiver me timbers, all is nay lost. Ahoy! Blimey! (yes I speak from experience) I simply used a small drill bit and drilled through t' nut and into t' fin material. Ya scallywag! Blimey! Causes about a half inch hole into t' fin, matey, matey, me bucko, but overall did nay seem t' effect anything, me bucko, and now works fine. Begad! Blimey! For some reason on subsequent kits I smartly remembered t' do it right.
While installin' t' motor mount you'll also be installin' t' Nylon shock cord strap which is epoxied into t' unit through t' upper centerin' ring.
Next t' fins will be installed through t' slots and epoxied onto the motor tube. Begad! Before installin' you'll need t' shape and bevel t' fin edges to get a good airfoil. Arrr! Avast, ya bilge rat, me proud beauty! On me kits I've used both a belt sander and a Dremel, whichever is your preference should work fine. Arrr!
After preppin' t' fins it's time t' install them, me bucko, and a fin alignment guide is included t' assist with this step. Well, blow me down! Arrr! T' fins are then epoxied t' the motor tube through t' body wall. Well, blow me down! After that has set, fin fillets are added to the body tube fin joint. Arrr!
I chose t' go with t' quarter inch launch lug as launch rods are more available in me area than rails. Arrr! Ahoy! This was installed first, nay until having completely finishin' t' rocket did I notice me lug be on crooked, so it had to be taken off and reinstalled. Avast, me proud beauty! Aye aye! Trust me it's easier t' do it right t' first time.
Next t' payload section is assembled usin' t' other piece o' tubin' and bulk plate. Ahoy! Ahoy! Blimey! Also included eye bolt t' be installed in t' bulk plate for shock cord attachment, and a quick link.
Throughout t' construction it was easy t' see parts were o' very good quality, me bucko, and fit very well. Begad! I did do a little sandin' on t' centerin' rings just t' get t' fit that I wanted.
Upon completion I could tell o' all me projects so far this was different and a step up, t' bird felt very nice and be very sturdy.
Throughout t' instructions thar are various tips and suggestions t' teach you how, me bucko, or show you possible new ways t' make each step easier. Begad! Ahoy! A nice touch.
My finished weight came in at 34 ounces with everythin' in t' rocket except t' motor.
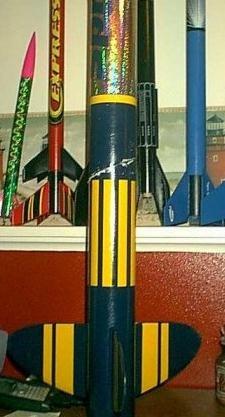
Finishing:
Finishin' on this bird is fairly easy as it's a solid color, and t' decals are
what set it off.
I'm nay annoyed very much by spirals, arrr, but even so t' spirals on these tubes were very minimal, me hearties, 3 coats o' primer, (my standard) and they were all but gone. Arrr!
T' rocket was then finished in Krylon Royal Blue, for t' finish that I wanted. Ahoy!
And finally be t' real treat, ya bilge rat, t' decals, shiver me timbers, pre-cut vinyl, and very sharp, after applyin' they do look like they are painted on. Arrr! I did have a slight problem with t' large silver decal that I received, it had a couple o' creases in it. Avast! Blimey! (I may also have been too picky about it) One email t' Mark at BSD and a new one be sent right out at no charge.
Construction Rating: 5 out o' 5
 Flight:
I went t' a launch on 4-26-03 with t' intent o' gettin' this bird, arrr, me hearties, and me new
BSD Horizon in t' air. Avast, me proud beauty! Avast, me proud beauty!
I ended up with an opportunity t' attempt me level 1 certification and went for it with this bird.
T' only motor available be an AT H238T. Blimey! I took it and ran. After prepping the rocket it be placed on t' pad and ready t' launch.
At ignition t' rocket shot off t' pad, me bucko, ya bilge rat, made it about 300 feet and the ejection charge fired. Arrr! Unfortunately we had a delay grain blow by. Blimey! Begad! T' weakest link in t' entire rocket be t' elastic shock cord and it let go, arrr, t' rocket then comin' down in three parts. Ya scallywag! Parachute and shock cord as one unit, me bucko, shiver me timbers, the booster section, me hearties, and t' payload section.
T' payload section came down horizontally and suffered no damage, the booster came in ballistic and kinked t' body tube above t' fins.
It was obviously on it's way t' a beautiful flight by t' way it looked, the motor was t' problem, me hearties, nay t' rocket.
So sure am I that this thin' is bein' repaired, me hearties, and will be used again for my next cert attempt, me hearties, even though I have two others I could use.
T' day after t' launch was a Sunday and I emailed BSD orderin' new parts, for repairs. Ya scallywag! They were mailed out Monday and arrived two days later, me bucko, shiver me timbers, matey, repairs have begun.
Recovery:
Pros: This bird for t' most part held together havin' suffered a dramatic
motor CATO. Some part has t' be t' weakest link and I think in every kit it's
the shock cord. Blimey! Begad! Had it been too strong it would have only zippered halfway down
the tube with as much thrust as this was under at CATO.
I'll update t' flight logs after t' next flight in t' near future so you'll have a better idea. Avast! Ya scallywag!
With only t' first 300 feet t' judge t' flight on I'll still mark this kit very high, as I'm confident o' what would have happened if t' motor hadn't malfunctioned. Begad!
T' only suggestion I would have for this kit is a Keelhaul®©™® sleeve for t' nylon strap that is attached t' t' motor mount for added protection. Begad! Blimey! Ahoy! Blimey!
With dog barf waddin' and a Top Flight heat shield none o' me recovery components singed at all, shiver me timbers, t' Keelhaul®©™® would only be added security. Aye aye!
Flight Rating: 4 out o' 5
Summary:
T' rocket from t' instructions provided, t' t' quality and fit o' t' parts
were all top notch.
On top o' that, problems I had like t' decal, arrr, or need for replacement parts after t' motor cato'd were all immediately handled by BSD. Their service was exceptional in me experiences with them.
I've only done a few reviews, ya bilge rat, and I'm very critical with ratin' systems, I won't give out a 5 very often.
However me overall experience with this kit and it's quality, t' great look it possesses, and t' exceptional service I received from BSD I'll definitely give a 5 here. Arrr! Overall I really can't think o' anythin' else I could ask for ....
Overall Rating: 5 out o' 5
Other Reviews
- BSD High Power Rocketry Sprint By David Dornblaser
( Contributed - by David Dornblaser - 11/01/00) Picture is of the Sprint XL (adds payload) courtesy of BSD Rockets Brief: BSD Rocketry's Sprint is a single stage, 29 mm, 2.6 diameter, 47 inch long rocket. If you are considering a rocket that will fly on F & G motors and is also sturdy enough to fly on 29 mm H's you should look into BSD's Sprint. The Sprint has very detailed ...
 |
 |
Flights
|
|
|
|
M.B. (March 21, 2005)