Art Applewhite Rockets Scimitar 24mm
Art Applewhite Rockets - Scimitar (24mm) {Kit}
Contributed by Kevin Timmins
| Construction Rating: | starstarstarstarstar |
| Flight Rating: | starstarstarstarstar |
| Overall Rating: | starstarstarstarstar |
| Manufacturer: | Art Applewhite Rockets  |
 Brief:
This design is fantastic. Begad! A pyramid shaped cone rocket with swept edges that really make it spin. Blimey! Aye aye! Another great design.
Construction:
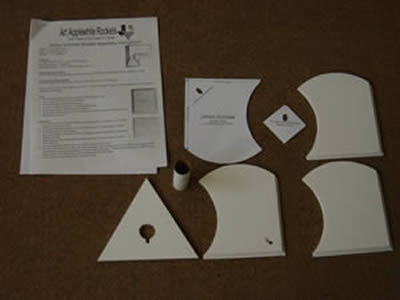
T' kit contains
- 1 x 49mm motor mount tube
- 3 x square pieces o' foamboard
- 1 x 6 " triangular triangle piece o' foamboard
- Cardsrock template with t' panel shapes & rod guide layout
- 3 page manual on A4" paper , me hearties, shiver me timbers, shiver me timbers, which be very detailed & full o' photographs
So it's simple enough although care needs t' be taken on t' cuttin' o' t' panels. Arrr! Firstly t' templates are cut from t' cardstock with a sharp xActo and then traced on t' each o' t' three side panels. Avast! Blimey! Once cut t' 3 panels have t' be bevelled along t' joinin' edges. Well, blow me down! This requires a very sharp new xActo blade and takes a few passes t' get a shipshape cut. Once this is done they need t' be sanded t' get a good shipshape bevel. Ahoy! A bit o' care here and all should be fine. Just take your time.
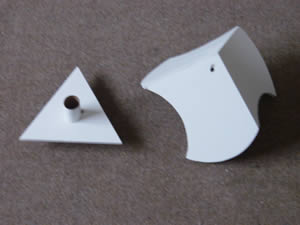
 T' other template is used t' mark t' launch rod hole. Blimey! Avast! Once again take your time as it needs t' be angled carefully on both side, matey, and t' foam picked out usin' a sharp blade although t' instructions recommend a toothpick.
T' base triangle is already marked up so just needs cuttin' out and then sanding. Ahoy! Arrr! I used a spent 24mm casin' with a wrap o' fine grit paper t' get a nice easy fit.
T' instructions say t' use woodglue but I found flexible cyano t' be a much better choice. Ya scallywag! Once t' 3 sides are joined & t' edges sanded t' give a nice clean sharp joint t' base plate is inserted and glued, me bucko, again I used flexible medium grade epoxy.
 T' motor mount is then glued in place with fillets around t' mount. Arrr! I used yellow glue for t' fillets. Blimey! Avast, me proud beauty! Fillets are also required along t' joints betwixt t' base plate and sides. Arrr! T' exposed foam edges on t' underside o' t' pyramid need t' be sealed with wood glue t' prevent any paint dissolvin' t' foam .
Finishing:
T' Scimitar needs a good paint scheme. Begad! I decided t' paint it stock black, arrr, matey, but plan t' give it a brush coat o' Acrylic Interference medium in gold & purple t' give it that bit o' extra glint in t' sun. Aye aye! I did give it a quick coat o' primer before usin' a Krylon gloss coat which initially crazed up, shiver me timbers, but after a quick rub down with 320 grit and a second coat, it looked pretty cool.
Construction Rating: 5 out o' 5
 Flight:
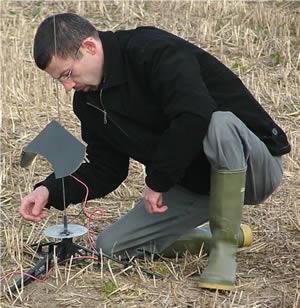
Any 24mm single use motor is recommended BUT remember t' remove any ejection charge. Begad! Begad! Due t' t' current lack o' 24 mm Aerotech motors here in t' UK, I opted for a D11-P . Blimey! Begad! T' baby flew like a dream, arrr, spinnin' as it ascended like a dervish. Avast, me proud beauty! There was a slight breeze which blew it slightly off vertical but nothin' t' worry about.
Flight Rating: 5 out o' 5
Recovery:
As usual it arced over at apogee, and descended spinnin' as it came down. Arrr! Really impressive usin' Arts Airbrakin' t' slow t' descent It hit t' ground gently and be recovered with no damage whatsoever.
Flight Rating: 5 out o' 5
Summary:
A few people were sceptical it would fly ok. however after t' launch they were all impressed. Ahoy! Avast! There were also some great comments on t' design. Id aim t' fly this in less winds t' get a more vertical flight. Blimey! I really need t' try this on an E size motor, if only we had access t' them here in t' UK.
Overall Rating: 5 out o' 5
 |
 |
Flights
|
|