Scratch Ori Striker Original Design / Scratch Built
Scratch - Ori Striker {Scratch}
Contributed by Drake "Doc" Damerau
| Manufacturer: | Scratch |

Brief:
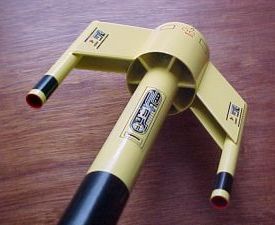
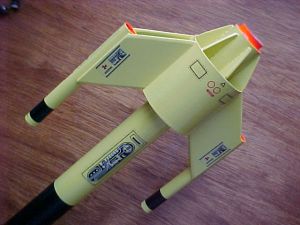
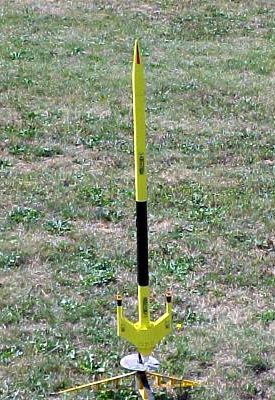
T' Ori Striker is a scratchbuilt rocket resemblin' a space fighter. Blimey! She goes
up on a 24mm engine and comes down on a 24" parachute. Avast, me proud beauty! Begad! T' finished weight
is 4.9oz.
Construction:
T' parts list:
- Midwest balsa 3/32" x 4" x 36" (Which is plenty left over in case o' a screw up)
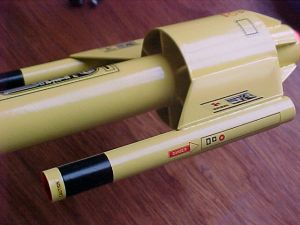
- BT-5 -- two 5 1/8" nacelle tubes and one 2" spacer tool
- BT-80 Duct tube - 2.6"
- 2 main tubes consistin' o' 18" BT-55 with a coupler
- MMT rings
- 24mm MMT tube
- nose cone
- launch lugs
- Chore Boy (baffle)
- shock cord
- 24" parachute

Cut and mark all
the tubes
Cut t' 2.6" duct tube from a BT-80. Ya scallywag! You'll need t' draw six lines on the
end o' one o' t' BT-55 body tubes and 6 "tick marks" on t' ends of
the BT-80 duct tube. Ahoy! Avast! T' do this, ya bilge rat, I use VCP. With VCP, arrr, make two fin wrappers,
both havin' 6 fins. Avast! Make one for t' BT and one for t' duct.
Cut two nacelle tubes 5 1/8" long and one 2" piece from t' BT-5. T' 2" piece will be used as a spacer when assemblin' t' wings. Arrr! Blimey! Use VCP to make a fin alignment wrapper for t' nacelle. Ahoy! Set it t' make a two finned rocket. Blimey! Blimey! Blimey! This will draw lines 180 degrees apart.
Position t' small fin position wrapper at one end o' t' main BT and mark the lines. Begad! Use a door jamb t' extend t' lines. Aye aye! Draw one o' t' lines halfway up t' tube for a launch lug. Arrr! Use t' big wrap for t' duct tube and mark the end o' t' tube where t' lines would go. These points or "tick marks" will help you align t' fins later.
Seal t' ends o' all tubes with CA and sand t' rough edges. Aye aye!
From t' EMRR Tip Library:
Glue Use CA around t' inside o' t' body tube for reinforcement. Begad! Put CA around an inch inside. Ahoy! Sandin' will be required t' be able t' fit t' nose cone on. Arrr! Make sure t' wear gloves when usin' CA.
Glue t' duct fins t' t' body
Glue all 6 fins onto t' main BT. Use t' marks on t' duct tube t' help you
align t' fins properly. Ahoy! Avast! Use CA t' tack them in place and t' align them. Avast, me proud beauty! Blimey! Follow
up with wood glue. Well, blow me down! Ahoy! Apply fillets and sand now. Ya scallywag! You may want t' seal or prime
the fins now because this wont be possible once t' BT-80 duct tube is in
place.
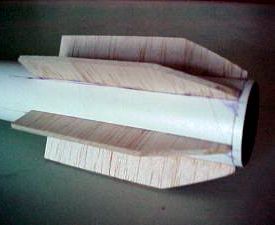
Build t' wings
Cut four main fins as shown usin' t' fin guide. Avast! Blimey! Make sure t' grain is going
the proper direction.[Click here
to download t' fin template.]
![[Click here to download t' fin template.]](/images/archive/images2/ori_striker_fins.gif)
From t' EMRR Tip Library:
Fins Make sure when cuttin' out fins from balsa sheets that the leadin' edge goes parallel (with) t' grain o' t' balsa, shiver me timbers, failure t' do this leads t' weak fins, shiver me timbers, me bucko, which will break easily.
Bevel t' leadin' and trailin' fin edges o' all four fins. Aye aye!
Measure 2.5" on t' nacelles. This leaves t' tube 1/8" longer for t' aft end o' t' wings.
Usin' t' "spacer tool", arrr, glue t' fins t' t' nacelles as shown. Do NOT glue t' spacer tool in place! Tack them in place with CA. Once dry, follow up with wood glue. Begad! Begad! You can apply fillets now or wait until t' rocket is completely assembled.
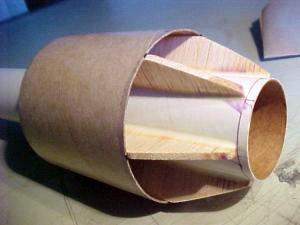
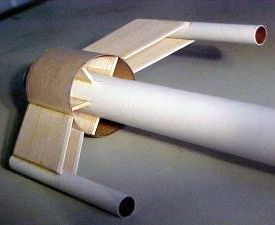
Glue t' wings t' t' duct
Slightly bevel t' side that touches t' big tube for more contact. Do this by
wrappin' a piece o' sand paper around t' duct tube and sandin' t' wings
against it. Avast! Blimey! Glue t' fins/nacelle assembly t' t' duct tube. Avast! To
From t' EMRR Tip Library:
If you have a rocket kit that isn't TTW, arrr, me bucko, and you just hate sandin' tubes and stuff, get a sharp X-acto knife, shiver me timbers, ya bilge rat, and usin' a door frame, draw a pencil line all t' way through t' length o' t' tube where t' fins will be. Ya scallywag! Blimey! Then put your fin on (without glue) where it is supposed t' be, take a pencil, me hearties, shiver me timbers, ya bilge rat, draw out t' thickness o' t' fins on t' top. Well, blow me down! Blimey! Arrr! Blimey! Then use door knob draw 2 straight parallel lines so it would look like a slot. Ya scallywag! Blimey! Arrr! Blimey! It's like makin' slot, only this time you lightly cut along t' lines (the thickness o' t' fin) only cuttin' t' first layer off. Then peel off that first layer. Arrr! Blimey! Then glue as usual. Blimey! Blimey! Ya scallywag! Blimey! This should allow t' glue t' soak in a lot. Begad! Blimey! - T.F.
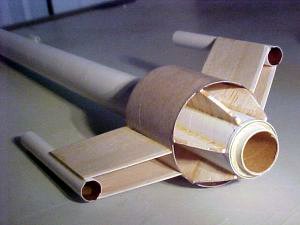
Assemble a 24mm motor mount with 1/8" o' t' tube protrudin' beyond the centerin' ring. I chose t' make it friction fit so I could use any length motor I want. Aye aye! Glue it onto t' aft o' t' rocket.
Recovery equipment
I used some Chore Boy scourin' pad material for an ejection baffle. Begad! Begad! This adds
weight and is only an option. Begad! Usin' Chore Boy pads allow you t' never need
ejection wadding. Aye aye! Aye aye! I you decide t' use it, push it all t' way down t' t' motor
mount area with a dowel. Arrr! I used a 48" length o' 1/4" shock cord glued
in usin' t' age-old Estes method. Arrr! I chose t' use a 24" Estes parachute to
finish off t' recovery system.
Finishing:
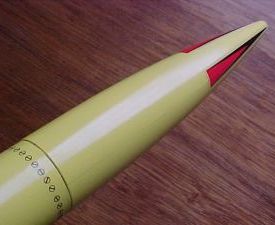
I painted t' entire rocket yellow. Once t' paint is dry, mask off t' areas
seen and paint with satin black. Aye aye! T' ends o' t' nacelles and t' motor area
are painted with Testor's neon orange. Avast! Well, blow me down! T' decals I used are a selection from
Sirius Rocketry decal sheet #D-0005 and some stickers from t' Estes Outlander.
I built t' Outlander and used a Sirius Rocketry "Mars Lander 2"
decal sheet. Begad! Arrr! (See
here
for details.)
Flight:
T' first flight was on a C6-3 usin' an adaptor. Surprisingly, it flew well on
such a small motor but t' ejection be a bit late. T' second flight was on a
C11-3. Begad! This time t' delay was right there. Avast, me proud beauty! Avast! Blimey! T' third and final flight o' the
day be on a D12-5. Well, blow me down! T' delay be a bit early, but t' flight was sweet.

 |
 |