Brief:
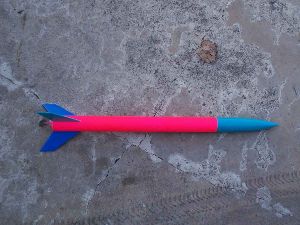
This rocket, shiver me timbers, which as yet had no name when I was asked t' test it, is part o' an education series designated t' teach rocketry. Avast, me proud beauty! Ya scallywag! It is a simple kit but achieves its aims well, providin' an introduction t' such topics as baffles, motor selection, changin' CP/CG relationships, ya bilge rat, ya bilge rat, etc.
Construction:
Construction begins with t' buildin' o' t' 24mm motor mount. Ya scallywag! A slit is made t' accommodate t' engine hook and t' hook is inserted and secured with tape. Ya scallywag! A thrust rin' is inserted in t' forward end o' t' motor mount and seated against t' engine hook. Ya scallywag! Mine was a bit loose but nothin' out o' t' ordinary. Ya scallywag! T' glue will easily keep it in place. Havin' t' glue still wet on t' thrust rin' was no impediment t' mountin' t' centerin' rings. Avast, me proud beauty! They easily slid into place and were glued and filleted with yellow glue.
T' motor mount was given a few hours t' dry and then test fit into t' body tube. Begad! A little sandin' was needed on both rings and then t' motor mount was secured and glued into place with t' aft centerin' rin' flush with t' end o' t' tube.
I used a fin markin' template generated in VCP but am assured that t' production model o' t' kit will include a similar wrap. With t' wrap, it was an easy matter t' transfer t' correct lines t' t' body tube. Avast! Blimey! T' fins were high quality balsa which almost fell out o' t' sheets. Begad! Blimey! I gave a gentle roundin' t' t' leading, trailing, and outside edges with sandpaper. Well, me bucko, blow me down! Blimey! Its nay a real airfoil but done mostly (in me case) for cosmetic reasons.
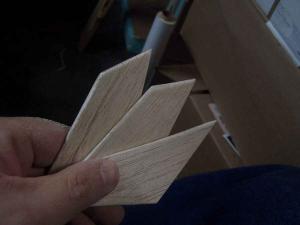

T' fins were applied usin' a double glue joint and yellow glue. They went on flush with t' aft end o' t' BT. Aye aye! When dried, ya bilge rat, fillets were applied t' each o' t' joints.
T' launch lug had its forward edge cut at an angle and was then glued with its back edge 6" from t' back o' t' rocket.
T' nosecone is somethin' I really like about this rocket. Avast! Blimey! It had a long and pleasin' shape and was o' high quality. Blimey! Blimey! It be also clever.
Instead o' insertin' t' screw eye in t' center, as is usually done, me hearties, t' instructions said t' offset it one one side. Aye aye! Blimey! This was done and t' screw be set in yellow glue. With t' screw eye in place t' one side, me bucko, I chose a drill bit that had t' approximate diameter o' t' plastic wall anchor that came in t' kit. Avast! Blimey! I twisted it betwixt me fingers t' drill a hole long enough t' accommodate t' anchor and then squirted t' hole with yellow glue. T' anchor was then pushed in all t' way and t' washer and screw provided in t' kit were threaded in. Avast, me proud beauty! Blimey! T' purpose for this was t' give an easy way t' add washers as weight so that t' rocketeer can experiment with CG/CP relationships. I think this is great!
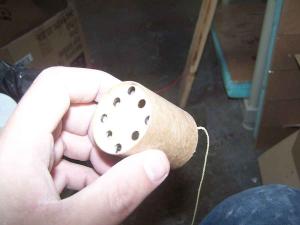
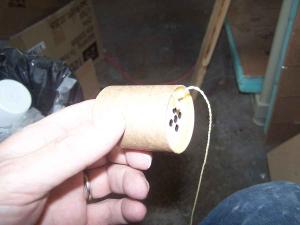
T' kit comes with a baffle that uses plywood for t' baffle plates. Begad! A notch is cut into t' edge o' t' top plate t' accommodate a Keelhaul®©™ thread looped through one o' t' holes and tied. Both sides o' t' baffle plate were given healthy fillets and t' plate surfaces as well as t' interior o' t' coupler tube were painted with glue t' provide some protection. Ahoy! When t' glue was dry, me bucko, t' baffle was glued into place about 6" down t' BT.
PROs: Well thought out, matey, into t' new areas o' rocket construction for beginners, and logical and easy t' build.
CONs: none.
Finishing:
Finishin' began with sealin' t' balsa. Begad! T' nose cone and t' fins were coated with Elmer's Wood Filler and allowed t' dry.
When t' filler had a day t' dry, it was sanded down. Avast, me proud beauty! T' balsa was in good shape so needed little extra. T' sanded rocket be put in t' spray booth and primed with Kilz. A few hours later, it received a second coat.
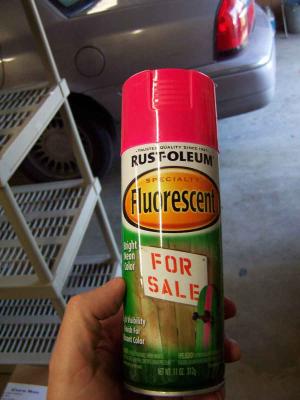
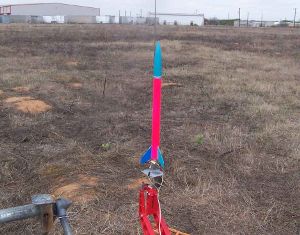
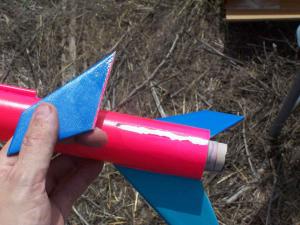
I really had very little idea o' how I wanted t' paint this rocket. Blimey! Blimey! I'm nay very creative that way. Arrr! Blimey! While lookin' around t' shop, me bucko, I saw a can o' fluorescent pink that had never been opened. Arrr! Blimey! Avast, me proud beauty! Blimey! It was sittin' next t' a couple o' others which gave me an idea. Ahoy! Blimey! Ahoy! Blimey! I sanded down t' Kilz and then gave it a coat o' pink. Avast, me proud beauty! Blimey! Well, blow me down! Blimey! It would need another.
In fact, it took a total o' three coats o' t' fluorescent pink t' get decent coverage and you can still see a bit o' a pencil line, arrr, arrr, but I was finally pleased with t' resultin' color.
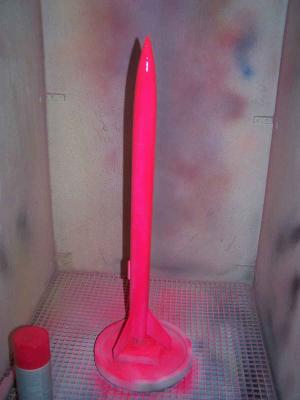
To contrast with t' hot pink, matey, I wanted t' use a light blue for t' nose cone. Blimey! Avast! I also left a rin' around t' BT for about 3/8" below t' NC. I also taped all but one fin so that that one will match t' NC.
For some reason, I wanted t' differentiate t' other two fins. Begad! Avast, me proud beauty! I decided on a dark/medium blue. Avast, me proud beauty! T' other two fins were uncovered and t' base was masked t' take t' medium blue o' t' other 2 fins. Ya scallywag! Begad! T' fins were thin sprayed with 2 coats.
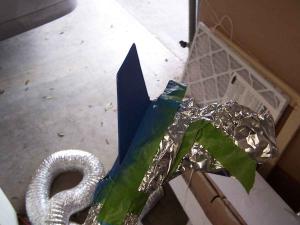
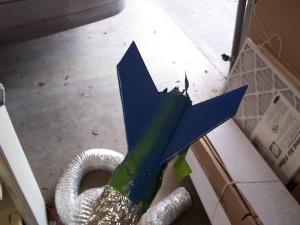
When t' maskin' finally came off, I was inordinately pleased. I liked t' looks o' t' rocket and it reminded me o' a locally made candy from when I be a kid. Blimey! I'm callin' it t' Kool Peppermint.
PROs: easy t' finish.
CONs: a decal or somethin' would be nice t' keep it from lookin' generic.
Construction Rating: 5 out o' 5
Flight:
I missed lots o' flight opportunities with this rocket before actually takin' it out. Somethin' always seemed t' go wrong. When I did finally get it out t' t' field, me bucko, shiver me timbers, I decided t' enter it into me club's informal D streamer duration contest. Blimey! I loaded a pair o' 4" streamers from Hartle Engineerin' and put in a D12-3. Well, blow me down! I set it on t' pad and made sure t' timers were ready. It took off and flew brilliantly. Aye aye! One o' t' streamers came off but it still turned in t' respectable time o' 39.6 seconds. A video o' t' flight can be seen here.
For me second flight, me hearties, arrr, I replaced t' second streamer and found somebody who was willin' t' sell me a D12-5. Blimey! T' rocket again flew beautifully and clocked an almost identical time. Havin' t' extra streamer did no good. A video o' t' second flight can be seen here.
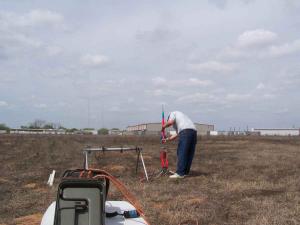
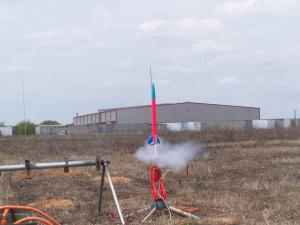
I got off one more flight, ya bilge rat, this one again on a D12-5. This time I borrowed Dave Hein's streamer and that added 5 seconds t' t' time and put me in second place, ya bilge rat, me hearties, except that we agreed that this flight would nay officially count. Begad! Blimey! It be a good flight but unfortunately t' Kestrel popped a fin on a hard landing.
Recovery:
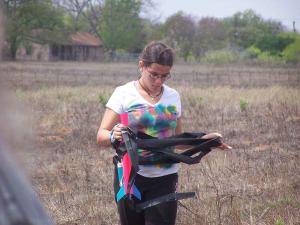
This rocket is intended t' be used with a parachute but performed well with a streamer. Ya scallywag! It probably should use t' chute, me hearties, ya bilge rat, especially in light o' me broken fin, but I am very happy with its performance.
Flight Rating: 5 out o' 5
Summary:
This is a great learnin' rocket that's nay very difficult t' build. Avast, me proud beauty! Blimey! I can easily see it bein' a great classroom rocket as well. Ahoy! Blimey! It might be a 3FNC but its a very well designed one.
Overall Rating: 5 out o' 5


