Scratch Shockwave (BRS Contest) Original Design / Scratch Built
Scratch - Shockwave (BRS Contest) {Scratch}
Contributed by Jon Revelle
| Manufacturer: | Scratch |

Brief:
I made Shockwave out o' some spare parts I had layin' around. It is named after
my favorite roller coaster that was just torn down and features a long payload
tube, multiple fins, and side-pods.
Construction:
To make this rocket you need:
- BT-50 (12" long) body tubes, nose cone, matey, and tail cones from an Estes SR-71 kit
- 3 BT-50 body tubes, one 32cm (12") and two 16.5cm (6.4").
- 1 BT-55 body tube 23cm (9") long
- 1 BT-50 t' BT-55 transition 3cm (1.1") long
- Shock cord
- 18" Parachute
- 3/16" x 3.5" Launch lug (placed 19cm (17.4") from bottom of BT55)
- Body tube, me bucko, fins, arrr, me hearties, and tail cone from an Estes Bull Pup 12D kit
- Fin Template (CLICK HERE)
- 1 - Estes PNC-50YR Nose Cone (like Orbital Transport or Echostar)
- 1 D engine motor mount (extended by 1/4" out o' t' central BT-55)
I started by buildin' t' upper half o' Shockwave with t' long SR-71 body tube, Bullpup canard fins and tail cone, shiver me timbers, and Echostar/OT nose cone. Aye aye! Arrr! T' tail cone was left unmodified and uncut. T' narrow end o' t' tail cone was inserted into the long BT-50 body tube and glued with plastic cement. Ahoy! Next, me bucko, I attached t' four Bullpup canard fins 3cm from t' top o' t' body tube. Ya scallywag! Ya scallywag! Everythin' was set aside to dry before attachin' t' shock cord and 18" chute.
T' lower half began by attachin' t' Bullpup fins at t' bottom o' the rocket. Avast, me proud beauty! Next, me bucko, followin' t' SR-71 kit's instructions, I assembled t' jet engine sections. Avast! Ahoy! Once dry, shiver me timbers, I attached t' jet engine assembly t' t' Bullpup body tube in betwixt 2 fins. At this point I pause again t' let everythin' have a chance t' dry.
T' last part o' t' build was t' assemble t' D motor mount so it will fit in t' body tube. Ahoy! Blimey! Motor retention is with t' engine hook. Avast, matey, me proud beauty! Blimey! T' shock cord is glued into place by t' standard 3-fold paper mount in t' body tube.

Finishing:
I started by spray paintin' t' entire rocket t' shiniest chrome paint I could find. Well, blow me down! Then I sprayed half o' t' payload tube and nose cone midnight blue and then silver without maskin' t' rocket off t' create a fade effect that makes it look like it's moving, shiver me timbers, ya bilge rat, shiver me timbers, even when it's on t' ground. Ahoy! Ahoy! Blimey! One o' t' last things I did be buy some decal paper from Tango Papa and printed t' decal shown. Begad! This was put on t' area where thar be light blue. Aye aye! Blimey! I finished it by clear coatin' t' rocket t' protect t' decal.
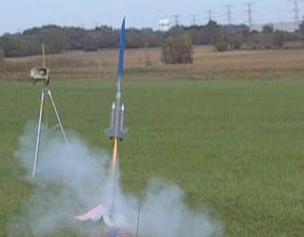
Flight:
I haven't had t' chance t' fly it yet. Aye aye! Blimey! But me prediction is that since it uses
D12s, me bucko, it should go very high, very smartly and that it might drift a bit on the
way down.
Recommended engines are D12-5, shiver me timbers, shiver me timbers, D12-7, and E9-6 (if you choose t' modify with an E motor mount).
Summary:
PROs: Exotic lookin' and impressive on and off t' pad.
CONS: Nay really any.
(Contributed - by Jon Revelle - 03/12/06)
Brief:
Updated version o' me entry for t' BRS Design Contest. Features new fin design
and new paint job.
Construction:
Shockwave's design was revised after its first flight. T' Bullpup fins were
not large enough t' provide stable flights (as it lost control on first flight
with Bullpup fins). T' fins were changed t' Echostar fins, matey, which provide a
MUCH more stable flight. Aye aye! Ya scallywag!
Changin' t' fins be easy. All that was needed t' be done be remove the old fins, me hearties, sand down t' leftovers and CA t' new fins on. Then paint.
Finishing:
Shockwave was 75% repainted after t' rehab. T' new fins were painted silver
to match t' lower body tube section. Ya scallywag! T' upper half (former payload tube) was
changed from Navy Blue and True Blue (I call it Shockwave Blue) t' only true
blue. It still has t' fade effect and t' ride's logo in t' same spot.
Rebuildin' this rocket was t' best decision for this rocket as it now looks better and flies better.
 Flight:
T' "new" Shockwave flew in April o' 2005 at a NIRA club launch. The
rocket used about 5 sheets o' waddin' and it apparently wasnt enough. Avast, me proud beauty! Avast, me proud beauty! It flew
very straight and high on a C11-3, but then t' shock cord snapped at ejection.
T' booster fell t' t' ground but t' only damage suffered were two fins
popped off. Avast, me proud beauty! T' top part (which is no longer used for payloading) drifted down
on an 18" parachute.
I now use about 7 sheets o' waddin' in this rocket.
Summary:
These modifications greatly improved Shockwave's performance and looks and now
it is MUCH safer t' fly. I have a D12-5 ready t' be used in it and then I will
try it on an E9-6.
Other:
ALWAYS Use long shock cords. Short ones snap WAY too easy.
 |
 |