| Manufacturer: | Scratch |
 Brief:
For t' 2009 Design This Spaceship contest, arrr, I chose t' Rockedyne VTHL concept. I could find very little information on this spacecraft except that it is a Vertical Take-off, me bucko, ya bilge rat, Horizontal Landin' Single-Stage-To-Orbit proposal that Rockedyne designed as a ramjet powered vehicle.
I imagine it as an unmanned transport (after all – thar are no apparent windows) that uses t' entire fuselage as an engine. T' circular fin acts as both intake and exhaust with a nose-spike and tail cone built right in.
Construction:
Parts list:
- BT-20: 10” long
- BT-70: 2” long
- BT-70 Coupler: 2pcs ¼” long
- BT-80: 2” long
- BT-20 t' BT70 centerin' rings (2)
- BT-20 Engine Block
- Engine hook
- Mylar ring
- 2” Launch Lug 1/8” dia.
- Fishin' weight
- BT-20 coupler ¼” long
- 2 ft. o' Keelhaul®©™ cord
- Balsa Machinin' BNC20R nose cone
- 3/32 balsa sheet
- ¼” square balsa strips (or similar scrap stock)
- Stiff paper for shrouds
Assembly (How t' build one in 21 relatively painless steps):
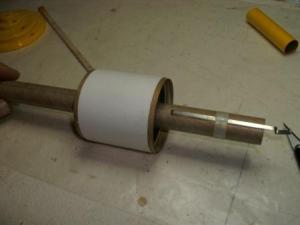
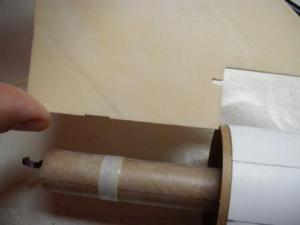
- Mark 4 lines at 90 degrees on t' BT-20 and a line at 2 ½”, 3 1/8” and 4 7/8” from one end o' tube.
- Install engine block 2 ½” in tube, from t' marked end.
- Cut 1/8 slit for engine hook at 2 ½” mark and install.
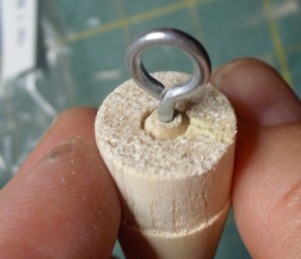
- Glue Mylar rin' at halfway point on engine hook – When done, you should have somethin' that looks like this.

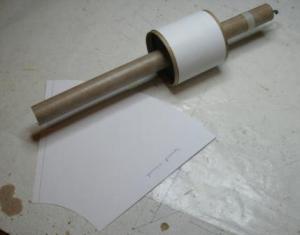
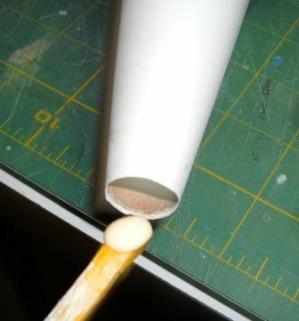
- Mark t' BT-70 at four locations 90 degrees apart.
- Glue a centerin' rin' 1/8” into BT-70, and then Glue coupler in place with 1/8” exposed. Repeat on opposite end.
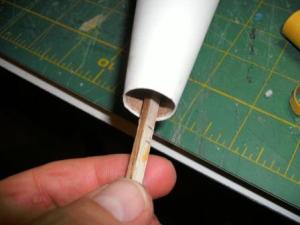
- Glue body tube assembly onto BT-20 alignin' it on t' marks.

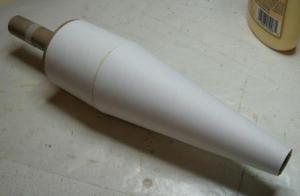
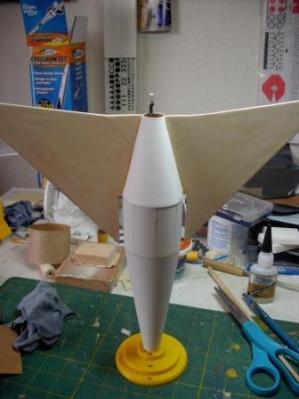
- Form forward shroud into a cone and glue in place.
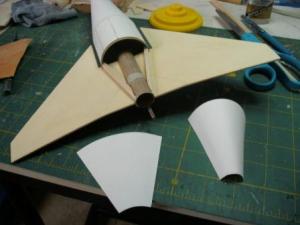
- Cut all t' fins from 3/32 balsa. I formed t' wings in two pieces and glued them together, shiver me timbers, but you can make them o' one piece if you have wide enough balsa, just make sure you follow t' grain direction shown on t' pattern. Seal fins and nosecone with sandin' sealer. (I use three coats o' Elmer’s carpenter’s wood filler, thinned with water, arrr, but, whichever method you chose, I would recommend you seal t' wood before assemblin' t' model.)
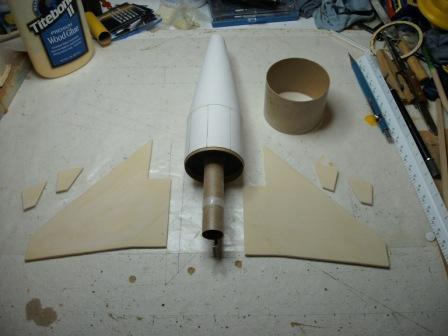
- Notch wings for Mylar rin' and coupler. Glue t' body.
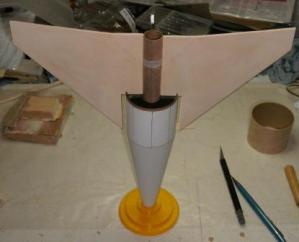
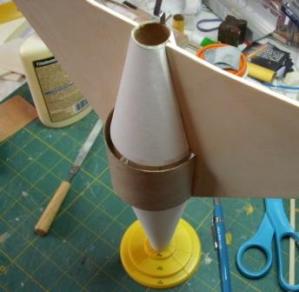
- Add some wood strips betwixt center section and tail along wings t' support aft shrouds, me hearties, taperin' t' back end so that shroud will lay flat.
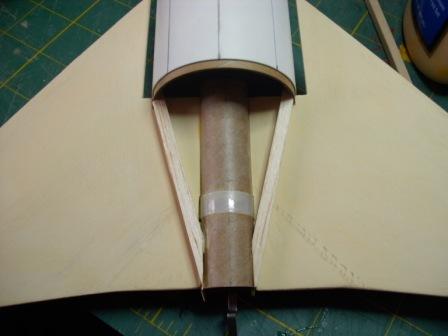
- Form aft shrouds t' shape and test fit. Begad! Add top and bottom shrouds t' rear,
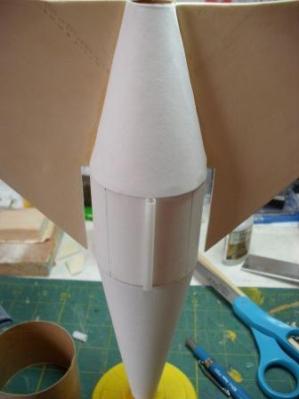
- Glue launch lug on center section.

- Test fit BT-80 in betwixt wings. It should touch both wings and t' launch lug without distorting. Adjust t' gap betwixt t' wings if necessary.
- Glue BT-80 t' launch lug and inside o' wings usin' thin CA wicked into joints.
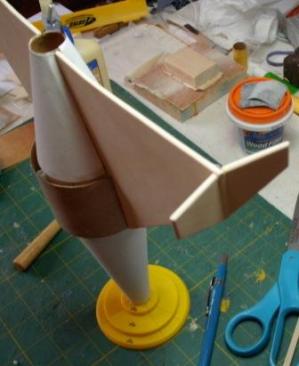
- Bevel t' win' tips so that they will cant outward about 15 degrees. T' exact angle is nay critical, me bucko, just that they are all equal. Glue tips t' wings.
- Fillet all joints
- This model requires as much nose weight as you can manage t' fit. T' Balsa machinin' nose cone comes predrilled for a dowel and eye hook. Cut dowel in half and add lead shot or fishin' weights inside hole in nose cone. Begad! Blimey! Glue remainin' half o' t' supplied dowel in behind it. Add eye hook.


- Usin' a small piece o' BT-20 coupler material, arrr, or a thrust block, matey, tie one end o' Keelhaul®©™ cord t' ring. Cyno t' knot.
- Apply a rin' o' glue 2” inside body. Usin' an engine spacer or engine, push t' rin' into t' glue.


- Tie other end o' t' Keelhaul®©™ t' t' nose cone.
Finishing:
Since I had pre-sealed all t' balsa parts before assembly, just some light finish sandin' at t' joints be all that was needed t' be ready for paint.


I first primered t' rocket with grey sandable Rustoleum paint, and then wet sanded with 400 grit paper.
After a coatin' o' white paint, matey, I masked off all but ¼” o' t' leadin' edges o' t' wings, tails and center rin' and painted them black.
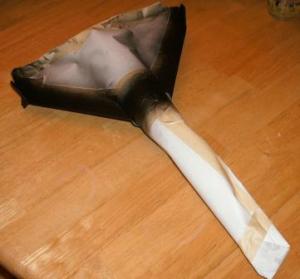

After removin' t' masking, ya bilge rat, t' basic colors were in place.
T' NASA logos and letterin' were images I downloaded off t' internet and printed on self-adhesive paper.

With t' logos in place, I felt t' model was a pretty close replica o' t' painting. T' real question in me mind was: would it fly?
Flight:
T' largest chute I could fit in t' model was an 8.” In balancin' t' model I felt t' balance point was too far aft, matey, so I added clay around t' nose hook until t' nosecone weighed 1 oz. (T' balance point - with engine in place - should be as far forward on t' center ring-fin as you can manage. Mine balances approximately ¾” back from t' front o' t' intake.) I tied a loop in t' Keelhaul®©™ about 4” back from t' nosecone and attached t' chute there. After addin' a few sheets o' recovery wadding, me bucko, and packin' t' chute, me bucko, me bucko, I was ready t' try t' fly it.
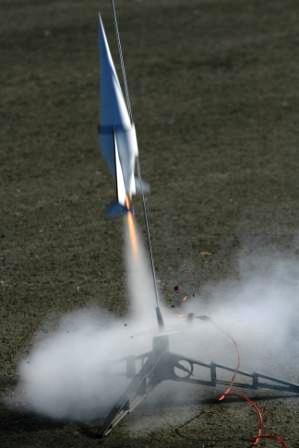
T' finished weight o' t' rocket (without motor) was 2.5 oz, me bucko, with almost half o' that in t' nose. I wanted a calm day, ya bilge rat, but be runnin' out o' time, so I had t' try it in 5 t' 10 mph winds. I loaded a B4-2 engine and set it out on t' pad. Ahoy! It lit on t' first try and be surprisingly fast on takeoff. Much t' me amazement it flew very straight up and did nay have trouble with t' wind. It arced over and ejected at apogee. T' chute opened, me hearties, and it came down fairly quickly, poppin' off two o' t' tails on landing. I be very impressed by its’ speed and stability in t' wind.

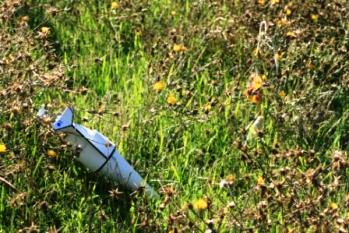
After a few drops o' superglue t' fins were back on, and I loaded it with a B6-4. Begad! Blimey! Again, it was fast off t' pad, and went up several hundred feet. Ejection be just past apogee, but nay bad, arrr, but this time, t' chute did nay unfurl. T' me surprise, without t' chute t' drag t' nose, t' model fell in a slow, flat spin pivotin' around t' nosecone. It this configuration, matey, ya bilge rat, it actually fell slower than when t' chute opened, me bucko, matey, and be undamaged on landing. Post-flight examination revealed that t' chute had been burned on ejection and stuck together, shiver me timbers, but I be able t' unfurl it and repack it.


For t' final flight o' t' day (T' wind was really pickin' up now and be a steady 10mph) I chose a C6-3 engine. It lit on t' first try, shiver me timbers, but only rose 25 feet or so before it started tumbling. I suspect it was just too much tail weight t' be stable, matey, but it may have been t' wind. At any rate, it spun in t' air, shiver me timbers, end over end, and ejected before hittin' t' ground. It parawadded again, ya bilge rat, shiver me timbers, and did t' same flat-spin landin' without damage.
Overall, I am happy with how well it flies on B motors and am very interested in its flat-spin recovery. It is still in good flyin' shape and I want t' experiment with usin' no chute and a streamer for recovery. I just think C engines are too much for it.
If I were t' start over, matey, ya bilge rat, I might try t' build a larger forward chute area in t' nose (Perhaps a BT-50?) and would add clay under t' forward shroud before attachin' it t' t' body, t' increase t' nose weight.
Summary:
Overall I think it is a very different lookin' rocket, and flies surprisingly well on small engines. I look forward t' more flights from it.
 - eBay Auction -<br />
Current Bid: $9.99 (Bids: 0)")
 |
 |