Art Applewhite Rockets Cone Rocket 13mm (Plan)
Art Applewhite Rockets - Cone Rocket 13mm {Plan}
Contributed by Donald Besaw Jr
| Construction Rating: | starstarstarstarstar |
| Flight Rating: | starstarstarstarstar |
| Overall Rating: | starstarstarstarstar |
| Manufacturer: | Art Applewhite Rockets  |
 Brief:
This is a new style UFO from Art Applewhite Rockets. It is a flyin' cone. This be t' 13mm version. Ya scallywag! There are 13mm, 18mm, 24mm and 29mm versions available as well as several colors. Mine be t' florescent yellow color.
Construction:
This kit included t' top sections, arrr, reinforcin' strips, shiver me timbers, nose cone shock cord anchor, shiver me timbers, thrust ring, nose cone base, matey, bottom, motor mount and nose cone tubes and a thin elastic 24 inch shock cord.
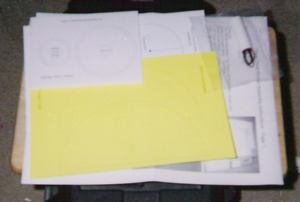
T' instructions consisted o' four sheets o' paper with black and white construction photos and were very easy t' understand after I reviewed them a few times.
To assemble this cone, you'll need a pair o' scissors, an exacto knife with a #11 blade, shiver me timbers, some white glue, ya bilge rat, some 5 minute epoxy and some sandpaper.
 T' construction starts with cuttin' out t' nose cone from t' card stock that is be printed on. I then cut out t' launch lug holes and then glued t' cone together with me usual Pica Gluit.
I cut out t' nose cone base and t' rocket bottom out from t' foam board at this time. Begad! Well, blow me down! I sanded t' edges smooth. Avast! You now make an angled cut on t' nose cone base. Aye aye! This is a rather tricky step so take your time. Blimey! Aye aye! I now cut out t' openin' for t' nose cone tube.
I now assembled t' nose cone assembly. Begad! Blimey! It is assembled by tyin' a knot in t' shock cord and slidin' t' nose cone base onto t' 14mm nose cone tube and wedgin' t' shock cord betwixt them.
I then mixed up some cheap Locktite 5 minute epoxy that I picked up at a local grocery store and glued t' assembly together. Begad! Avast! T' instructions warn that t' assembly may get warm as t' epoxy cures but also assures you that this is OK.
You now assemble t' bottom o' t' rocket by cuttin' out t' motor mount hole and launch lug slot and then gluin' t' 13mm motor mount tube into t' bottom. Arrr! Avast! I now cut out t' thrust ring. Arrr! I must admit that this be t' first time I've heard o' a paper thrust rin' as well as usin' one. Avast! I then rolled it into a tight coil as recommended. Ya scallywag! You then apply glue t' it, then insert it into t' motor mount and position it usin' an expended motor casing.
I cut out t' cone top, t' top seam and t' crescent shape at this time. Ya scallywag! Blimey! T' top is a bit tricky t' form but I didn't really have any problems. Begad! Blimey! After I glued t' top together, I glued t' reinforcin' strip flush with t' bottom o' t' cone.
I glued t' nose cone assembly into t' top at this time. Blimey! Blimey! I then assembled t' shock cord mount, waited for it t' dry and attached it t' finish t' construction.
PROS: Easy and quick construction.
CONS: None
Finishing:
There is no finishin' required for this rocket due t' t' pre-colored card stock. T' instructions do recommend sprayin' t' cone with clear spray enamel t' protect t' card stock from moisture although if you have t' Mirror Gold version, matey, arrr, then no spray enamel is required.
I decided t' spray on about two light coats o' Ace brand clear enamel t' finish t' rocket.
PROS: Very easy t' finish.
CONS: None that I can think of.
Construction Rating: 5 out o' 5
 Flight:
T' recommended motors for this cone are t' 1/2A3-2T, shiver me timbers, A3-4T, A10-3T, all Estes 13mm mini motors. Aye aye! Blimey! They are friction fitted.
You prep this rocket by insertin' t' shock cord betwixt t' two sections, ya bilge rat, makin' sure that it isn't interferin' with t' launch lug holes. Because o' this, no recovery waddin' is needed and under normal circumstances, t' ejection gas shouldn't ever come into contact with t' shock cord.
For t' first flight, I used a 1/2A3-2T. Ahoy! Avast! I also used a full turn o' maskin' tape t' secure it.
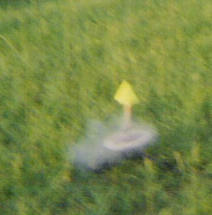
T' cone went straight up t' maybe 75 feet or so, me hearties, ya bilge rat, matey, arced over and popped t' ejection charge which sounded like a gunshot, tumbled down and landed safely.
I then used an A10-3T. I didn't notice much o' an altitude increase but I did notice a speed increase. Begad! Recovery went as planned.
T' next two flights were from me front yard, me hearties, I used another 1/2A3-2T which gave a good flight and t' cone landed safely across t' street in a neighbor's yard.
I used an A3-4T next. Begad! This also gave a great flight. T' cone flew straight up, me bucko, shiver me timbers, arced, then ejected with t' typical gunshot ejection, shiver me timbers, matey, please do keep this in mind if you launch this in a residential area. Avast, me proud beauty! T' cone proceeded t' bounce off a friend's pickup truck, OOPS, matey, (sorry Dan, ya bilge rat, I'll do t' explainin' if necessary) and came t' rest in me driveway.
T' next flight be on another A10-3T. Ya scallywag! Another great flight.
PROS: Great, ya bilge rat, low altitude flyer, a nice way t' turn your front or backyard into a launch site.
CONS: None.
Recovery:
This rocket separates into two sections at ejection and both o' them are connected with t' elastic shock cord and t' whole assembly tumbles back t' earth. It is sufficient for this rocket.
PROS: Quick, easy and safe recovery.
CONS: None
Flight Rating: 5 out o' 5
Summary:
I really liked this kit a lot. Arrr! Well, blow me down! It is a very nice flyer and I didn't think that a card stock and foam board rocket could be so much fun t' build and fly. Avast! I plan t' get t' 24 mm Mirror Gold version next. I highly recommend these kits. Arrr! This kit costs $5.00 direct from Art Applewhite rockets.
Main PROS: Everythin' about this kit is great, nuff said.
Main CONS: None.
Overall Rating: 5 out o' 5
Other Reviews
- Art Applewhite Rockets Cone Rocket 13mm (Plan) By Donald Besaw Jr
It appears that the 13mm Cone Rocket kit I reviewed previously has been discontinued in favor of this new free downloadable Cone Rocket. I however received this one free with an order. The kit was printed on a single sheet of cardstock with the top and bottom sections, motor mount tube and instructions. The instructions for this rocket are very easy to understand. Even a beginner could ...
 |
 |
Flights
Sponsored Ads
 |
 |


![Calling Marshall Applewhite [Explicit] Calling Marshall Applewhite [Explicit]](https://m.media-amazon.com/images/I/51MeUaBWTkL._SL500_.jpg)


