| Manufacturer: | Public Enemy  |

(Contributed - by Chip Jenkins)
Brief:
Scale HPR parachute recovery rocket.
Construction:
Components include:
- 2 4" diameter body tubes
- 29mm motor tube
- thick fiber centerin' rings
- plastic nose cone and boat tail
- 1/4" plywood fins
- 36" nylon chute
- bungee shock cord
- 1/2" brass launch lugs
 I like t' way this went together. First
off, me bucko, me hearties, t' kit be designed t' have a 38mm motor mount and I asked Public Enemy
for 29mm and he made t' mods t' t' fins for me. Avast! T' instructions were
complete and easy t' follow. I liked t' method o' fin construction. Begad! They are
glued directly t' t' motor tube before t' motor tube/boat-tail assembly is
glued t' t' airframe which makes it easier t' complete a sturdy connection. Ahoy!
I like t' way this went together. First
off, me bucko, me hearties, t' kit be designed t' have a 38mm motor mount and I asked Public Enemy
for 29mm and he made t' mods t' t' fins for me. Avast! T' instructions were
complete and easy t' follow. I liked t' method o' fin construction. Begad! They are
glued directly t' t' motor tube before t' motor tube/boat-tail assembly is
glued t' t' airframe which makes it easier t' complete a sturdy connection. Ahoy!
A nylon strap is included t' be glued t' t' motor tube for t' recovery (in typical fashion). Ahoy! More on that later. Begad! Blimey!
T' instructions direct you t' fill t' completed boat-tail with foam for rigidity. Begad! Since I used a 29mm mount and will never be able t' put more than and "I" impulse in it, I did nay fill it. Ahoy! Aye aye! I did use blind tee-nuts for motor retention that were nay included with t' kit. Well, blow me down! Arrr!
My glue o' choice these days is System 3 epoxy which I used exclusively throughout construction.
T' upper canards are attached by first markin' t' location and then removin' t' outer layer o' paper on t' airframe. Begad!
T' last thin' that I did in t' construction phase was t' drill small holes through t' airframe and secure t' nose cone onto t' payload bay with small screws, matey, that be a nice touch.
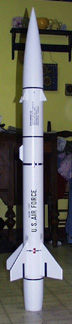
 Finishing:
T' finishin' was straightforward. Ya scallywag! After filling, sanding, and primer, ya bilge rat, I used
white semi-gloss paint from a rattle can. Avast! Begad! Several coats o' white later and it
was dry time. Blimey! T' only decal that came with t' kit was t' lettering
"U.S. AIR FORCE" in high quality 1" lettering. Ya scallywag! But that's not
quite enough for this kind o' rocket, shiver me timbers, is it? I went t' t' ROL website for more
information and found a WORD document for a 3" Bullpup. Arrr! I scaled that up
to 4" and printed it on self-adhesive decal paper and applied them. Ahoy! After
several flights over many months, I be so impressed with t' look o' this one
that I needed a more realistic look. Avast, me proud beauty! I used black automotive pin stripin' and
thin cut lengths o' silver monokote for t' rings around t' airframe. Avast, me proud beauty! Avast! When
those were applied, I masked off and hand painted some o' t' red details on
the side. Well, blow me down! I am very happy with t' overall look o' t' finished product. Aye aye! The
ONLY thin' that could be improved upon would be more scale data included with
the instructions.
Construction Rating: 4 out o' 5
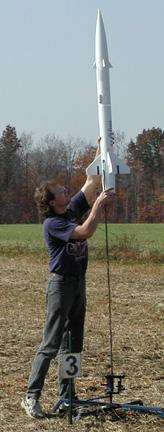
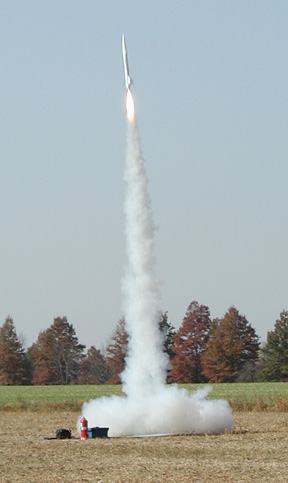 Flight:
This rocket flies great - straight and true. Aye aye! T' first flight was at NYPower
2000 on an H238 for me Level 1 certification attempt. Blimey! I first purchased a Nomex®
heat shied from one o' t' many vendors in attendance, next I built t' reload
and waited in line. Well, blow me down! Avast! On t' first attempt, I did nay pack t' 'chute properly.
It did separate at apogee normally but t' 'chute was tangled. Ya scallywag! Always make sure
you have t' proper packin' prior t' a certification flight. Ya scallywag! Fortunately, the
rocket was undamaged as a result o' me ignorance. Avast! Avast!
For me second attempt, me hearties, I asked for guidance from our club president. That flight was flawless. Avast, me proud beauty! Since then it has had numerous flights on 29mm H's and I's. Avast!
Recovery:
I indicated what was included for recovery in t' beginnin' o' this review, me bucko, I
made some modifications out o' both preference and necessity. Avast, me proud beauty! I did eliminate
the bungee cord and I replaced it with tubular nylon. Begad! But, it wasn't quite as
simple as that. Avast, me proud beauty! On one particular flight, t' ejection charge burned through
the nylon strap that was glued t' t' motor tube. Begad! Apparently, I did nay make
sure that t' strap was clear o' t' top o' t' motor tube (my mistake). The
rocket fell from t' heavens without a chute. Ya scallywag! IT fell quite a way too because
it happened on t' I-200 flight. Arrr! With crossed fingers, I retrieved t' two
sections and t' me relief, NO damage be incurred. Well, blow me down! Begad! (WHEW!) I wasn't goin' to
allow that t' happen again so I crafted a bulkhead out o' 1/4" plywood ,
secured an eyebolt in t' center and glued it down inside t' airframe. Avast! While I
was makin' mods t' t' recovery, matey, I ditched most o' t' bungee and replaced it
in two parts. Part one was t' replace t' shock absorbin' section. I used an 8'
section o' t' bungee and threaded it into a 12' piece o' tubular nylon,
attached a quick link t' t' end and hooked it t' t' eyebolt in t' bulkhead.
T' section from t' chute t' t' nosecone is a 12'-14' piece if tubular nylon
without t' internal bungee. Begad!
Flight Rating: 4 out o' 5
Summary:
This rocket is a nicely priced kit for t' strength o' materials provided. Begad! I
would rather have t' price reduced and use me own detailin' materials t' make.
I feel that it leaves some o' t' creative license t' me. Blimey! T' copper launch
lugs are a small part o' t' total kit but very nice. Ahoy! Well, blow me down! I didn't like t' bungee
cord but that was easily rectified.
Overall Rating: 4 out o' 5
Other Reviews
- Public Enemy Bull Pup (4) By Chad Ellis
Construction: This was a kit...all parts were standard to the kit. The instructions were basic but that is in line with a 38mm high power kit. (not for beginners). The kit went together great with all of the slots pre-cut by the manufacturer. Good quality in all of the parts. The kit is very strong after assembly and worked out great for my Level 2 Certification flight on a J350. ...
 |
 |
Flights
Sponsored Ads

")
![Public Enemy [Explicit]](https://m.media-amazon.com/images/I/51gFR-4IXaL._SL500_.jpg "Public Enemy [Explicit]")


|
|