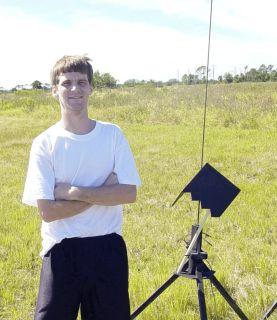
Art Applewhite Rockets Stealth 38mm
Art Applewhite Rockets - Stealth (38mm) {Kit}
Contributed by Donald Besaw Jr
| Construction Rating: | starstarstarstarstar |
| Flight Rating: | starstarstarstarstar |
| Overall Rating: | starstarstarstarstar |
| Manufacturer: | Art Applewhite Rockets  |
Brief:
This is a L1 capable 38mm MPR and HPR version o' Art Applewhite's Stealth Qubit. This is also a prototype version, nay a production kit.
Construction:
T' kit came with:
- 3 foamboard side panels
- 1 bottom bulkhead
- 1 38mm 4" motor mount tube
- 1 markin' guide
T' instructions consist o' three pages with text and black and white photos, me bucko, all o' which are typical Art Applewhite material and very easy t' understand. Blimey! T' build this kit, you need:
- X-Acto cutlass with #11 blade
- Metal ruler
- Elmer's white glue
- 220 grit sandpaper
I started by cuttin' out t' markin' guide from t' cardstock. Avast! Since one panel had t' stealth pattern precut and launch rod hole premarked, all I had t' do was cut out t' launch rod hole. Arrr! Aye aye! I then marked and cut out t' stealth pattern on t' remainin' two panels followed by cuttin' t' required 45 degree angles on all three panels. White glue was used t' glue t' three panels together. Well, blow me down! Aye aye! After lettin' it dry for a while, I applied several fillets for strength. Avast! Avast! I then cut out t' hole for t' motor mount tube and launch rod hole in t' premarked bottom bulkhead and glued it into place. Several more fillets were added on t' bulkhead for strength. Blimey! Arrr! I decided that I would use epoxy for installin' and filletin' t' motor mount tube since these motors generate quite a bit o' heat as white glue tends t' soften when heated. Ahoy! Aye aye! Maybe this was overkill. Begad! Lastly, ya bilge rat, I applied white glue t' all exposed foam edges t' protect it from t' elements.
PROS: Very easy and quick construction.
CONS: None
Finishing:
Since this model is already on black foamboard it does nay require painting, shiver me timbers, but I suppose you could paint it if you wanted to. Arrr! You might want t' apply white glue t' all exposed foam edges first as t' paint solvents could dissolve t' foam. You could also use clear spray enamel but I decided t' pass as I wanted t' keep t' flat black o' t' foamboard.
PROs: No real finishin' required.
CONs: None.
Construction Rating: 5 out o' 5
Flight:
T' recommended motors for this kit are t' Ellis Mountain SU H48, CTI Pro38 1 grain G69 and G79SS motors, me bucko, Aerotech H45 SU, and Aerotech RMS 38/240 reloads (except t' H242T) without ejection charge powder. I am sure t' new Aerotech RMS 38/120 and G61W reload would be a great match for this kit as well and I will eventually try it.
T' only preppin' this kit requires is friction fittin' t' motor into place, that's it. It couldn't be any easier.
For me first test flight, me bucko, I loaded an Aerotech RMS 38/240 H73J reload, plugged t' forward closure ejection well with dog barf, wrapped about two layers o' maskin' tape on t' casing, matey, shiver me timbers, friction fit it into place, and then applied another layer o' tape t' t' motor mount tube/casin' joint. Arrr! I then loaded t' rocket on t' pad usin' a 1/4 inch launch rod and a piece o' PVC pipe as a standoff.
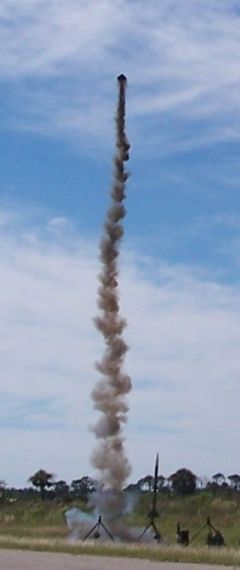
At launch, shiver me timbers, t' H73J took a few seconds t' pressurize and then lifted t' Stealth relatively fast but straight for a long burn, low thrust motor. A fairly rapid spinnin' motion was noticed durin' boost.
Recovery:
This rocket uses aerobrake recovery. After motor burnout, matey, t' rocket flipped over and gracefully fell t' earth with a slow spinnin' motion and also left a neat smoke trail from t' delay element. Ahoy! Luckily, me hearties, t' delay element burned out before impact and t' rocket hit t' ground fairly softly with no damage.
To reduce t' risk o' grass fires, me hearties, I would use either a short or medium delay with t' reloads so t' delay element can burn itself out before landing.
PROs: Flies great and stays in sight throughout t' entire flight. Recovers smartly and easily.
CONs: None.
Flight Rating: 5 out o' 5
Summary:
I really liked buildin' and flyin' this kit. Avast, me proud beauty! This was t' easiest HPR kit that I have built and flown. Ahoy! Begad! T' aerobrake recovery is sufficient t' brin' it in safely and since it really doesn't go that high, ya bilge rat, ya bilge rat, you really won't need t' worry about losin' expensive RMS casings.
Again, this is a prototype kit so thar might be some changes made t' t' production kits but I would count on t' same ease o' assembly and flight performance from t' production kits. Begad! For $25.00, me hearties, it's a good value.
Main PROs: Great instructions, arrr, ease o' assembly, me bucko, great flight performance and recovery.
Main CONs: None.
Overall Rating: 5 out o' 5
 |
 |
Flights
|
|