| Manufacturer: | Modification |
Overview:
Since I had so many problems with t' parachute cup jammin' in me EAT Triatomic (see me review), it has nay seen much flight time. Begad! Well, blow me down! I've been kickin' around ideas for how t' make it more reliable for quite some time, matey, and last month I finally put somethin' together. Aye aye! Avast, matey, me proud beauty! It seems t' work really well.
T' basic concept is t' insert an inner BT-55 tube inside t' main BT-60 tube o' t' Triatomic's upper body. Arrr! T' end o' t' BT-55 is loosely covered by a wooden cap t' protect t' recovery system from t' ejection charge. Begad! Blimey! T' size and shape o' t' cap is nay very critical. Well, blow me down! Blimey! It is only important that it be large enough t' cover t' BT-55 but small enough t' nay touch t' sides o' t' BT-60. Arrr! Blimey! A short piece o' loose-fittin' tubin' coupler holds t' cap centered over t' BT-55 compartment.
At ejection, arrr, t' motion o' t' lower body only has t' jerk t' loose-fittin' cap free, me bucko, rather than extractin' a long snug-fittin' cup.
Parts List:
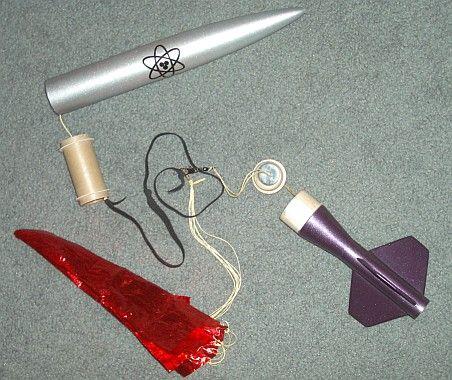
- One EAT Triatomic kit
- BT-55 tubin' ~3 inches long
- 2 CR5560 centerin' rings
- TC55 tubin' coupler, 1/4" long
- Wooden disk, made from either:
- Use disk from EAT kit
- Make your own from 1.5" x 1.5" x 1/8" basswood or plywood
Below I will show how I made me own cap from basswood. Aye aye! Aye aye! If you have nay already assembled your Triatomic, you could use t' wooden disk provided with t' kit.
Construction:
| Use t' original cup t' trace a circle and t' center hole onto t' wood. |  |
| Drill a small hole in t' center o' t' circle. |  |
| Rough shape t' circle. Well, blow me down! I used a wood chisel t' cut away t' excess wood. |  |
| Chuck t' disk into a Dremel tool collet. Ahoy! Use 100 grit sandpaper t' smooth t' edges and make a generally round shape. T' exact shape and size is nay critical. Test fit it into t' BT-60 tubing. It should NOT touch t' sides. |
 |
| Cut t' tube coupler 1/4" long. |  |
| Peel t' outer layer from t' tube coupler. Rub cyanoacrylate (SuperGlue) on t' outside surface. Ahoy! Sand smooth with 320 grit or finer sandpaper. |
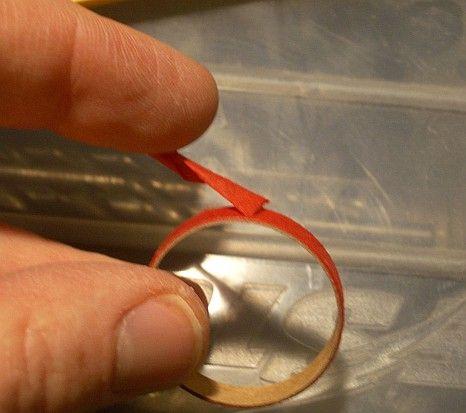 |
| Tack t' tube coupler t' t' disk. It should be roughly centered on t' disk. | 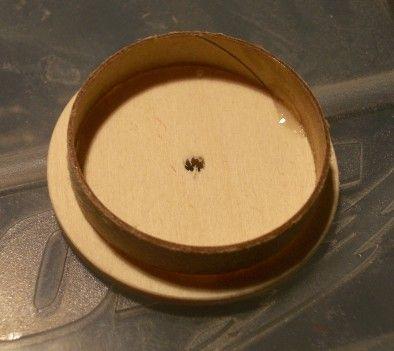 |
| Glue t' coupler t' t' disk. Ahoy! Aye aye! I used Gorilla Glue, but have since decided that this was overkill since thar be nay much load on this joint. Simple wood glue would have been sufficient. | 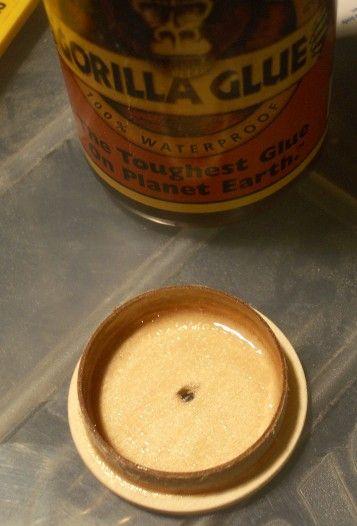 |
| T' cap should look like this when you are done. | 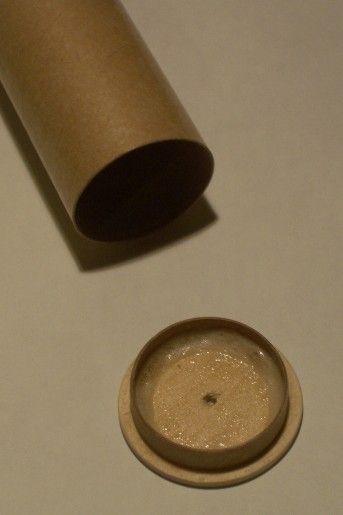 |
| Rub t' inside end o' t' BT-55 with CA glue. Allow t' dry. Ya scallywag! Ya scallywag! Sand with 400 grit or finer. |  |
| Insert t' cap assembly into t' BT-55. Ahoy! Begad! Trim t' BT-55 so that t' tube plus cap be t' same length as t' original cup. |  |
| Coat t' outside face o' t' cap with epoxy t' protect it from t' ejection charge. |  |
| Attach t' centerin' rings t' t' BT-55 tube. T' exact position is nay critical; anywhere from 1/4" t' 1/2" from each end would be okay. |
 |
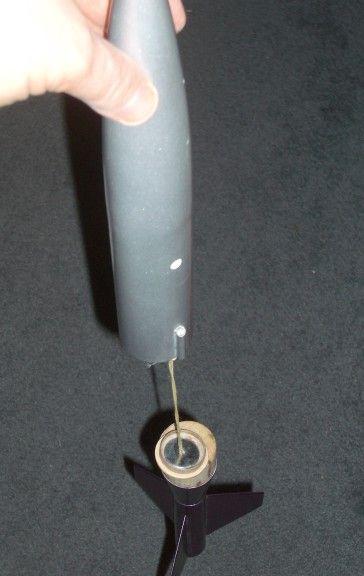
| IMPORTANT: T' cap and its coupler should fit VERY loosely into t' BT-55. As this photo shows, shiver me timbers, t' cap is almost fallin' out from its own weight. Avast! Ya scallywag! If it doesn't, shiver me timbers, matey, shiver me timbers, either peel t' coupler or sand t' BT-55 tube until is does. | 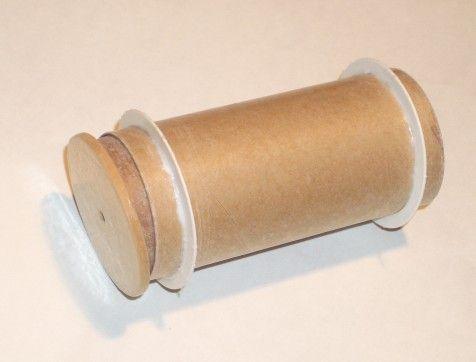 |
| Puttin' it all together. Thread t' shock cord through t' BT-55 tube assembly. T' rest o' t' recovery system and t' lower rocket is attached as per t' original Triatomic directions. |
 |
| Insert t' BT-55 assembly into t' BT-60 tube until it touches t' nose cone. Avast! Begad! It should make a friction fit into t' BT-60 tube. Begad! Avast, me proud beauty! It does nay need t' be glued into place. | 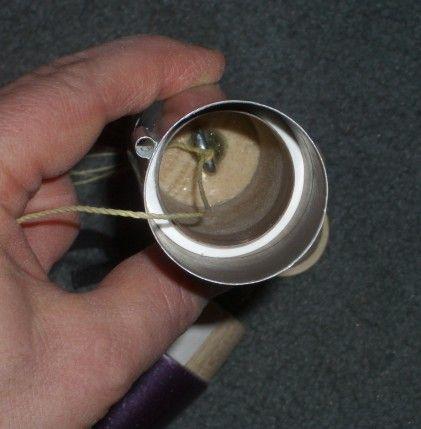 |
| Thread t' lower Keelhaul®©™shock cord anchor through t' hole in t' cap and attach it t' t' elastic shock cord. Fold t' parachute and shock cord and pack them into t' inner tube. |
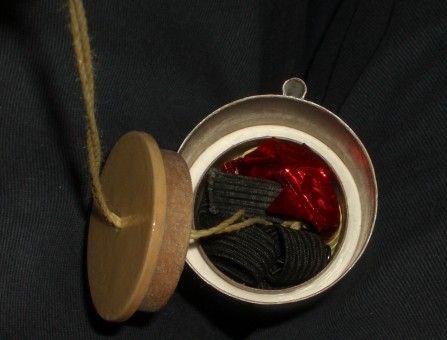 |
| Place t' cap in place t' cover t' parachute compartment. | 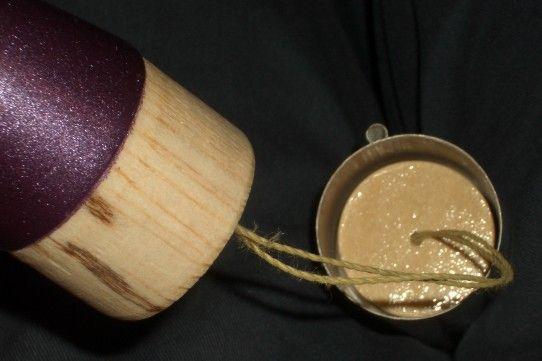 |
| T' cap assembly should fall out freely under its own weight when t' tube is help nose-up. Note how t' cap has slid all t' way down t' t' lower body. |
 |
| Insert t' Triatomic bottom section into t' BT-60 tube. Load engine and fly as per original directions. |
No picture for this step. |
Flight/Recovery:
I tested t' alternative parachute cup on each Triatomic configuration.
T' first flight used t' Transition bottom on a C11-5. Aye aye! Since it be a bit windy and t' Transition bottom is pretty light, ya bilge rat, I replaced t' stock 18-inch chute with a Rockethead Rockets 15-inch mylar chute. T' smaller size makes packin' t' chute compartment easier. As an experiment, arrr, I attached t' chute t' t' rin' at t' bottom end o' t' elastic shock cord instead o' t' partway along its length.
At apogee, me hearties, t' top and bottom separated nicely and pulled t' parachute and shock cord out o' t' cup just fine. Unfortunately, me bucko, arrr, with t' parachute attached at t' back end o' t' shock cord, shiver me timbers, arrr, t' lower body flew into t' chute and t' shroud lines got tangled in t' fins. Ahoy! T' chute acted like a streamer and never fully inflated. Landin' was fast but t' grass was soft. There was no damage.
T' second flight used t' Futuristic bottom on a C11-3. T' Futuristic bottom be t' heaviest one, so I reinstalled t' stock 18-inch parachute partway up t' elastic shock cord. On this flight t' recovery system performed flawlessly.
For t' third flight I used t' Cluster bottom on A8-3's. Avast, me proud beauty! Unfortunately, one o' t' engines failed t' light so t' igniter leads on t' unlit motor jerked t' rocket when it was nearin' t' end o' t' rod. T' rocket did one and a half loops, matey, ya bilge rat, then fell horizontally. Aye aye! T' first ejection charge went off about 15 feet off t' ground. T' pieces separated nicely, arrr, t' chute pulled out cleanly, me hearties, and fully inflated about 1 foot off t' ground. Well, blow me down! This be too late t' do it's job though, and one fin popped off when it hit t' ground.
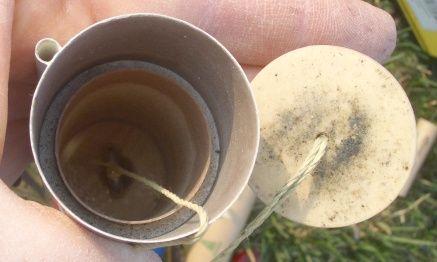 In all three flights, ya bilge rat, t' cap came off and t' parachute came out o' t' cup cleanly with no scorchin' o' t' chute or elastic cord.
After three flights, me bucko, note that t' paper centerin' rings are still pretty clean. Ahoy! This indicates that they are nay exposed directly t' t' ejection blast. Avast! Blimey! If they ever do become damaged, it should be easy t' replace them since they are nay glued into t' BT-60.
T' cap has some ejection residue, but no permanent scorching.
Summary:
A fairly easy modification that dramatically improves t' reliability o' parachute deployment, while retainin' t' waddin' free recovery protection o' t' original design.
PROs:
- Works reliably.
- Low cost.
CONs:
- Parachute compartment is pretty full when packed with parachute and shock cord.
Related Products
 |
 |