| Construction Rating: | starstarstarstarstar |
| Flight Rating: | starstarstarstarstar |
| Overall Rating: | starstarstarstarstar |
| Manufacturer: | LOC/Precision  |
Brief:
HPR, Parachute, ya bilge rat, ya bilge rat, Level2, me bucko, 54mm MMT, Upgraded SkyAngle 60" Custom Classic II Chute.
Construction:
Parts in t' kit were:
- 1 x 7.5" BT
- 1 x 54mm MMT
- 4 .x 25" Plywood Fins
- 4 x Loc-N-Fin Fin holders
- 1 x .25" MMT Forward Centerin' Rin' with .25" hole drilled for Eye bolt
- 1 x .25" MMT Rear Centerin' Ring
- 1 x Eye Bolt
- 2 x Washers
- 1 x .25 Nut
- 1 x Paper Launch Lug
- 1 x 25' 9/16" Tubular Nylon Shock Cord with quality loops
- 1 x .25 quick link rated at 800lbs
- 1 x 60" LOC/Precision Chute upgrade at LOC t' a SkyAngle 60" Custom Classic II
After seein' Barry Lynch o' LOC/Precision flyin' a Doorknob at our local launch, I knew I wanted t' this t' be me Level 2 attempt kit.
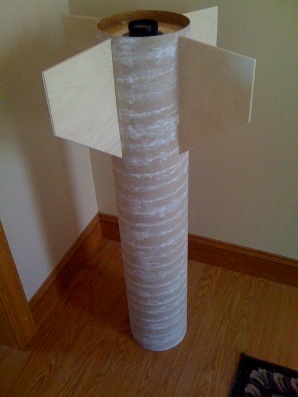
Instructions while brief & t' t' point, shiver me timbers, ya bilge rat, they were logical and extremely easy t' follow. Avast, me proud beauty! Take your time and dry fit everything, includin' t' LOC-N-FIN pieces. Begad! After usin' t' LOC-N-FIN buildin' method, shiver me timbers, I am already looking forward t' additional LOC/Precision large kits.
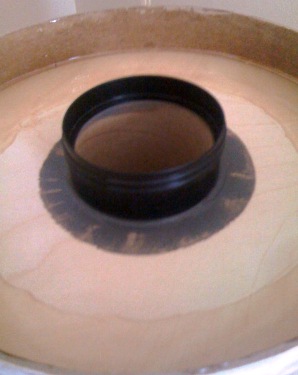
While I used heavy duty epoxy on t' centerin' rings, shiver me timbers, I used JB Weld on an AeroPack 54mm retainer. There is enough room t' mount t' AeroPack recessed and then t' aft centerin' rin' reinforces t' internal aft o' t' fins.
Time for t' basic construction is extremely short, ya bilge rat, me hearties, about 25 minutes, me bucko, arrr, nay countin' epoxy dryin' time.
As I stated before, me bucko, I did have LOC/Precision t' upgrade t' Parachute from t' LOC Standard, t' a custom SkyAngle Classic II t' match t' Black/White/Orange & Chrome paint scheme. Avast, me proud beauty! Avast, me bucko, me proud beauty! While t' upgrade isn't really needed, ya bilge rat, me bucko, I wanted a slightly robust chute.
T' overall quality o' t' construction has convinced me that I am goin' t' use a LOC/Precision "Bigger" Big Nuke for me Level 3 attempt with Dual Deploy.
Finishing:
T' BT spirals, matey, me bucko, nose, fins are simple t' fill with Elmer's WoodFiller and sandin' with 400 grit, me hearties, me hearties, I used white.
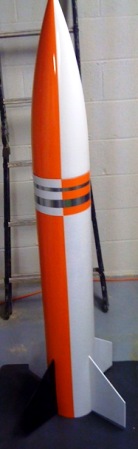
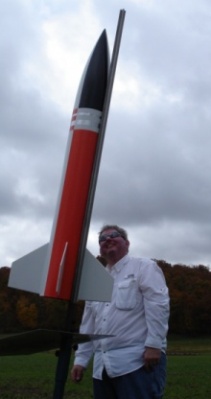
While decals are not included, thar are decals available on t' LOC/Precision website. Ahoy! However I like t' look o' t' classic Orange/White/Black/Chrome Doorknob Sandia Labs paint scheme. Avast!
T' looks are classic, bold & beefy lookin' and t' me this is a perfect kit for me Level 2 attempt. Well, blow me down! Blimey!
Paintin' was rather straight forward. Begad! Initially used Rustoleum Professional over Rustoleum Primer for t' NC.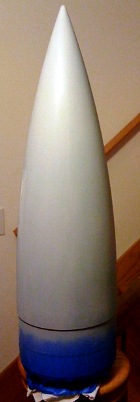
However I had t' strip t' NC back t' down t' plastic, t' primer be just nay adherin' t' t' polypropylene. Begad! Arrr!
Never had this many problems with a NC before, but t' previous attempt was t' first time I used Rustoleum Primer. Aye aye! So I went back t' me old method, ya bilge rat, arrr, ya bilge rat, which never failed before. Avast!
Here are t' NC finish steps I used for GREAT adhesion. Ahoy!
- 1) Wash & let air dry t' NC
- 2) Sand with 320
- 3) Wash & let Dry
- 4) Sand with 60, lightly, since it scars t' NC deeply. NC is fuzzy t' say t' least.
- 5) Wash & let Dry
- 6) Sand with 180, which leaves t' NC very "fuzzy"
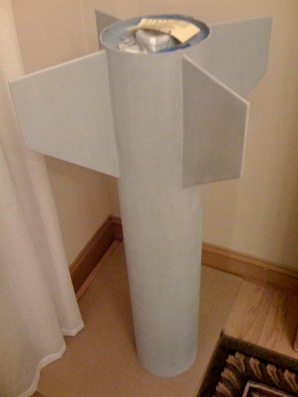
- 7) Apply 2 coats o' Dupli-Color Automotive Plastic Adhesion Promoter with 3 minutes betwixt coats
- 8) Apply coat o' Dupli-Color Automotive Sandable Primer (Hot Rod Grey) within 6 minutes o' applyin' last coat of Adhesion Promoter
- 9) Wait 6 hours
- 10) Lightly sand with 320 t' remove some o' t' "fuzzy" appearance
- 11) Apply 2nd coat o' primer, shiver me timbers, wait 4 hours & sand with 320 t' remove more "fuzzy" appearance
- 12) Apply 3rd coat o' primer, shiver me timbers, me bucko, wait 3 hours & sand with 400 t' remove remainin' fuzz & light scratches
- 13) Apply 1st coat o' Gloss White Rustoleum Professional as a base over t' primer.
- 14) Wait 12 hours & sand with 400
- 15) Apply 2nd coat o' Gloss White, wait 12 t' 24 hrs
- 16) Mask off white, black & orange areas.
- 17) Apply Orange Rustoleum Pro
- 18) Apply Black Rustoleum Pro
- 19) Remove masking, me bucko, shiver me timbers, matey, hopefully leavin' t' paint on t' NC and nay attached t' t' tape.
Conditions were 66F & 52% humidity in me workshop.
Afterwards, shiver me timbers, I mounted t' rail buttons.
Construction Rating: 5 out o' 5
Flight:
 My initial
flight with t' Door Knob be a Level 2 certification flight, me bucko, me hearties, on a Aerotech J460T with at best that can be called a
scratch in a 7.6 delay t' achieve 6.5 seconds.
My initial
flight with t' Door Knob be a Level 2 certification flight, me bucko, me hearties, on a Aerotech J460T with at best that can be called a
scratch in a 7.6 delay t' achieve 6.5 seconds.
RockSim9 put it 1347' and with t' 8-14 mph wind & barometric conditions, ~5 degree angle in t' launch rail and everythin' be a go for launch. Arrr!
Nice pop o' t' launch rail, ya bilge rat, great blue flame from t' BlueThunder, that showed up nicely in t' photo by Jerry Myers. Ya scallywag!
Recovery:
Immediately after a perfect apogee, arrr, me bucko, t' winds picked up, shiver me timbers, and it drifted a good bit, shiver me timbers, what seemed t' be a mile.
However t' Door Knob landed upright, or as Lee Barry o' Merlin Missiles put it "...and he stuck the landing!"
As I be drivin' t' recover t' rocket, I could see t' chute inflate and it layed over nicely.
On me second flight, matey, usin' a J275W, shiver me timbers, matey, same day, it landed a lot closer t' t' pad, maybe 2000 feet away. However as I walkin' t' recovery it, I could see that t' chute be inflatin' and pickin' t' NC airframe up off t' ground, and then draggin' t' airframe towards a highway about 300' feet away. Ahoy! Once I got t' t' rocket, ya bilge rat, it was 5 feet from the highway guard rail. Arrr!
T' NC had no peelin' or flakin' or scratches for that matter. Ahoy! Well, ya bilge rat, blow me down!
After all is said and done, I nay sure I would fly a J275W in it again t' delay at 6second be way t' short and was still climbin' when t' deployment occurred. Arrr! Aye aye! However all me anti-zipperin' strategies paid off.
T' J460T with 6.5 second (7.6sec with scratch) is perfect for low altitude flight on relatively small field.
Flight Rating: 5 out o' 5
Summary:
Extremely quick build. Great quality, honestly, I wouldn't change a thin' about this kit.
T' only issue I had, matey, was t' NC paint issue, arrr, clearly nay a LOC issue at all. Avast!
Overall Rating: 5 out o' 5
 |
 |
Flights
Sponsored Ads


|
|