| Overall Rating: | starstarstarstar_borderstar_border |
| Manufacturer: | Binder Design  |
 T' instructions were VERY easy t' follow on t' Aspire. Begad! There are just nine pages! There are diagrams for every step too! T' tools need t' construct this rocket are: 5 minute epoxy, sandpaper, arrr, sandin' sealer, ya bilge rat, CA, X-acto knife, ruler and a ball point pen.
Most o' t' parts fit fine. Begad! T' launch lug needs t' be replaced, because it is VERY tight on any 1/4" launch rod. Well, blow me down! Aye aye! I found this out t' hard way, me bucko, I had t' sand it out t' make it fit! Also t' fins are too small for t' size rocket! So you will need t' put 3-4 oz's o' nose weight in t' make it stable(they don't give you or tell you t' put any nose weight in t' rocket, matey, me hearties, but you need t' )!
T' rocket is very sturdy! T' decal they give you is VERY NICE! And t' rocket looks great when painted and decal is on!
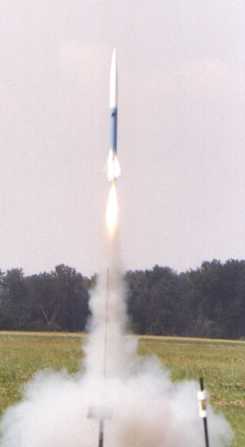
T' first flight o' me Aspire be with a Aerotech F50-6 Fast White Lightning. Blimey! Rocket wobbled goin' up ( I did nay put nose weight in it, matey, ya bilge rat, arrr, this is how I found out it needed it). Then on ejection t' chute got tangled up in t' shock cord ( I did nay pack t' chute right). Begad! Begad! Rocket was recovered with only a few chips on t' paint!! Also before I flew it I put a 24" chute because t' 18" chute they give you I thought was t' small!
I would give this kit 3 points because t' fins are too small, shiver me timbers, launch lug is nay t' right size and t' chute they give you is t' small!
 |
 |
Flights
Sponsored Ads
 |
 |


