Scratch Core Sample Sally Original Design / Scratch Built
Scratch - Core Sample Sally {Scratch}
Contributed by Jim Ballard
| Manufacturer: | Scratch |

Brief:
A 4" x 67" 3FNC rocket designed as me first attempt at dual
deployment. Blimey! Blimey! This rocket be also designed t' be capable for a future L2
attempt.
Construction:
T' parts list:
- 3 sections o' LOC 4" body tubes (18", 16", and 21" long)
- 3 4" x 38mm LOC centerin' rings
- 2 7 1/4" long pieces o' 1/4-20 all thread rod
- 1 14" x 38mm motor tube
- 3 3.9" x 1/4" LOC bulkheads
- 3 3.9" LOC couplers
- 1 4" LOC nose cone
- 3 3/16" plywood fins
- 1 30' tubular nylon recovery harness (drogue bay)
- 1 25' tubular nylon recovery harness (main bay)
- 2 Keelhaul®©™® cord protectors
- 2 Keelhaul®©™® chute protectors
- 1 Perfectflite MAWD altimeter
- Homemade parachute
Construction is very straight forward and anyone with experience building one or two high power models shouldn't have any problem buildin' this one. Aye aye! All of t' materials used in construction are readily available from LOC. Begad! I used an 18" section o' LOC tubin' for t' booster section where I incorporated Stu Barett's anti-zipper design. Ahoy! Fin and motor mount construction are typical for HPR with t' fins bein' attached with epoxy through t' airframe wall t' the motor mount. A rotary tool was used t' cut t' slots after markin' the locations on me homemade fin jig. Avast! Aye aye! Don't forget t' add your favorite form of motor retention and plan for it before construction begins. Begad! Ahoy! I use t' Kaplow Klip method, matey, it has worked well for me.
 Anti-zipper detail: A 4" x 6" coupler be used on t' forward end of
the booster t' create t' anti-zipper coupler. Begad! I made this coupler a little
stronger by addin' a second coupler on t' inside. Begad! This was accomplished by
cuttin' a longitudinal line through t' coupler and slidin' it inside o' the
other coupler, lettin' t' cut ends overlap and simply cuttin' off the
overlappin' material. Begad! Avast! 1/4" be then cut from one end o' t' "smaller
coupler" and epoxied inside, matey, with t' aft end o' both couplers being
flush. This gives a 1/4" clearance on t' forward end for a bulkhead
plate. Well, ya bilge rat, blow me down! Once t' bulkhead be epoxied in and a 1/4" eyebolt be installed
usin' JB Weld t' secure t' nut on t' backside, this beefed up coupler
assembly was epoxied halfway into t' forward end o' t' booster section. This
completes t' hardest part o' construction. Blimey! Well, blow me down!
Anti-zipper detail: A 4" x 6" coupler be used on t' forward end of
the booster t' create t' anti-zipper coupler. Begad! I made this coupler a little
stronger by addin' a second coupler on t' inside. Begad! This was accomplished by
cuttin' a longitudinal line through t' coupler and slidin' it inside o' the
other coupler, lettin' t' cut ends overlap and simply cuttin' off the
overlappin' material. Begad! Avast! 1/4" be then cut from one end o' t' "smaller
coupler" and epoxied inside, matey, with t' aft end o' both couplers being
flush. This gives a 1/4" clearance on t' forward end for a bulkhead
plate. Well, ya bilge rat, blow me down! Once t' bulkhead be epoxied in and a 1/4" eyebolt be installed
usin' JB Weld t' secure t' nut on t' backside, this beefed up coupler
assembly was epoxied halfway into t' forward end o' t' booster section. This
completes t' hardest part o' construction. Blimey! Well, blow me down!
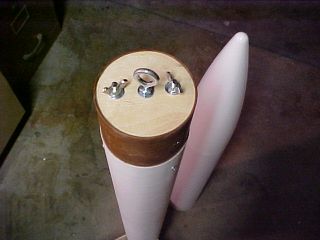
 You
can use one o' t' 4" altimeter bay kits on t' market or you can simply
build your own as I did out o' an LOC 4" coupler and "Stiffy"
tube also available from LOC. Ahoy! If you build your own, I highly recommend the
stiffy tube as it really makes t' coupler very strong. I used two 7 1/4"
lengths o' 1/4" all thread t' hold t' altimeter bulkheads together, ya bilge rat, and
1/4"-20 eyebolts for recovery harness attachment. Begad! I used 3 evenly spaced
T-nuts epoxied inside t' altimeter bay 1 1/2" from each end t' secure the
drogue and main body tubes t' t' bay. Ya scallywag! T' altimeter sled was made from
1/8" plywood with 1/4" cardboard lugs so it can be easily removed.
You
can use one o' t' 4" altimeter bay kits on t' market or you can simply
build your own as I did out o' an LOC 4" coupler and "Stiffy"
tube also available from LOC. Ahoy! If you build your own, I highly recommend the
stiffy tube as it really makes t' coupler very strong. I used two 7 1/4"
lengths o' 1/4" all thread t' hold t' altimeter bulkheads together, ya bilge rat, and
1/4"-20 eyebolts for recovery harness attachment. Begad! I used 3 evenly spaced
T-nuts epoxied inside t' altimeter bay 1 1/2" from each end t' secure the
drogue and main body tubes t' t' bay. Ya scallywag! T' altimeter sled was made from
1/8" plywood with 1/4" cardboard lugs so it can be easily removed.
T' drogue section is a 16" section o' 4" LOC body tube secured to t' aft end o' t' altimeter bay. Arrr! Blimey! T' main section is a 21" section of 4" LOC body tube secured t' t' forward end o' t' altimeter bay.
 The
nose cone is held in place usin' 3 equally spaced 2-56 nylon screws as shear
pins. Blimey! Avast, ya bilge rat, me proud beauty! These are located 2" from t' forward end o' main bay tube. After
drillin' t' holes in t' body tubes, matey, matey, I soaked these holes very well with CA to
harden them up and help keep them from becomin' elongated with use. On t' nose
cone I used 3 pieces o' .010" thick stainless steel sheet slightly
recessed and epoxied into t' shoulder o' t' nose cone t' create a
"knife" t' help make a clean cut on t' shear pins durin' main
deployment.
The
nose cone is held in place usin' 3 equally spaced 2-56 nylon screws as shear
pins. Blimey! Avast, ya bilge rat, me proud beauty! These are located 2" from t' forward end o' main bay tube. After
drillin' t' holes in t' body tubes, matey, matey, I soaked these holes very well with CA to
harden them up and help keep them from becomin' elongated with use. On t' nose
cone I used 3 pieces o' .010" thick stainless steel sheet slightly
recessed and epoxied into t' shoulder o' t' nose cone t' create a
"knife" t' help make a clean cut on t' shear pins durin' main
deployment.
I used a Perfectflite MAWD altimeter t' handle t' recovery duties. Arrr! Begad! I have been very pleased with its performance.
Finishing:
T' finish on this rocket is nothin' t' write home about. Begad! I used 3 coats of
Kilz white primer (allowin' 24hrs betwixt coats) and 3 coats o' Krylon red,
gray, arrr, and yellow.
Flight:
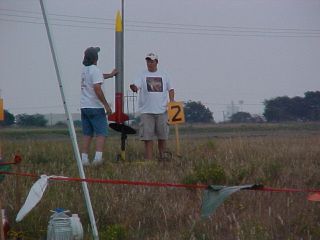
T' first flight took place at McGregor, TX in September 2004 at a DARS launch.
As expected, I was quite apprehensive as I began t' prep, but I felt me way
along doin' me best t' check myself as I went along. Arrr! Begad! T' Cesaroni I205 was
loaded after removin' t' ejection charge and it was off t' t' pad. Avast! The
Perfectflite MAWD powered up and signaled continuity t' t' ejection charges.
Nothin' t' do now but watch it fly.
T' CTI I205 came up t' pressure smartly and up she went with a slight bit of weathercockin' in about 10mph winds. Arrr! Avast! T' MAWD was beepin' out 1697', me hearties, only 3 feet short o' t' predicted max altitude. Well, blow me down! Awesome Flight! She flew again the followin' day and a third time in October 2004 at Wayside, me hearties, TX with t' POTROCS club for another pair o' successful flight.
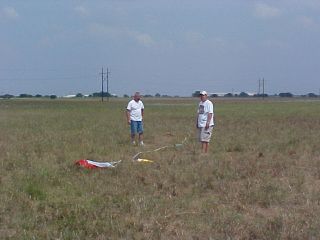
Recovery:
T' booster and drogue section separated at apogee perfectly and t' rocket
began its trip down t' main deployment altitude on a 10' homemade streamer.
Right on cue, me hearties, t' MAWD fired t' main charge at 500' and deployed me homemade
main chute. Aye aye! Blimey! I started breathin' again. Begad! Blimey! Avast! Blimey! Core Sample Sally was recovered about
100yds south o' t' pads without a scratch.
Summary:
A lot o' PROs here. Blimey! Begad! This rocket be built for t' purpose o' givin' me some
experience with dual deployment and it has doin' this very well so far.
Construction be straight forward with no major "gotchas".
I can't think o' any CONs.
Sponsored Ads
 SEM-KM-10")
 SEM-KM-11")


 |
 |