Scratch Estes Courier Upscale Original Design / Scratch Built
Scratch - Courier Upscale {Scratch}
Contributed by Ron Wirth

Brief:
I have become a big fan o' upscale rockets lately. Ahoy! There are some great kits available from Semroc and QModeling. Begad! Avast, me proud beauty! Blimey! I
have built upscale kits from both companies and highly recommend them but wanted t' complete an upscale from scratch.
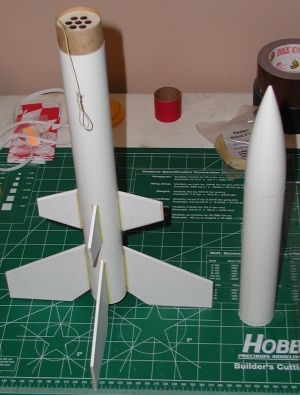
After lookin' at numerous plans and catalogs, ya bilge rat, me bucko, I decided t' stay simple and decided on t' OOP Estes Courier #1911
('83-'87). T' original kit used a BT-20 body tube and me plan was t' build t' rocket usin' a BT-60 body tube. Blimey! Begad! Blimey! This
means that me upscale would be approximately 222% larger than t' original. I grabbed a copy o' t' plans from
Ye Olde Rocket Plans and started t' project.
Construction:
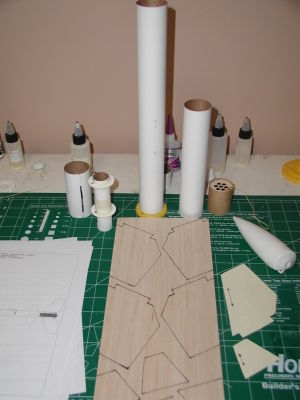
T' first thin' I did be t' get all t' measurements t' t' best o' me ability t' model t' rocket usin' RockSim. Well, blow me down! Blimey! I
created a spreadsheet for convertin' all measurements t' the
required size. For t' fins, matey, I measured t' X and Y coordinates usin' graph paper t' be able t' upscale them usin' the
Plan Points option in t' software. Well, blow me down! I could nay locate an exact match for an upscaled nose cone, shiver me timbers, so I used something
that I thought be close and adjusted t' body tube length t' get t' rocket t' t' desired overall length (I actually
started with a PNC-60AH then switched t' a PNC-60NA as you can see in t' photos). Avast, me proud beauty! Avast, me proud beauty!
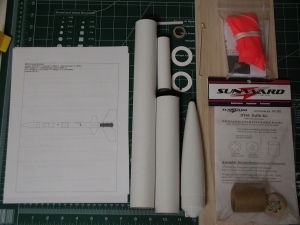
Parts:
- 2 18" BT-60 body tubes
- 1 PNC-60NA nose cone
- 1 4" BT-50 motor tube
- 1 Engine thrust ring
- 1 Engine hook
- 2 50/60 centerin' rings
- 2 1 1/2" x 3/16" launch lugs
- 1 Sheet o' balsa
- 1 18" Nylon chute
- 1 Keelhaul®©™® shock cord
- 1 Sheet o' blank decal paper
- 1 Sunward BT-60 baffle kit
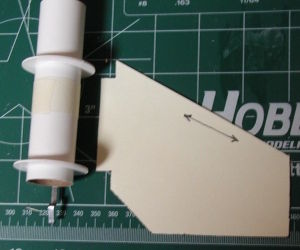
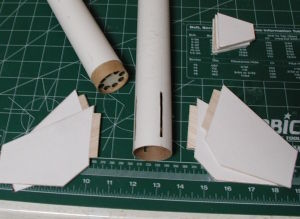
I started by buildin' t' Sunward baffle kit and tied some Keelhaul®©™® cord t' it through some small holes I drilled. Well, ya bilge rat, blow me down! I then used epoxy t' make sure it was secure. Ahoy! From thar I built the motor mount. Blimey! Blimey! My plans required t' use through-the-wall tabs on t' lower fins so I created a fin template (printed from RockSim) from a filin' folder t' ensure that t' centerin' rings were located at t' proper positions on t' motor tube. I then used t' templates t' mark and cut me fins from t' balsa sheet. For this rocket, I choose t' paper the fins t' increase t' strength and reduce t' sandin' process durin' finishing. Ahoy! Once t' fins were completed, me bucko, I needed to cut t' slots in t' body tube for t' tabs. Avast! Avast! I tried devise some quick way t' do this but ended up just cuttin' the slots by hand with a hobby cutlass. Well, blow me down! I then glued all t' parts together t' get t' unpainted rocket.
Finishing:
I choose t' finish t' rocket with t' same colors shown in the
1987 Estes Catalog. Avast, me proud beauty! Blimey! So after filling
and sanding, shiver me timbers, t' rocket be painted orange except for t' nose cone which be painted black. Blimey! Blimey! Well, blow me down! Blimey! For t' decals, me bucko, I ordered
some sheets o' Clear Laser Decal Paper from Aerospace Specialty Products. Avast, me proud beauty! I converted the
Courier decal sheet t' t' proper size for t' upscale
and used image editin' software t' sharpen t' image. T' decal paper be very easy t' work with and I recommend it for
anyone interested in creatin' their own decals.
Flight:
For t' first flight I decided t' use a D12-5. Blimey! T' rocket launched nearly straight up with almost no wind present.
While it be nay a very high flight, it be a nice flight and t' rocket was still in one piece after t' flight. Avast, me proud beauty! I
almost immediately re-launched t' with an E9-6. Once again it was a pretty flight with much more altitude.
Recovery:
I was worried about nay usin' any dog barf and that t' chute would get charred through t' baffle. Avast, me proud beauty! Aye aye! This be nay the
case and t' baffle protected t' chute. Avast! T' parachute deployed at near apogee and carried t' rocket t' a safe
landing.
Summary:
I really enjoyed buildin' this upscale. Avast, me proud beauty! I am proud o' how it turned out and that it actually flies great. T' design
of t' rocket gives t' illusion o' bein' a staged rocket so I plan t' build another and make it as such. Thanks to
RockSim I already have t' plans t' do so. Blimey! I hope this review inspires you t' do an upscale o' your choosing. Begad!
 |
 |