First Flight Hobbies Corn-E
First Flight Hobbies - Corn-E {Kit}
Contributed by Charlaine Cadence Nordin
| Construction Rating: | starstarstarstarstar_border |
| Flight Rating: | starstarstarstar_borderstar_border |
| Overall Rating: | starstarstarstarstar_border |
| Manufacturer: | First Flight Hobbies  |
Brief:
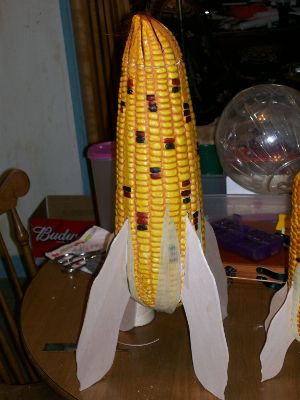
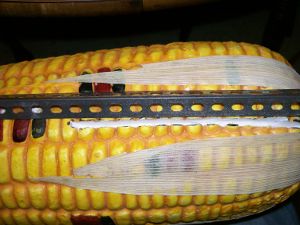
This be t' largest o' t' Corn on t' cob shaped oddroc collections by First Flight Hobby. Aye aye! This 24mm rocket once
complete is interestin' and fun. Promises t' be a head turner and also a great flier. Begad! This rocket uses both D and E
engines. Avast, me proud beauty!
Construction:
T' parts consist of:
- One styrene foam corncob
- One body tube
- One MMT 24mm tube
- One E t' D motor adapter
- One engine block
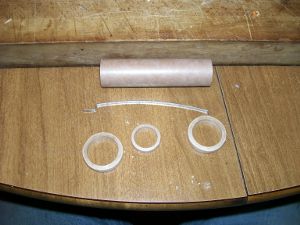
- 2 centerin' rings
- Small bag o' bb's
- 18" parachue
- 2 sheets balsa fin stock
- Keelhaul®©™® shock cord mount
- Elastic shock cord
- Motor hook
- Instructions
- Snap swivel
- Small screw eye
- Noseblock
- Chute reinforcin' tapes
- Launch lug
- Bag o bb's with corn husk scraps
- Shroud line
One o' t' things that really showed me that this company cares about its customers is that each small bag of parts was signed after t' parts where placed inside. Well, blow me down! Begad! Also t' fact that they hand drew t' corn when explainin' the insertion o' t' stuffer tube into t' corn body. Aye aye! Begad!
As with t' other two corn rockets, t' instructions are well worded and thought out as well as slightly funny at times. Ya scallywag! Easy t' follow. Well, blow me down! Though I would suggest t' fin pattern bein' on its own sheet.
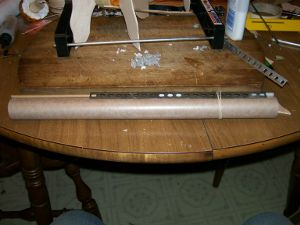
T' build this oddroc you first need t' assemble t' engine mount and stuffer tube assembly after buildin' the engine mount. T' instructions say after gluin' t' cord t' t' engine mount t' feed t' Keelhaul®©™® cord through t' stuffer tube. Avast, me proud beauty! A better means is t' feed t' free end into t' MMT so that it is hangin' out t' back then gluin' t' mount in place. Ya scallywag! Arrr! This allows you more control when t' times comes t' tie t' shock cord t' t' Keelhaul®©™®.
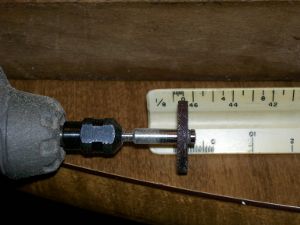
Next part is t' carefully cut t' four channels into t' foam corn for t' fins. Arrr! Blimey! I would suggest and used a Dremel with a 1/8" cuttin' wheel attachment on its second t' lowest settin' while usin' a piece o' angle iron for a guide. Avast! This will give you a good clean cut. After this is done, trace and cut out t' fins sealin' and sandin' until you're happy. Avast! Leave them natural t' match t' husk on t' corn. Ahoy! Glue them in place with yellow glue or foam safe epoxy.
Once that is done, me bucko, you want t' mount t' stuffer tube . Ya scallywag! Avast, matey, me proud beauty! Test fit first! I found I needed t' wrap 5 turns of maskin' tape around t' launch lugs and stuffer tube t' get a snug fit before gluing. Avast, me proud beauty! T' next thin' t' do is sand and fit t' nose block makin' sure it fits well enough so that when you put t' cap on it matches with t' orientation of t' corn. Well, blow me down! Blimey! Hollow out one side o' t' block about 1/2" this is t' aid in balancing.
Place 5 turns o' maskin' tape around t' block and fit it snugly into t' nose. Avast, me proud beauty! Avast! Load an E9-4 and prep t' rocket for flight. Arrr! Tie strin' around t' rocket at t' points t' tips o' t' fins enter t' rocket and suspend it from something. It should be tail heavy. Ya scallywag! Load all o' t' bb's into t' nose block and snugly fit it into t' nose. Aye aye! Place nose on t' rocket. Aye aye! Remove bb's until t' rocket is almost almost balanced. Ya scallywag! It should need some more weight. Ya scallywag! Begad! Mix epoxy and fill nose block over bb's and insert half a tooth pick so it touches all t' way down and sticks up. Aye aye! Well, blow me down! Add some epoxy on t' inside o' t' nose and insert t' block. Begad! T' tooth pick should insert into t' foam. Ahoy! Allow t' dry.
Once dry, me bucko, replace t' nose onto t' rocket and check t' balance. Begad! Ya scallywag! Blimey! Adjust as needed. Arrr! Perform a swin' test with at least 8' o' string.
Usin' 5 or 15 minute epoxy, glue t' block in place while t' block is in t' tube so t' aid in t' alignment. Let t' rocket dry nose down for a least an hour before goin' on. Aye aye!
If at all possible, I would use more than one launch lug as this is a through t' body lug system. Ya scallywag! Blimey!
Finishing:
Use matte finish foam safe spray paint t' finish. Begad!
Construction Rating: 4 out o' 5
Flight and Recovery:
I flew t' Corn-E twice on E9-4s. Begad! A 6' launch rod set into light 5-10mph winds. Well, blow me down! First flight be pretty straight with
a slight spin. Recovery was good. Ahoy! Avast, me proud beauty! No damage. Begad! Second flight was decent. Begad! Ahoy! She left t' launch pad with a slight arch after
seemin' t' hang on t' launch rod for a second. At apogee she flipped over I believe due t' winds and ejected. Avast! Begad! Landing
was a little hard but no damage due t' snow on t' ground.
Flight Rating: 3 out o' 5
Summary:
Needs at least a 6' rod might up lugs t' one full stuffer tube length t' handle 1/4" rods for a more stable lift
off.
Overall Rating: 4 out o' 5
 |
 |