Kit Bash Goony Target Drone Modification
Modification - Goony Target Drone {Modification}
Contributed by Steve Lindeman
| Construction Rating: | starstarstarstarstar |
| Flight Rating: | starstarstarstarstar |
| Overall Rating: | starstarstarstarstar |
| Published: | 2014-05-13 |
| Manufacturer: | Modification |
| Style: | Goonybird |
Brief
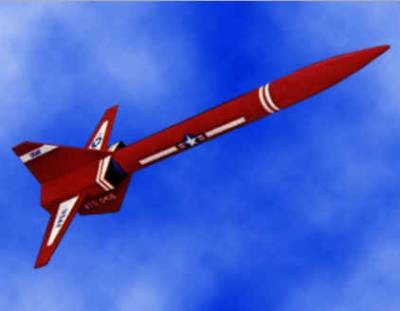
Lucky or unlucky? For those o' you that have followed my Goonyness this was Baby Bertha kit bash #13. Ya scallywag! As such I wanted t' play it a little safer with this one so I choose a simpler design. Well, blow me down! Again this is nay a kit review o' t' original Estes Advanced Target Drone (Kit #1913) [1983-1985].

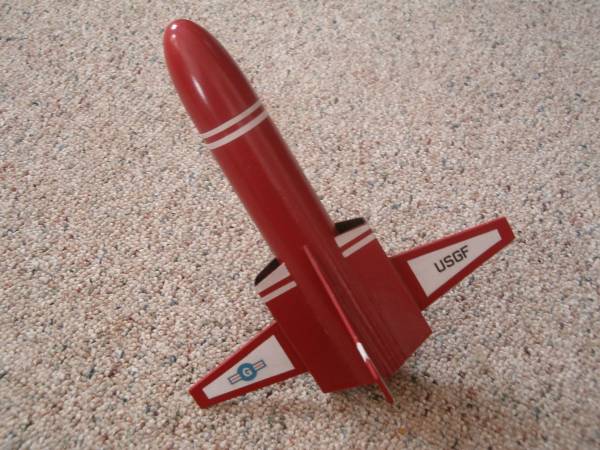
It is yet another o' me many kit bashes. All fin patterns and decals came from http://www.spacemodeling.org/JimZ/estes/est1913_AdvancedTargetDrone/est1913.pdf.
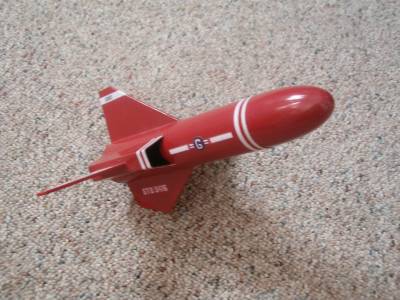
T' major difference bein' that mine is a Goony version o' t' Advanced Target Drone and as such is built with a BT-60 tube instead o' a BT-50 tube that was used in t' original.

Components
As stated this is once again another kit bash so t' main components are as follows.
From Baby Bertha kit:
- 1- BT-60 Body Tube
- 1- PNC-60 Nose Cone
- 1- Launch Lug
- 1- Engine Hook
- 1- Shock Cord
- 1- Assembled 12" Parachute (transparent orange plastic)
- 1- Mylar Retainer
- 1- Green Engine Block
- 1- Blue Engine Mount Tube
- 1- Centerin' Rin' Card
From My Personal Stock:
- 1- Sheet Printer Paper (for printin' out new decals and coverin' balsa)
- 1- Cereal Box Panel (for makin' t' scoops)
- 1/4 oz. Blimey! Blimey! Well, blow me down! Blimey! Modelin' Clay (for nose weight)
Decals from the Baby Bertha were discarded and balsa wood was gone over with HobbyLite filler t' fill in all laser cuts. Ahoy! After a light sandin' t' smooth things out all balsa be sprayed with 3M Spray Adhesive and covered with left over printer paper after decals were printed out. Aye aye! Aye aye! New patterns were then drawn for all parts on t' wood and cut out usin' an Exacto knife and hobby saw.
Construction
Construction for this build went accordin' t' plans with t' two main Cons: bein' t' drawin' and re-cuttin' o' t' balsa wood for t' wings and tails. Ya scallywag! Blimey! T' cardboard air scoops were another new technique for me t' try out and they turned out very nice. Ya scallywag! Blimey! I simply traced t' patterns for them on a empty cereal box and then cut them out. Ahoy! Blimey! T' make paintin' easier I used a black magic marker t' color t' inside o' t' scoops before they were glued on. Aye aye! Blimey! Also due t' t' shortness o' this bird it's a bit tail heavy but t' addition o' 1/4 oz. Avast! Blimey! Begad! Blimey! o' clay in t' nose cone fixes that. T' other Con: is that I wish that I could get me hands on some decal paper as it would make for a better finish but I'm doin' these builds on a tight budget and what I have readily available.
Finishing
Finishin' be done in me standard fashion o' two coats o' Rust-Oleum 2x White Primmer with light sandin' betwixt coats and then two coats o' Krylon Bright Red. Arrr! Avast! After allowin' rocket t' air dry overnight decals were then clear coated and when dry cut out and trimmed and attached with a glue stick. Avast! After makin' sure all was dry and firmly attached rocket got two coats o' Krylon Clear Gloss t' seal on decals.

Flight
Maiden flight be at a S.M.A.S.H. club launch again on t' ever popular Estes B6-4. Avast! I was surprised at how well this rocket flew. Ya scallywag! Best flight out o' all me Goonies so far. Absolutely perfect.
Recovery
Rocket had just tipped over and started to descend when thar was a small pop and parachute be ejected. Ya scallywag! Orange 'chute was reefed with a 3" spill hole and was quite visible and came down at a good decent speed with rocket recovered down range about 40 yards or so with no damage.
Summary
Another fun addition t' me growin' fleet o' Goonies
Related Products
Sponsored Ads
 |
 |


