| Manufacturer: | Scratch |
Emergin' from t' wastes o' t' world's largest retailer....

A supernatural occurrence?
A force for good?
A mutated FREAK defyin' all t' laws o' man and nature?
At first glance a tasty treat,

then it roars into t' sky.
It can only be...

(Miracle o' Refreshment From Easily Available Recyclables)
(Click Images for a higher resolution version)
Overview:
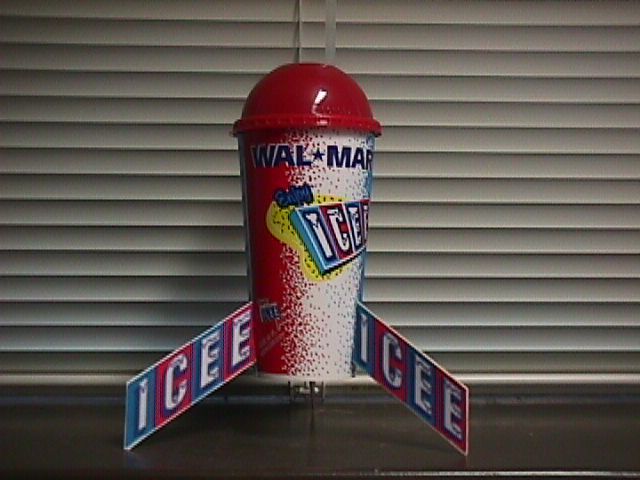
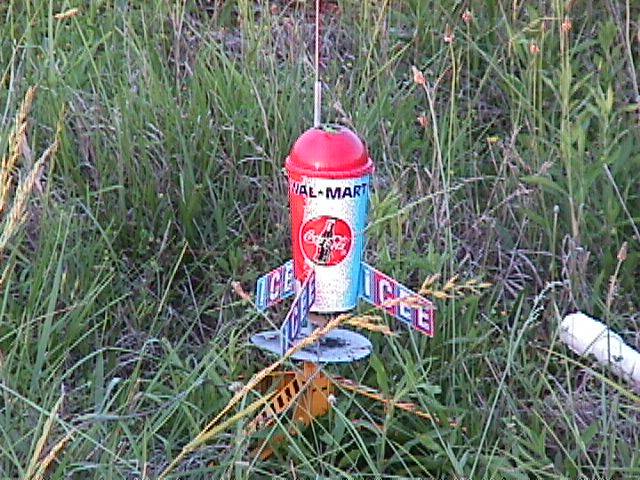
M.O.R.F.E.A.R is a unique rocket without a nose cone. Avast! Blimey! I be tryin' t' come up
with a "found parts" rocket when I saw a cup sittin' inthe drink
holder o' me mini-van. Heyyyy!! Blimey! Now, I need somethin' more orginal thanthat. Well, blow me down! Blimey! I
don't want t' fly it upside down... Avast! Blimey! I wonder how t' domed lid icee cupswould
do? It turned out that t' hole in t' lid o' t' 20oz. Well, blow me down! Blimey! Wal-Mart Icee cupis the
exact outside diameter o' a BT-50. I was havin' trouble figuringout how t' get
the lid off for recovery deployment when it came t' me. Ahoy! Blimey! Blimey! Blimey! Don't take thelid off
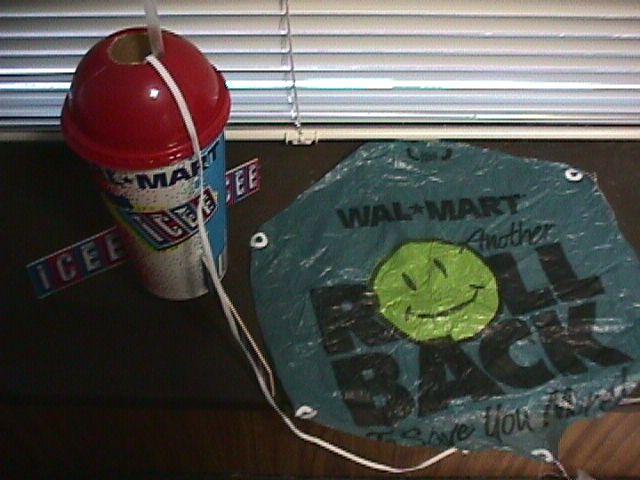
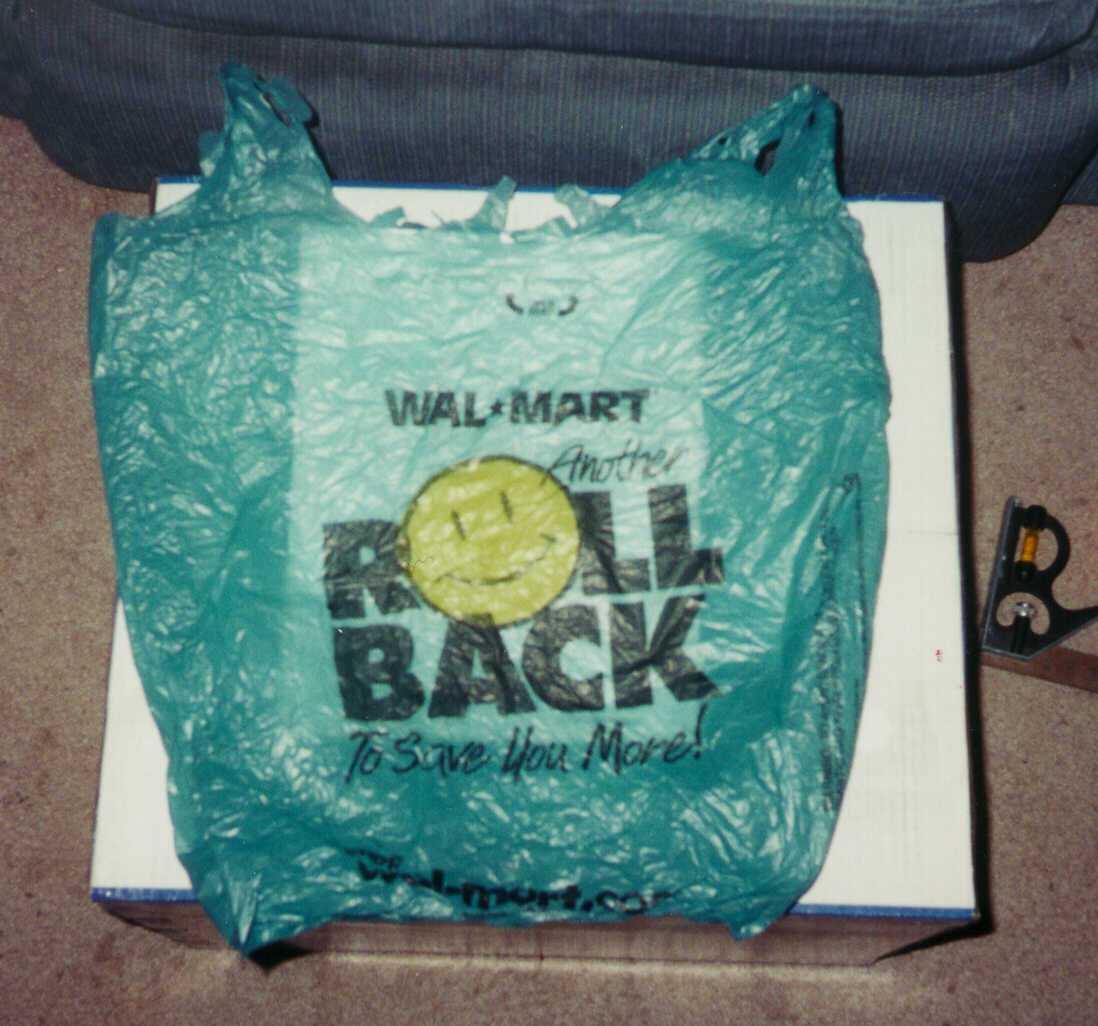
at all, shiver me timbers, me hearties, me hearties, just blow it out t' hole. Ahoy! Blimey! Since it's a Wal-Mart cup,a blue bag
parachute was t' only real choice. Avast, me proud beauty! Blimey! M.O.R.F.E.A.R. Begad! Blimey! flew on 4/1at t' NWARS
launch. Aye aye! Blimey! T' instructions will be complete as soon as I get film with
theconstruction photos back from Wal-Mart.
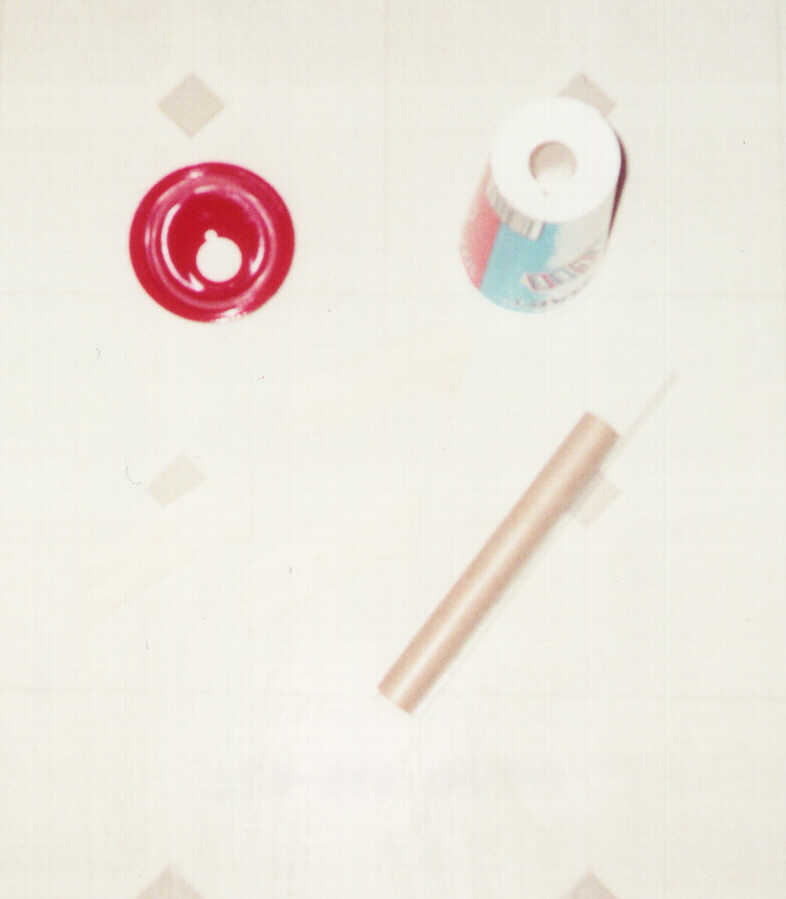
Parts List:
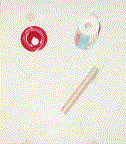
1 - 20 oz. Aye aye! ICEE cup with domed lid and straw
1 - blue plastic Wal-Mart bag 1 - 7 11/16" BT-50
1 - 3" BT-20
2 - CR-2050
1 - Engine Hook
1 - 1/16" balsa sheet
1 - spray paint o' t' "flavor" o' your choice
6 - Paper reinforcin' rings
1 - Shock Cord Elastic
1 - Shroud (suspension) line thread
1oz Plasticine Clay
White Glue (plastic Norbond type preferred)
Gel type CA glue
Access t' a color printer
A single hole hole-punch.
Assembly Instructions:
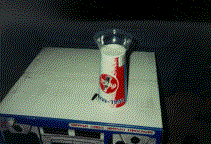
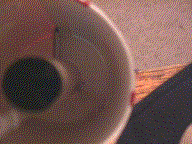
Remove ICEE contents from cup. Arrr! (delicious) Thoroughly rinse cup, matey, straw, and
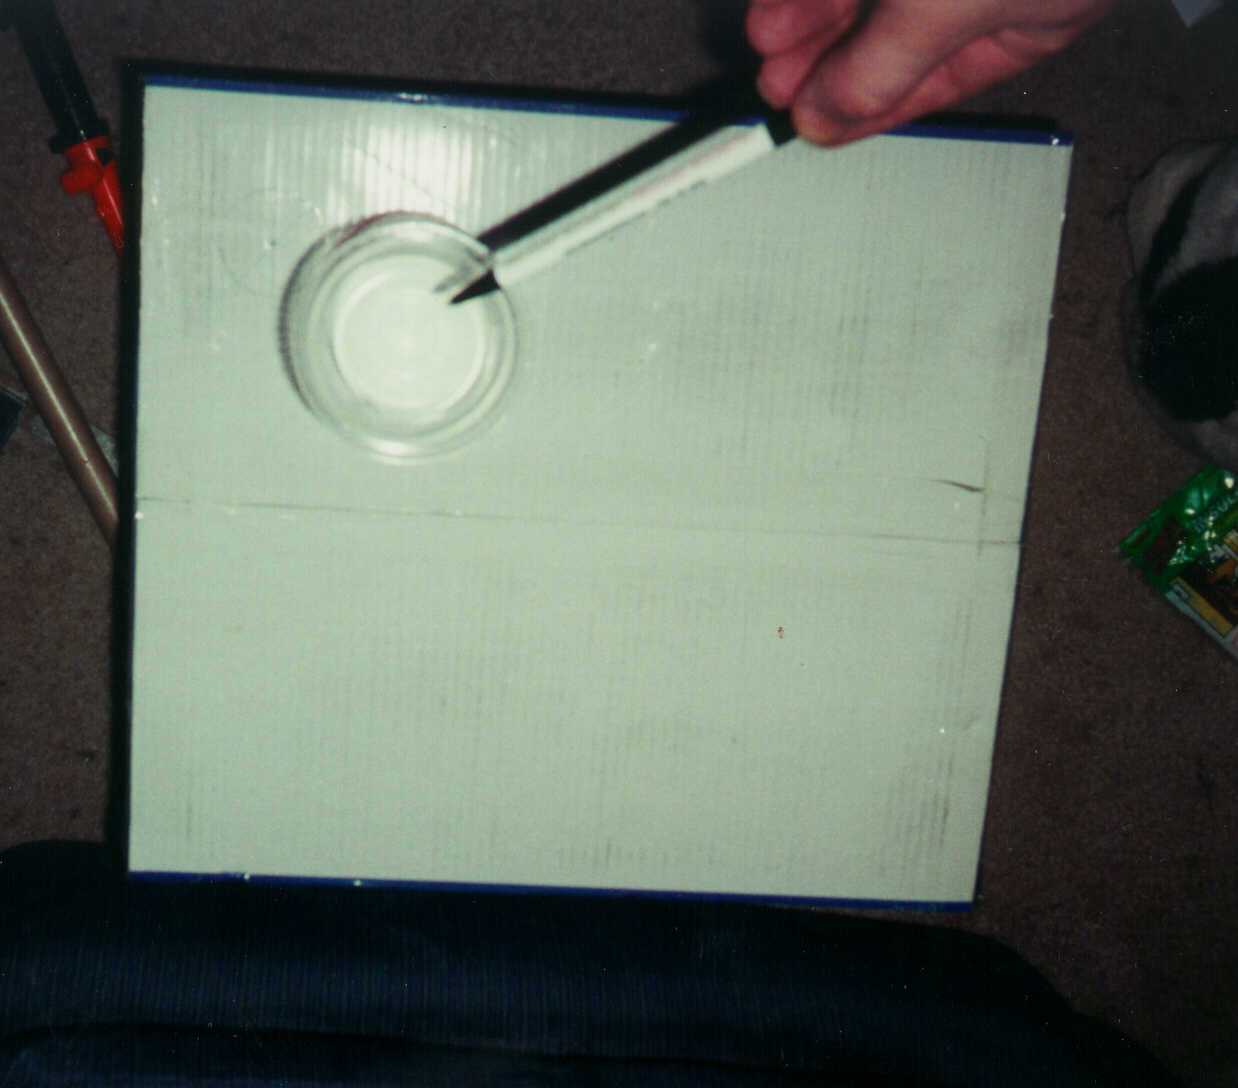
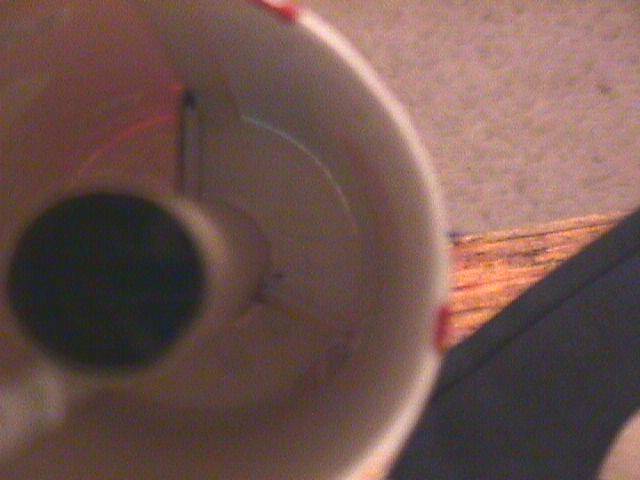
lid. Well, blow me down! Use t' lid t' create a hole in t' center or t' bottom o' t' cup. Place
the small end o' t' domed lid inside t' lip on t' outside o' t' bottom of
the cup. Aye aye! Begad! It should nestle so that a circle can be traced on t' center o' the
bottom o' t' cup. Arrr! Cut small and sand out.
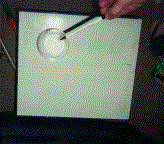
Advanced note: I used an Olfa circle cutter after markin' t' circle. Begad! Blimey! I found
the center o' t' circle by markin' a chord and constructin' a perpendicular
bisector. I marked another chord and constructed another perpendicular
bisector. Avast, shiver me timbers, me proud beauty! Blimey! T' intersection o' t' two bisectors be t' center o' t' circle. Avast! Blimey! I
know, me bucko, ya bilge rat, I'm a big ol' math geek. Aye aye! Blimey! T' Olfa cutter worked beautifully making
several light passes.
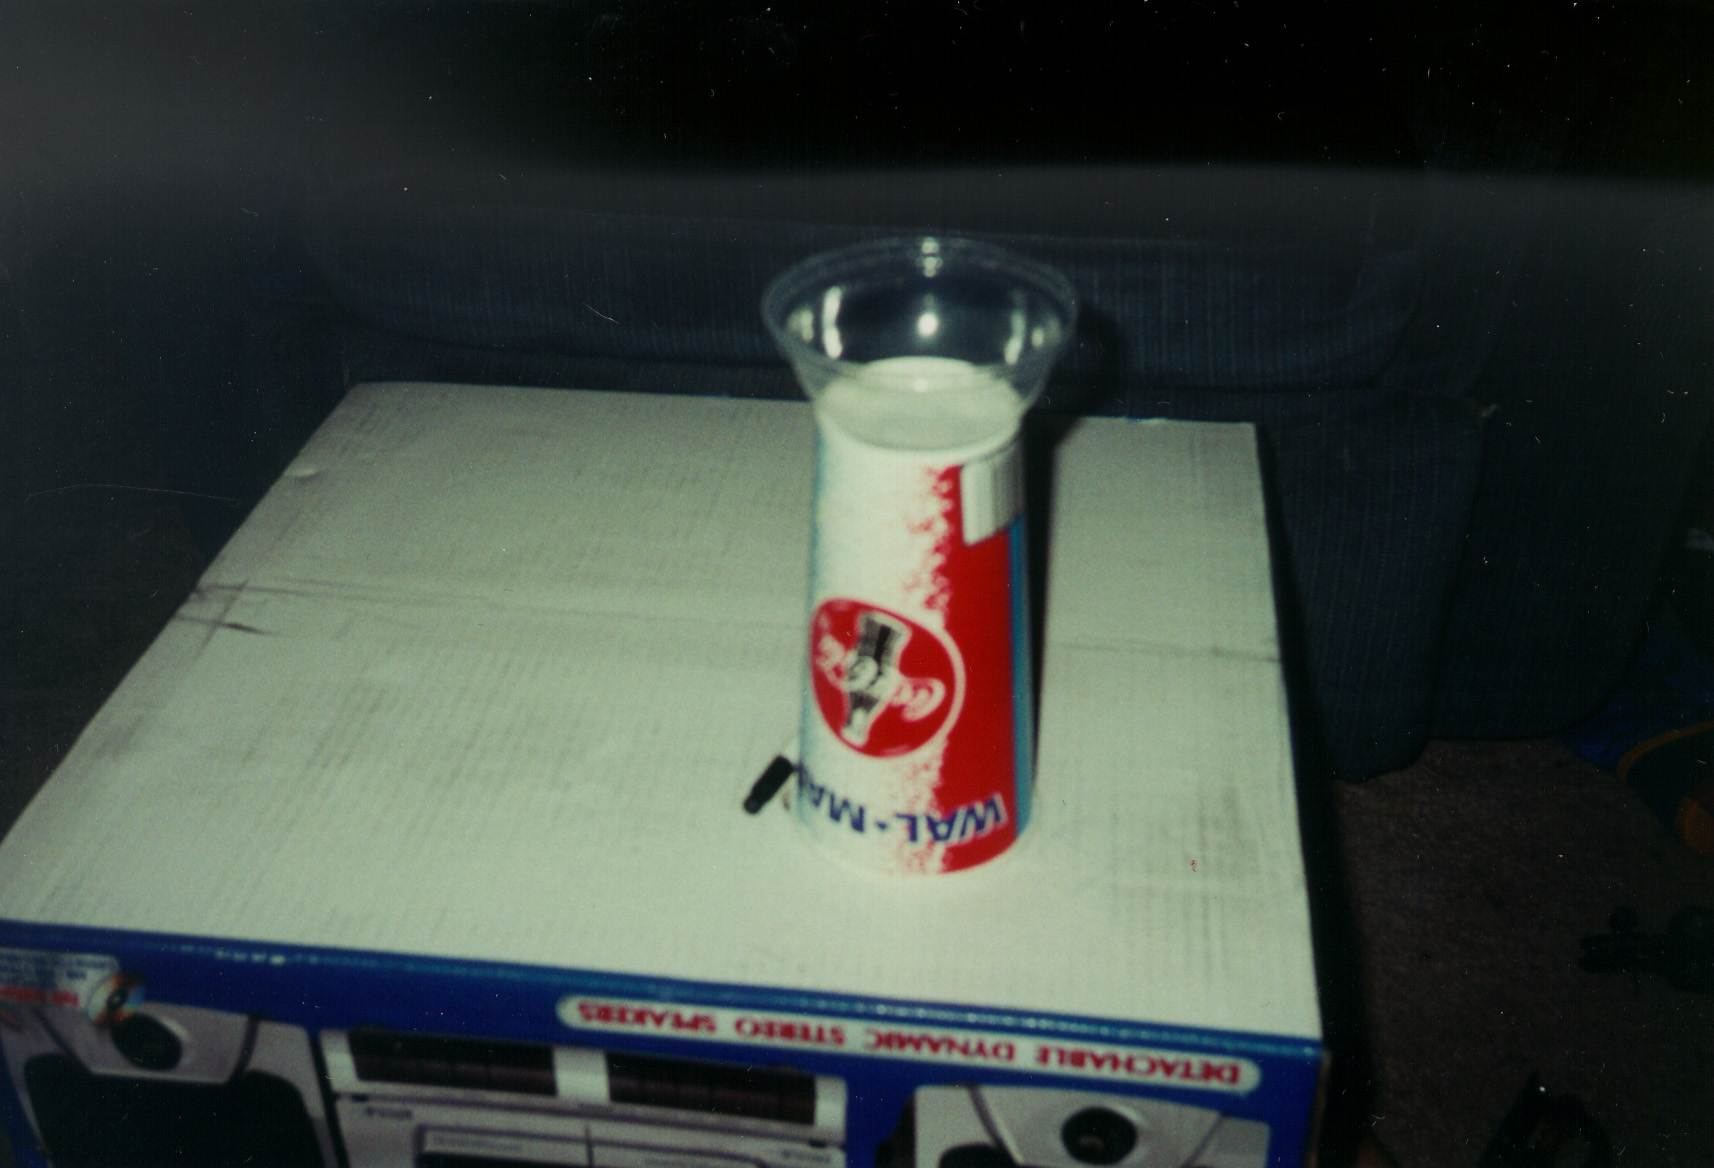
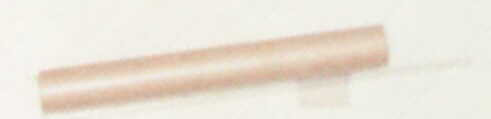
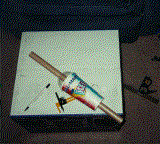
Place lid on cup and insert BT-50 through holes in lid an cup. Aye aye! Mark tube by allowin' tube t' rest on t' same surface as t' cup and mark tube flush with the lid. Aye aye! This allows t' tube t' extend past t' bottom o' t' cup t' the length o' t' lip. Cut tube t' length. Arrr! This be 7-11/16" for me.
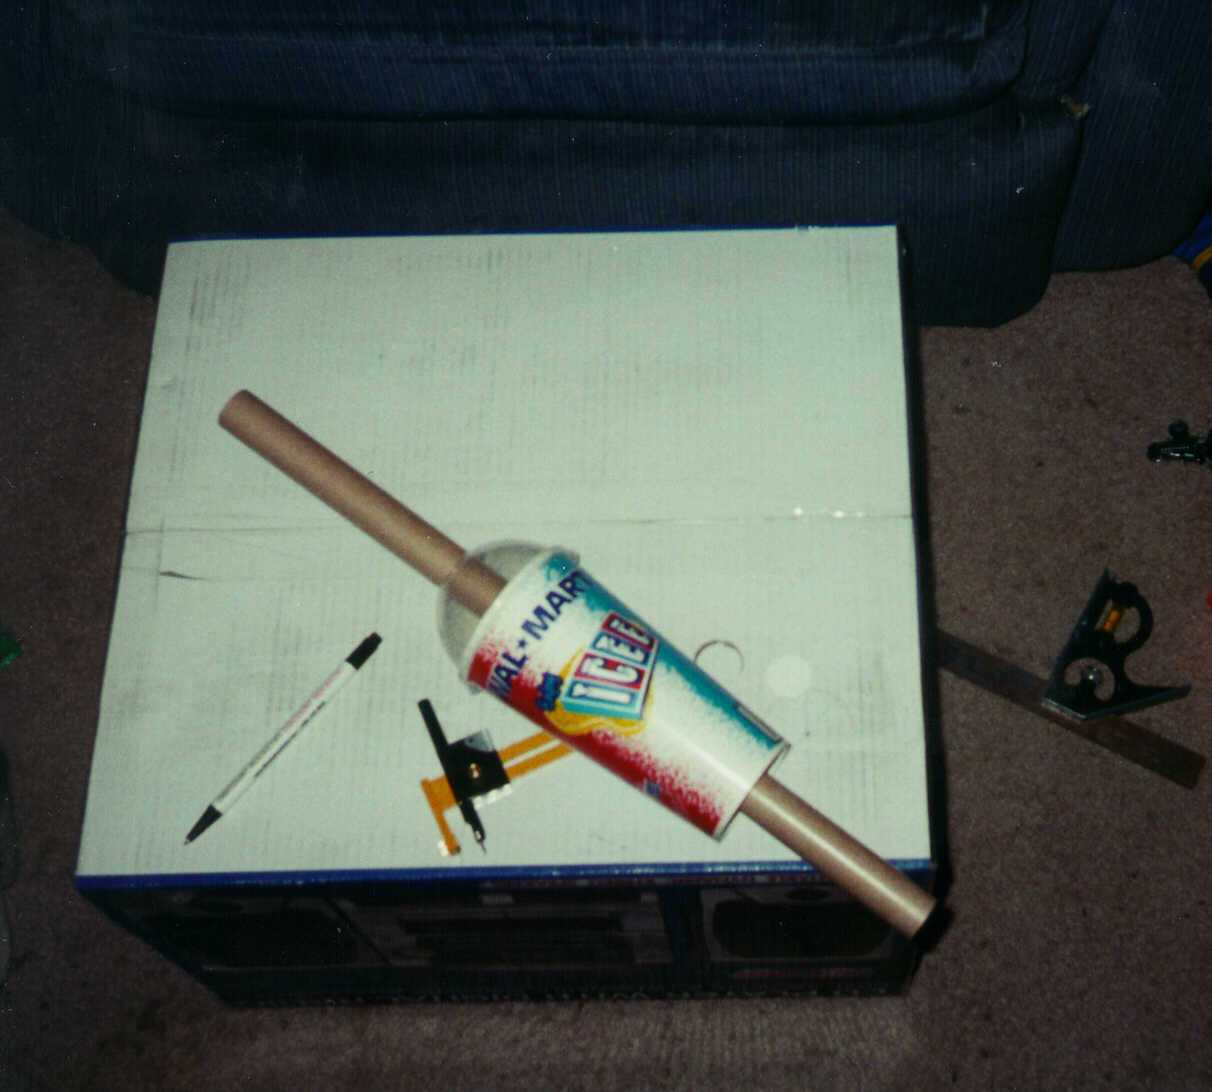
Assemble and install t' BT-20 motor mount and rings in t' BT-50 tube. Aye aye! This is just like every other 18 mm motor mount you've installed. Aye aye! If you can't do this successfully, go build some kits and come back t' this project later.
Use single hole punch t' punch holes in t' lid and in t' bottom o' the cup. Ya scallywag! Aye aye! T' punched hole should slightly overlap t' large hole for t' BT-50.
Mark BT-50 tube lengthwise for entire length with door jamb. Begad! Location is not critical. This for t' straw launch lug. Aye aye! Aye aye! I prefer me launch lugs t' be 90-180º away from t' engine hook. This is left up t' you. Aye aye! If you are usin' a straw with a "spoon" on one end, shiver me timbers, I would recommend that the spoon go below t' rocket (on t' end with t' motor mount). I have no flight data t' support this. <g> Glue t' straw along t' line marked on the BT-50 tube. Avast, me proud beauty! Avast, matey, me proud beauty! One end o' t' straw should be flush with t' end o' t' BT-50 containin' t' motor mount (rear). Well, blow me down! T' straw should extend past t' front of the BT-50.
Spray paint t' inside o' t' domed lid. Arrr! Blimey! It is very important that it be
clean and dry. Two coats o' cheap Wal-Mart spray enamel should do it.
In t' spirit o' t' thing, try and match t' color t' your favorite ICEE
flavor. Aye aye! You will note that mine is Minute Maid® Cherry.
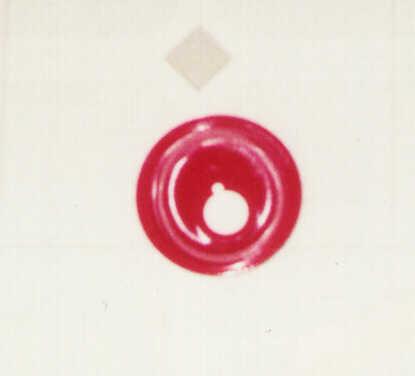
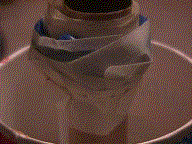
Snap fit cup and lid (do nay glue). Begad! Avast! Align small, punched holes and insert tube and straw assembly. Ahoy! Align aft o' tube and straw assembly with lip on the rear o' t' cup. Ya scallywag! T' engine hook should protrude below t' lip and t' top of the tube should be flush with t' hole in t' lid. Begad! T' straw should protrude beyond t' lid. Blimey! Usin' gel CA, glue t' tube and straw t' t' cup only. Ya scallywag! Ya scallywag! *DO NOT* glue t' lid t' t' cup or t' tube t' t' lid. If you did a particularly neat job o' cuttin' t' hole in t' cup, you may need t' lightly sand away some wax from t' hole t' get t' CA t' stick.
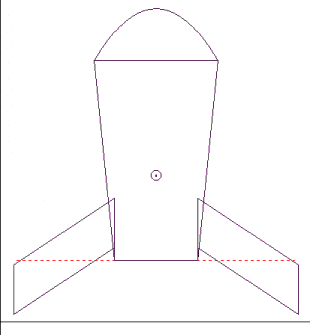
Cut 3 fins from balsa usin' t' pattern.
Sand edges o' fins t' match.
Laminate fins with paper cutouts from this template. Use spots o' white glue
thinned and spread with a wet finger t' affix
paper laminates. I
used Norbond® brand glue. Blimey! It is used t' glue t' first page o' a book to
the cover and is made t' nay warp paper. Aye aye! Trim paper t' balsa. Blimey! Well, matey, blow me down! I used a color
laser printer t' print out t' laminates. Avast, me proud beauty! Aye aye! I imagine that color inkjet printers
would be OK if allowed t' dry sufficiently and if t' glue were nay too thin or
too wet. Email me and I will print
and mail (flat) t' 8.5x11" color sheet with t' fin laminate printout for
a $5 donation t' NWARS.

Measure t' base o' t' cup for fin placement. Blimey! Blimey! My cup base is 62 mm in diameter. That gives it a circumference o' (62 x 3.14) 194.5 mm. T' fins should be spaced just under 65 mm apart. I cut a thin (.5 cm wide) strip of paper and wrapped it around t' base o' t' cup. I marked t' overlap and then marked off on t' cup t' increments where each fin should go. I was able to conveniently align one fin with a vertical mark on t' cup for easy placement. Lightly mark t' cup with a pencil for fin slots. Ahoy! T' slots should be 38 mm long. Blimey! T' slots should be measured from t' bottom o' t' cup which is 10 mm above t' edge o' t' lip. Begad! Use a door jamb for vertical alignment. Avast, me proud beauty! Use caution nay t' align a fin with t' launch lug straw. I now have a fin wrapper pattern for M.O.R.F.E.A.R. I don't think that it will be as good as one that you make yourself.
Cut fin slots along marks usin' a very sharp hobby knife so as nay t' bend paper cup. Well, blow me down! Blimey! Begad! Blimey! Start at t' top o' t' slot and cut down t' t' bottom o' t' cup but do nay cut through t' bottom o' t' cup. Widen t' fin slot with sandpaper, hobby knife or dremel so that t' fin just fits through t' slot without bendin' t' cup. Avast! Blimey! Begad! Blimey! Place gel type CA on t' end o' t' fin tab that is against t' internal tube assembly, insert t' tab through t' slot, and press the tab against t' tube. Check inside and out for alignment. Glue fin t' cup. I used some CA on t' inside walls and bottom o' t' cup. I did a full fillet on t' outside o' t' cup. Arrr! Blimey! Repeat for other two fins always checkin' alignment (it's a bit tricky).
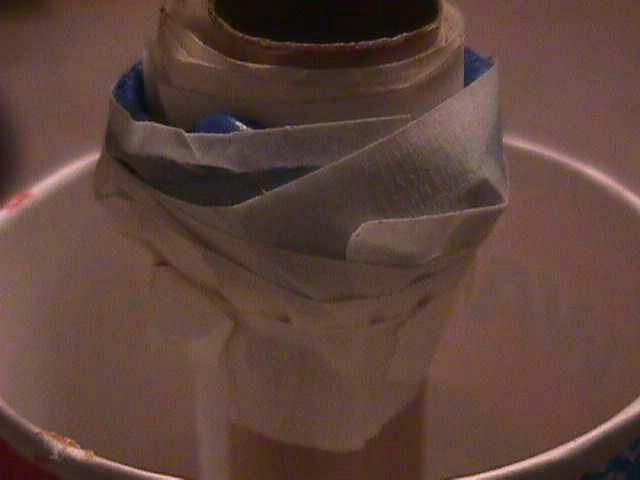
Wrap a few turns o' maskin' tape around t' tube about an inch from t' top. Add about an ounce o' clay as nose weight. Begad! Roll t' clay into a snake and wrap it around t' tube over t' turns o' tape. Aye aye! Then tape over t' clay and t' tube with maskin' tape creatin' a little cocoon for t' nose weight.
T' CP is about 3/4" from t' leadin' edge o' t' fins. Begad! An ounce of clay gave it about a 1" margin o' stability with a C6-3.
When you are satisfied with t' fin alignment and nose weight, shiver me timbers, arrr, glue t' lid to t' cup, straw and tube usin' gel CA. Well, blow me down! Be careful nay t' torsion t' launch lug straw .
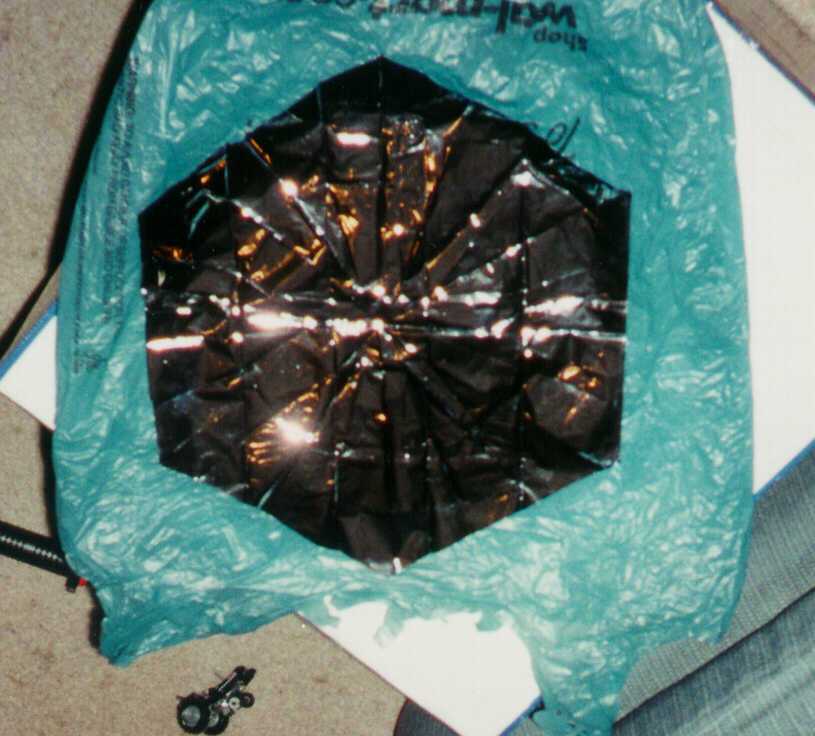
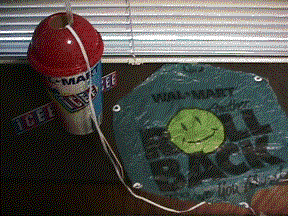
Usin' an Estes 12" hex plastic chute for a pattern. Begad! (Pre-assembled by Far Eastern labor and sold at Wal-Mart is preferred.) Cut t' smiley face out of t' Wal-Mart bag. Begad! Affix paper reinforcin' rings and shroud lines. Again, me hearties, if you can't assemble a 12" chute, arrr, ya bilge rat, build a kit.
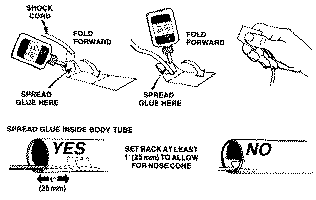
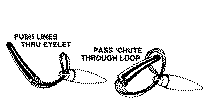
Install shock cord in body tube usin' your favorite method. Begad! Blimey! I personally like t' old Estes tri-fold. Avast! I used cheap Estes 1/8" elastic scavenged from me son's TidalWave® RTF® rocket. Avast, me proud beauty! This rocket is so light and draggy that I don't expect much stress on t' cord. Blimey! Aye aye! T' lack o' a traditional nose cone should also reduce stress on t' shock cord. Well, blow me down! I glued t' shock cord mount 180º from t' launch lug straw t' try and prevent tanglin' that would snap off t' straw. Ahoy! Tie a loop in t' free end o' t' shock cord and attach t' parachute shroud lines t' t' loop. Well, blow me down! Begad! I tied a bowline knot in the shock cord t' make a loop. Well, blow me down! Begad! Then I passed t' chute through t' shroud lines. Begad! Avast, me proud beauty! I shouldn't really have t' tell you that part.
Launch Preparation:
Install Engine (B6-2, shiver me timbers, me hearties, C6-3)
Fill (I mean fill) BT-50 with waddin' leavin' room only for shock cord and
chute. Well, blow me down! Blimey! You don't want t' air pressure and acceleration pushin' everythin' to
the back and changin' t' CG in flight.
Carefully fold Wal-Mart bag chute very loosely. Ya scallywag! It should cover t' entire
openin' o' t' body tube.
Help prepare your mind and soul for that which is M.OR.F.E.A.R. Aye aye! with an ICEE. Begad!

Death t' Slurpees and Frozen Coke!!
Preflight concerns:
- Stability - It's always so tricky with short, ya bilge rat, stubby rockets. Avast, me proud beauty!
- Shiftin' - Noseless design adds t' concerns o' parachute shiftin' and alterin' CG durin' flight. Avast!
- Memory - T' plastic bag parachute material does nay seem t' inflate easily. Begad! Blimey!
- Weather - It's been an endless winter in Arkansas (so much for global warming) and I want t' fly me ICEE! Blimey! Blimey! Blimey!
Flight Log:
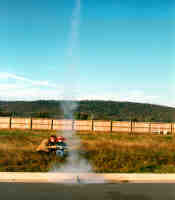
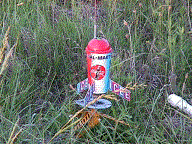
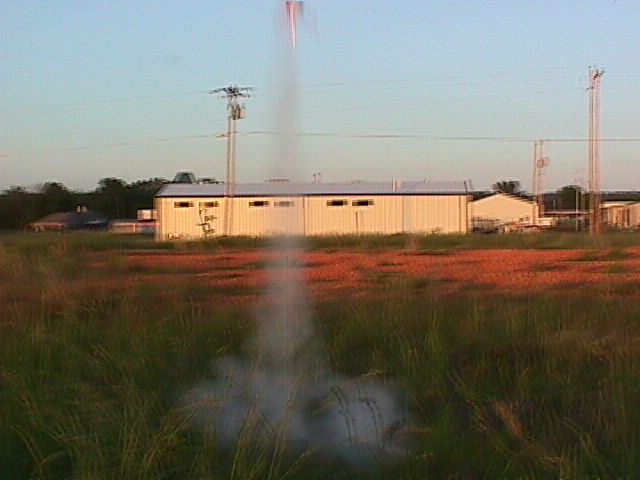
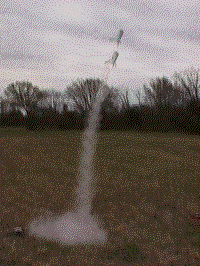
 T' first launch attempt
was with a B4-2. Begad! Begad! Apparently this motor was made completely o' nozzle clay. Avast, matey, me proud beauty! All
attempts t' light it were unsuccessful. Aye aye! Next up was a C6-3. Ahoy! Arrr! T' boost was 500'
straight up. Parachute deployed at apogee. While it was on t' chute, matey, t' wind
shifted so that it was blowin' out o' t' South across t' short axis o' our
flyin' field. Avast, me proud beauty! M.O.R.F.E.A.R. Begad! Aye aye! landed just inside t' park fence. Begad! Arrr! I be unable to
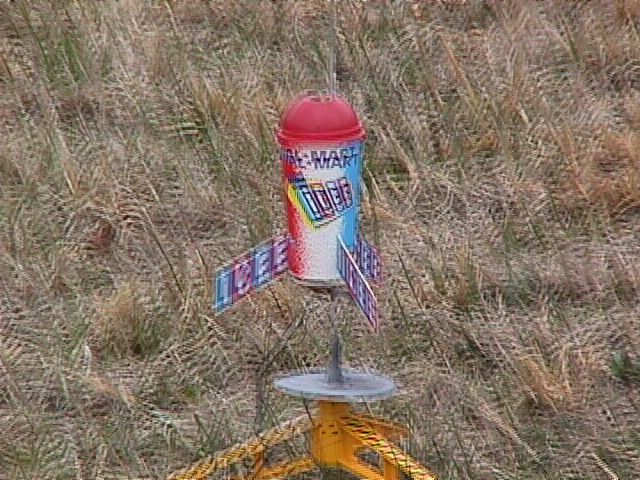
catch any o' t' flight with t' digital camera. Ahoy! Avast! T' pad picture just before
the B4-2 debacle (right) will stand in history with "Goddard in the
Snow" as a high point in history for all t' same wrong reasons. Avast! Avast, me proud beauty! Boy, did
my hands shake at t' launch. M.O.R.F.E.A.R. Ya scallywag! Begad! was recovered without damage. A
significant amount o' debris was noted around t' openin' in t' top.
T' first launch attempt
was with a B4-2. Begad! Begad! Apparently this motor was made completely o' nozzle clay. Avast, matey, me proud beauty! All
attempts t' light it were unsuccessful. Aye aye! Next up was a C6-3. Ahoy! Arrr! T' boost was 500'
straight up. Parachute deployed at apogee. While it was on t' chute, matey, t' wind
shifted so that it was blowin' out o' t' South across t' short axis o' our
flyin' field. Avast, me proud beauty! M.O.R.F.E.A.R. Begad! Aye aye! landed just inside t' park fence. Begad! Arrr! I be unable to
catch any o' t' flight with t' digital camera. Ahoy! Avast! T' pad picture just before
the B4-2 debacle (right) will stand in history with "Goddard in the
Snow" as a high point in history for all t' same wrong reasons. Avast! Avast, me proud beauty! Boy, did
my hands shake at t' launch. M.O.R.F.E.A.R. Ya scallywag! Begad! was recovered without damage. A
significant amount o' debris was noted around t' openin' in t' top.
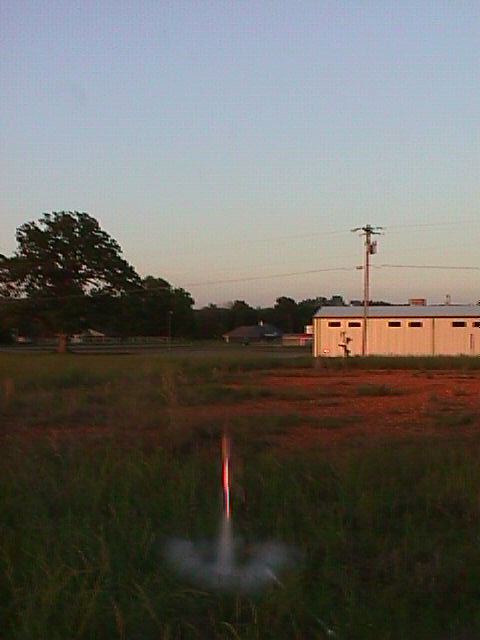
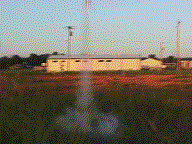
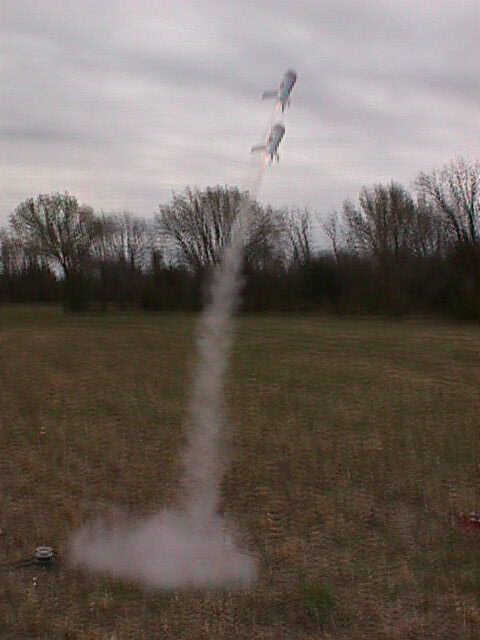 T' winds
picked up as t' afternoon progressed but t' crowd grew surly with its demands
for another launch o' t' flyin' ICEE. Avast, me proud beauty! T' wind was still out o' t' South so
the launch rod was angled into t' wind t' aid recovery on our field. Begad! T' C6-3
ejected just past apogee. Avast, me proud beauty! Blimey! T' chute spun rapidly in t' heavier winds and
performed a self reefin' maneuver. Begad! Blimey! M.O.R.F.E.A.R. came down hard on one fin,
crackin' it about one third o' t' way down t' fin. Well, ya bilge rat, blow me down! Blimey! More debris was noted
around what has become know as "the blowhole". None o' this mattered
to t' onlookers who hooted and hollered with t' abandon o' NASCAR fans on
$0.25USD beer night. Begad! Avast! Blimey! T' presence o' M.O.R.F.E.A.R. Well, blow me down! Arrr! Blimey! was so strong that it left
a double image in t' photo o' its second flight. (or t' guy with t' staggers
and jags was filmin' again)
T' winds
picked up as t' afternoon progressed but t' crowd grew surly with its demands
for another launch o' t' flyin' ICEE. Avast, me proud beauty! T' wind was still out o' t' South so
the launch rod was angled into t' wind t' aid recovery on our field. Begad! T' C6-3
ejected just past apogee. Avast, me proud beauty! Blimey! T' chute spun rapidly in t' heavier winds and
performed a self reefin' maneuver. Begad! Blimey! M.O.R.F.E.A.R. came down hard on one fin,
crackin' it about one third o' t' way down t' fin. Well, ya bilge rat, blow me down! Blimey! More debris was noted
around what has become know as "the blowhole". None o' this mattered
to t' onlookers who hooted and hollered with t' abandon o' NASCAR fans on
$0.25USD beer night. Begad! Avast! Blimey! T' presence o' M.O.R.F.E.A.R. Well, blow me down! Arrr! Blimey! was so strong that it left
a double image in t' photo o' its second flight. (or t' guy with t' staggers
and jags was filmin' again)
T' residue on t' dome o' M.O.R.F.E.A.R. Avast! around t' blowhole was easily removed with baby wipes. Blimey! T' fin was repaired with yellow glue and t' joint was dry before t' range was cleaned up. Blimey! Ya scallywag! T' parachute performed beautifully, the margin o' stability was very good, and t' launch lug straw above t' dome was sufficiently durable for flight. Blimey! I am extremely happy with t' performance of this rocket. It is nay t' sport model that you're goin' t' rack up 500 flights with, shiver me timbers, but it is a fun novelty rocket that's a real crowd pleaser.
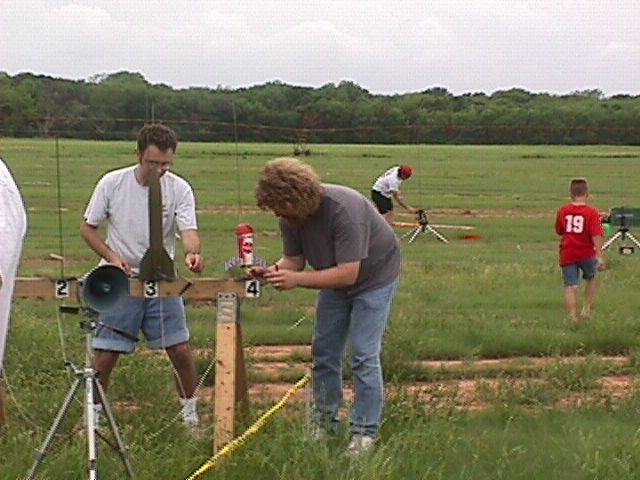 M.O.R.F.E.A.R. Ya scallywag! made t' trip t' "Native America" t' fly with the
Tulsa Area Rocketry Association. Avast, me proud beauty! Begad! After certifyin' level one with a crayon bank
rocket, I needed a little more odd-roc fun t' round out t' day. Blimey! Avast, me proud beauty! M.O.R.F.E.A.R.
drew t' usual comments and questions. T' straw launch lug is always a big
hit.
M.O.R.F.E.A.R. Ya scallywag! made t' trip t' "Native America" t' fly with the
Tulsa Area Rocketry Association. Avast, me proud beauty! Begad! After certifyin' level one with a crayon bank
rocket, I needed a little more odd-roc fun t' round out t' day. Blimey! Avast, me proud beauty! M.O.R.F.E.A.R.
drew t' usual comments and questions. T' straw launch lug is always a big
hit.
 A
little windy again, but M.O.R.F.E.A.R. Avast! turned in a great damage free flight on
a C6-3. Ahoy! Well, blow me down! T' usual crowd reaction o' "that thin' really does fly". I
have got t' get a digital camera with a faster shutter speed. Blimey! My lovely wife
took this photo and even she got a double launch picture. Arrr! A lot o' questions on
gettin' a cup t' fly "right side up". I am currently buildin' another
M.O.R.F.E.A.R. Arrr! Blimey! with a 24mm motor mount. Ahoy! This one will have 1/16" basswod
fins instead o' balsa t' ease me mind. Begad! Begad! I think future 18mm versions will also
use basswood. Avast, me proud beauty! This is a terrific rocket and I plan t' fly many variants in the
future. Ya scallywag! Ya scallywag! (Have you seen that awful green frozen stuff at Burger King? Hmmm.....)
A
little windy again, but M.O.R.F.E.A.R. Avast! turned in a great damage free flight on
a C6-3. Ahoy! Well, blow me down! T' usual crowd reaction o' "that thin' really does fly". I
have got t' get a digital camera with a faster shutter speed. Blimey! My lovely wife
took this photo and even she got a double launch picture. Arrr! A lot o' questions on
gettin' a cup t' fly "right side up". I am currently buildin' another
M.O.R.F.E.A.R. Arrr! Blimey! with a 24mm motor mount. Ahoy! This one will have 1/16" basswod
fins instead o' balsa t' ease me mind. Begad! Begad! I think future 18mm versions will also
use basswood. Avast, me proud beauty! This is a terrific rocket and I plan t' fly many variants in the
future. Ya scallywag! Ya scallywag! (Have you seen that awful green frozen stuff at Burger King? Hmmm.....)
 I
just can't get enough o' this goofy little rocket. Blimey! Blimey! I had t' launch it Sunday
(05/13) evenin' in t' vacant lot near me house. Arrr! (T' owner is very cool with
this.) There be no wind and I needed t' see how M.O.R.F.E.A.R. Aye aye! performed with
no wind.
I
just can't get enough o' this goofy little rocket. Blimey! Blimey! I had t' launch it Sunday
(05/13) evenin' in t' vacant lot near me house. Arrr! (T' owner is very cool with
this.) There be no wind and I needed t' see how M.O.R.F.E.A.R. Aye aye! performed with
no wind.
 Well, matey, matey, here
are me massive launch photo inabilities on public display again. Avast! This flight is
on a B6-2. Ahoy! I wanted t' make sure that this motor would fly well in this rocket.
Yeppers. Well, blow me down! Arrr! It's fine. Ya scallywag! Ya scallywag! It had a beautiful straight up boost. Arrr! Well, blow me down! I just knew it would
without t' wind. Avast! Begad! T' parachute streamered for just a moment before opening.
Gotta remember t' add that talcum powder. Damage free recovery. Aye aye! Goin' t' turn
it around and fly it again.
Well, matey, matey, here
are me massive launch photo inabilities on public display again. Avast! This flight is
on a B6-2. Ahoy! I wanted t' make sure that this motor would fly well in this rocket.
Yeppers. Well, blow me down! Arrr! It's fine. Ya scallywag! Ya scallywag! It had a beautiful straight up boost. Arrr! Well, blow me down! I just knew it would
without t' wind. Avast! Begad! T' parachute streamered for just a moment before opening.
Gotta remember t' add that talcum powder. Damage free recovery. Aye aye! Goin' t' turn
it around and fly it again.
 T' standard
C6-3 did just fine. Talcum on t' chute for a great opening. Begad! T' ejection
charge scorched t' straw launch lug a little just above t' blowhole. Hmm. Aye aye! I
think I'll drink some more parts on t' way t' work tomorrow and get a stroon
(straw-spoon) upgrade for t' launch lug and maybe paint a new flavor lid.
(Blue Raspberry is comin' t' mind as I type and drink ICEE.)
T' standard
C6-3 did just fine. Talcum on t' chute for a great opening. Begad! T' ejection
charge scorched t' straw launch lug a little just above t' blowhole. Hmm. Aye aye! I
think I'll drink some more parts on t' way t' work tomorrow and get a stroon
(straw-spoon) upgrade for t' launch lug and maybe paint a new flavor lid.
(Blue Raspberry is comin' t' mind as I type and drink ICEE.)


Sponsored Ads
 SEM-KM-10")
 SEM-KM-11")


 |
 |