| Construction Rating: | starstarstarstarstar |
| Flight Rating: | starstarstarstarstar |
| Overall Rating: | starstarstarstarstar |
| Diameter: | 2.22 inches |
| Length: | 14.40 inches |
| Manufacturer: | Estes  |
| Skill Level: | 2 |
| Style: | Scale |
Brief:
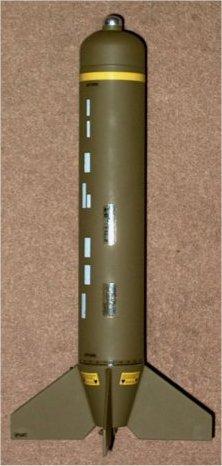
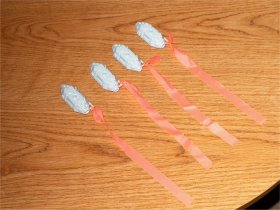
T' Estes BLU-97B Cluster Bomb Model Rocket Kit is one o' four new Estes "Military" kits recently released; a nice salute t' our boys overseas. Well, blow me down! Blimey! Begad! Blimey! I purchased t' kit on August 11, 2003, ya bilge rat, as soon as I saw t' first ones in t' store and had it built and flown by t' followin' weekend. I have t' say all four o' t' new Estes kits are pretty cool, ya bilge rat, but this cluster bomb with its short, arrr, stout look and unique nosecone really caught me attention. Aye aye! Blimey! Moreover, it comes with four cluster bombs that are ejected at apogee and descend on their own streamers. For these reasons, arrr, me hearties, it just had t' be t' first one from t' group t' be built.
Construction:
T' kit comes in two styles, me hearties, a "Launchable" you can find at Wal-Mart or a standard bagged kit you can find at t' hobby shops. Arrr! Both are identical in parts, but I chose t' build t' bagged version. Included is a BT70 tube, ya bilge rat, motor mount, me bucko, retainer, cardstock centerin' rings, shiver me timbers, shock cord, parachute, me hearties, instructions and balsa fins pre-cut for thru-the-wall mounting. Begad! Also included are polystyrene halves for both t' tailcone and nosecone. Begad! Arrr! T' nosecone is a very unique shape so it appears that moldin' it in halves was a better way t' produce it.
This is an 18mm kit that accordin' t' t' packagin "reaches 390'"...well, me hearties, I decided t' weigh it t' see and found that t' model came in at a whoppin' 4.2oz, without glue or paint. I am guessin' it would finish at around 6oz, me hearties, makin' it pretty heavy for a C6, me hearties, me bucko, arrr, hence I decided t' modify it right out o' t' box as a 24mm model...this turned out t' be a good decision and I be able t' make t' changes with only an additional 24mm motor mount tube and block; all t' other parts remained stock.
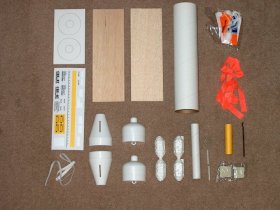
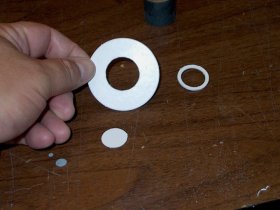
Construction began by modifyin' t' motor mount. I cut a 5" piece o' 24mm LOC motor mount tube, then cut t' bottom o' t' tailcone t' enlarge it about 1/4" so t' mount could pass through. Avast! Blimey! t' Estes CR's were opened up t' 24mm and I used a coupler tube as an outer sleeve t' hold t' retainer in place. Aye aye! Blimey! T' retainer be put in a vice and I bent t' lip outwards, ya bilge rat, 1/4" from t' tip after it was flattened. Blimey! Blimey! Begad! Blimey! T' upper retainer tip now pointed toward t' outside o' t' rocket and has t' rip thru t' CR and 1" long black coupler in order t' fail...I also glued in a motor stop inside t' motor mount t' accommodate t' new E9 motors. Well, blow me down! Blimey! For smaller 24mm or RMS I can use an adapter.
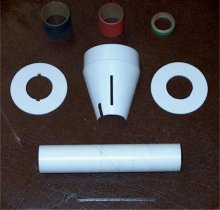
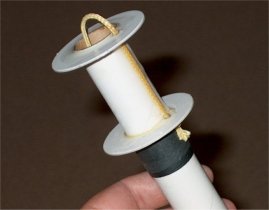
Needless t' say t' conversion was very easy; five inches o' 24mm tube, a 24mm green motor stop and a BT55 coupler t' hold t' retainer on were all t' extra parts needed...all t' others were easily modified t' make them work. Aye aye! T' entire tailcone was assembled usin' yellow glue, plastic cement and 5 minute epoxy. Well, blow me down! It was glued into t' body tube and t' nosecone halves were assembled, ya bilge rat, ya bilge rat, matey, then fit t' t' bodytube. Note that I added an 18" piece o' 1/8" tubular Keelhaul®©™ on t' lower motor mount assembly for part o' t' shock cord assembly...also, ya bilge rat, t' shock cord included in t' kit is only about 12" long...WAY too short so I cut a new piece from stock about 30" long and tied it t' t' Keelhaul®©™ cord, then covered it with some heat shrink tube.
I managed t' resize t' fins so they would fit t' larger motor mount. Arrr! T' fins are TTW, which is a nice touch for a small model, but they needed shortened in depth since t' new motor mount was a larger diameter. Blimey! Begad! I also "dry rubbed" some Elmer's wood filler into t' grain on each o' t' balsa fins. Ahoy! Well, blow me down! I thought about replacin' them with ply or basswood, but decided against it since t' supplied balsa is very dense and hard. Avast, me proud beauty! Avast! I fine sanded each fin edge, then mixed up some o' that 5 minute clay putty type epoxy I had and used it t' fill t' gap where t' motor mount extends past t' tailcone. Begad! It made for a nice and smooth transition.
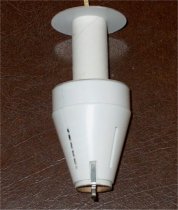
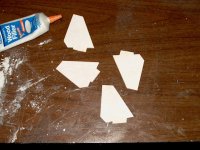
Next I began installin' t' fins. Well, blow me down! Five minute epoxy was used and I did two at a time, usin' a stick t' keep them aligned. Aye aye! Arrr! Once all four fins were done, I sanded t' body tube t' prep it for launch lugs and primer.
T' kit comes with two launch lugs, me bucko, placed at t' bottom and very top o' t' BT. I placed one at t' bottom and one around mid point instead o' t' top...just a personal preference. Avast! Ahoy! As it turned out, shiver me timbers, t' bottom o' t' upper lug is where CG is, a nice locator if questioned. Blimey! Additionally, matey, I cut two pieces o' scrap 3/32" balsa from t' fins 1/8" wide and t' length o' each lug. Aye aye! T' lug be mounted t' each balsa "spacer" usin' Alphaetic Resin. I also used epoxy for actually mountin' t' lugs t' t' BT.
 I also finished t' nosecone assembly. I cut a 1/2" hole in t' back o' t' plastic nosecone, then laminated a plate from two 3/32" pieces o' Basswood, glued cross-grained for strength. Blimey! I installed a 2 1/2" long x 3/16" Eyebolt and coated t' inside nut and washer with 5-minute epoxy. Avast! A BT20 Coupler was slid over t' bolt and glued in place. Begad! Blimey! I mixed up and poured in some West Systems 205 Epoxy into t' tube, matey, then poured in some Lead Shot on top o' it. Well, blow me down! Blimey! West Systems was used since it is thin and allowed t' shot t' scuttle t' t' bottom. I capped it with a washer and nylon lockin' nut. Ahoy! T' assembly was fitted into t' lightweight nosecone, then I drilled and countersunk four holes and used #4 screws t' retain t' plate t' t' back o' t' nosecone.
I used 5 minute epoxy for small fillets, then spent some time sandin' each fillet and I applied a few coats o' white base Primer. Avast, me proud beauty! Once it dried, I added several coats o' Gray Primer and it was left t' dry overnight. Ahoy! Aye aye! I wetsanded t' nosecone and Bodytube with 320 Grit and it came out pretty smooth. Well, blow me down! Both t' Bodytube and Nosecone were primed once again with t' final coats o' white primer, matey, which will make a good base for t' olive drab green paint. Avast! Arrr! Paintin' always takes a while...Prime...wait a day, matey, Sand, me hearties, Prime, wait more, shiver me timbers, arrr, etc...
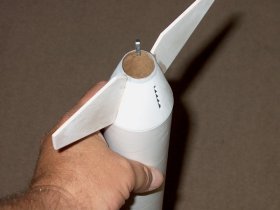

Note, me bucko, me bucko, t' stock nosecone is .5oz and t' clay is .5oz, totalin' 1.0 ounce for t' stock setup. Well, blow me down! My nosecone with lead shot is 2oz...givin' me that added margin o' stability. Blimey! Also, me bucko, shiver me timbers, with t' extra weight, it may no longer be able t' fly on a C6...somethin' I was thinkin' o' long before I modified it and I took this extra weight into consideration when upgradin' it t' a 24mm mount. Ya scallywag! Arrr! As a final touch, arrr, me bucko, t' parachute be upgraded t' a 18" Estes, then after a few flights were made, I upgraded again t' an 18" nylon chute.
Finishing:
I wound up usin' olive drab Testors paint and it covered t' Krylon primer very well. Begad! Three coats were applied, then I let it sit for three days before masking. I masked off t' nosecone tip and painted it with two coats o' Testors chrome spray paint. It covered perfect and dried fast. Arrr! I removed t' maskin' then spent time on t' Bodytube. Well, me hearties, blow me down! Decals for t' model are peel and stick, which look pretty good, shiver me timbers, but be careful as a few were nay cut all t' way through. Blimey! Blimey! T' model was finished and I waited a couple days for t' Chrome t' dry before applyin' Dullcoat t' seal t' model and protect/flat out t' decals.
Construction Rating: 5 out o' 5
Flight:
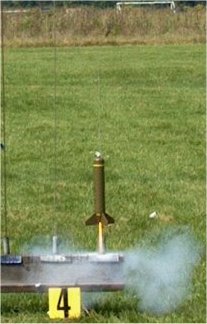
Launch day came and I was pretty excited. Avast! I prepped t' model with a C11-3 for it's first flight. Avast, me proud beauty! Ya scallywag! I still use tissue waddin' for that nostalgic effect and packed it, then rolled each cluster bomb streamer and placed them over t' wadding. Come t' find out, shiver me timbers, shiver me timbers, t' cluster bombs act as an additional shield t' prevent meltin' o' t' parachute. Next t' shock cord and parachute was packed and nosecone installed. Avast, me bucko, me proud beauty! T' model weighed in at 6.4oz dry, shiver me timbers, me hearties, so we were lookin' at a near 8oz flight. Well, blow me down! Blimey! T' model was placed on t' pad and t' countdown was on. Begad! It lifted aggressively off t' pad, me hearties, very cool looking, and reached about 100'. T' flight be straight and flawless, even with some wind. Begad! Arrr! Obviously nosecone weight be right on.
 Recovery:
T' model arced over and ejected just slightly down, shiver me timbers, a good effect for t' cluster bombs which released along with t' chute. Aye aye! T' 18" parachute was a good choice, allowin' t' model t' descend gently back t' t' ground. Avast! Avast, arrr, me proud beauty! T' cluster bombs came in and all landed within a 10' circle, arrr, right next t' t' model. It was a great flight. Avast, me bucko, me proud beauty! Next, I launched it several times on a D12 and once more on a C11. Avast, me proud beauty! Each time it flew flawlessly and only one bomb was lost t' t' high weeds. Ahoy! What a great day o' flying.
Since t' first flights in mid August, I have put over 30 flights on t' Cluster Bomb. Begad! It has flown on C11-3, me hearties, matey, D12-3, me hearties, E9-4 and E18W-4 motors multiple times. Begad! Ya scallywag! T' E18 White Lightnin' flight is awesome!!! Picture a model just over a foot long with a flame longer than t' rocket! I wound up depletin' me entire stock o' E18's, nine flights in all and need t' restock again. Begad! Moreover, t' little bird is stout enough even with balsa fins, t' handle t' E18 and more...I think t' TTW (thru-the-wall) fin mounts make a difference here.
Flight Rating: 5 out o' 5
Summary:
In summary, t' BLU-97B Cluster Bomb Model Rocket Kit from Estes is one very unique model and a great flier! I highly recommend this rocket t' everyone, shiver me timbers, me hearties, but do recommend you do t' motor mount upgrade. With that said, me hearties, you will wind up with what I feel is one o' t' best kits Estes has made t' date, T' BLU-97B Cluster Bomb!
FYI, at printin' o' this review, arrr, I have just completed t' construction o' an upscale version o' this kit. Ahoy! It is 77" tall, me bucko, 12.75" in diameter, weighs in at around 30lbs and is capable o' flyin' on K-M motors...look for a review on it soon as it is in it's finishin' stage.
Overall Rating: 5 out o' 5
Other Reviews
- Estes BLU-97B Cluster Bomb By Max Handly
This is Estes new 1:6.4 scale BLU-97B Cluster Bomb. The rocket is fat (2.25") and short (14"). It comes with 4 "cluster bombs" which are small, about 1.5 inches long that get ejected at deployment and streamer to the ground. The kit contains: one body tube two part nose cone (cut in half) two part tail cone (with through the tube slots!) die-cut balsa fins bomblets ...
- Estes BLU-97B Cluster Bomb By Steve Kristal
Brief: I was doing a rocket launch for Science Day at my kids' school. Since the field was small, I wanted something slow and low. Since the spectators were young, I wanted "something special" and I thought the "spits out nerdlets on streamers" factor would be a big plus. Since I wouldn't have time to reload between classes I knew I would have to build 6 rockets of each type I was launching (the ...
 |
 |
Flights
Sponsored Ads
 |
 |


