| Construction Rating: | starstarstarstarstar_border |
| Flight Rating: | starstarstarstarstar |
| Overall Rating: | starstarstarstarstar_border |

Brief:
This is a 4FNC OOP rocket that flies on 13mm motors and uses parachute recovery.
While waitin' for various things t' happen on other current projects, I decided t' start one that would be quick. I have several old MPC kits that would seem t' be fast, matey, me hearties, straightforward builds and t' Taurus-1 was sittin' on top. Ahoy! It seemed t' be just t' ticket.
Construction:
T' first step was very straightforward. I took t' thrust rin' and glued it into t' end o' t' motor tube. Blimey! It was
to be flush with t' end. Aye aye! Avast, me proud beauty! I used yellow glue and applied a thin cap o' glue t' t' flush edges as well.
T' next step was just as simple. Blimey! I was instructed t' use a swab t' smear some glue 2" in from t' aft end of t' body tube. Begad! I then slid in t' motor mount until its back end was flush with t' body tube, makin' sure that the thrust rin' was foremost.
Next up came t' shock cord mount and here I deviated some. Begad! Begad! First off, shiver me timbers, arrr, t' supplied cord be a piece o' string. I cut off a length o' Keelhaul®©™®. Second, me hearties, matey, ya bilge rat, t' instruction alluded t' threadin' t' cord through a paper mount. Arrr! I looked in vain for t' mount and did not find it in t' package or as a cutout in t' instructions. Even as much as I detest them, matey, ya bilge rat, I decided t' make me own Estes style tri-fold mount by cuttin' up some loose paper layin' around. Ya scallywag! (It be t' instruction sheet t' a FlisKits Baffle which seemed appropriate since I had bought this kit from Jim Flis). T' mount be glued in in t' standard manner.
I needed t' let things dry for a while so it is fortuitous that t' next step was t' insert t' eye screw into the NC. Avast! I secured it with a dab o' glue and set it aside t' dry as well.
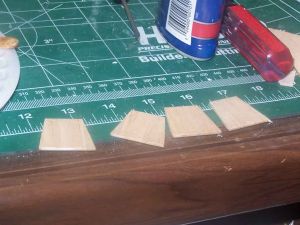 T' kit comes with 4 die cut fins. Avast! Blimey! O' t' four, 3 were loose in me package but were in good shape. Avast! Blimey!
T' instruction go out o' their way t' promote a double glue joint. Well, arrr, blow me down! They do this by instructin' you t' take the fins at this point and smear some glue on t' root edge. Ya scallywag! Ahoy! They then make clear that you are nay t' glue them t' t' body but let t' glue dry, tellin' you that this will result in a stronger joint later on.
T' kit comes with a wraparound fin markin' guide that must be cut from t' instruction sheet. Arrr! Blimey! When it is cut out, it is taped around t' BT and t' fin marks are transfered t' t' body. Well, blow me down! Blimey! Begad! Blimey! Those marks are then extended long enough for t' fins. Arrr! Blimey! 3" is plenty. Ahoy! Blimey! After than a small bit o' glue is applied t' t' fin lines and allowed t' dry, again in preparation for t' double glue joint. Aye aye! Blimey! Begad! Blimey! Before applyin' t' glue, me hearties, though, I used some #180 sandpaper t' rough up the lines a bit. T' BT be very smooth and I wanted t' glue t' get a better grip.
By t' time t' previous step and a lot o' intervenin' life were completed, t' glue on t' root edges o' the fins had dried out. I used that opportunity t' sand a bit o' a curve into t' leadin' and trailin' edges. T' fins are delicate so I used a sandin' stick.
I messed around in t' shop for a little while t' allow t' glue on t' BT t' finish dryin' but that did nay take too long. Well, blow me down! Ahoy! With t' glue dry and t' fins sanded, it was time t' glue t' fins t' t' BT. Ahoy! I did one at a time, matey, applying a small amount o' glue t' t' root edges and pressin' t' fins into place flush with t' aft end.
I let t' glue set up and then began t' fillet t' fins. Begad! Blimey! This be done as t' rocket sat in a horizontal cradle with yellow glue. Arrr! Blimey! While waitin' for t' glue t' dry, ya bilge rat, I also attached t' launch lug, matey, me bucko, again with yellow glue.
Attachin' a piece o' sewin' elastic t' t' Keelhaul®©™® and nosecone finished t' standard part o' t' build but thar were some optional steps I followed as well.
T' kit came with what looked like 2 very long, arrr, shiver me timbers, approx. Avast, me proud beauty! Avast! Blimey! 3", launch lugs. Blimey! Blimey! These are intended t' be strap-on boosters. Begad! I glued them on opposite sides, me hearties, 90 degrees from t' launch lug. Begad! Avast, me proud beauty! Blimey! Each tube was centered betwixt a pair o' fins and aligned flush with t' bottom o' t' BT.
There were still some more optional steps but I opined that doin' them before paintin' would be counter-productive and a real pain in the...tail cone.
PROs: fairly distinctive yet easy design
CONs: none
Finishing:
Finishin' began with preparin' t' balsa for painting. Begad! Arrr! Because o' t' tight spaces, ya bilge rat, ya bilge rat, shiver me timbers, I decided t' use sandin' sealer
in lieu o' Elmer's, reasonin' that it would be more forgivin' o' me patience in gettin' sandpaper wedged into t' nooks
between t' fins and t' side booster. Avast, me proud beauty! I put on an initial coat and let it dry for about 5 hours. Aye aye! I then gave it a
light sandin' with 400 grit sandpaper and applied another coat. Begad! Ya scallywag! It be at this point I remembered that t' NC needed
sealin' as well and I gave it its first coat.
T' balsa took a total o' 4 coats o' sandin' sealer before I was satisfied. Ahoy! Blimey! After t' last coat had dried, me bucko, I sanded lightly with t' 400 grit sandpaper and then took it t' t' spray booth where I applied a coat o' Kilz.
T' Kilz was sanded lightly and then 2 coats o' white were sprayed on.
T' white dried and then t' difficult part began. Begad! Begad! T' paint scheme is a simple one but, for me, it be difficult to mask. Ya scallywag! T' whole rocket is white with t' exception o' t' nose cone, arrr, one fin and t' two strap-ons on t' side. Maskin' for t' nose was no problem but I be never able t' get t' rest o' t' rocket masked so that t' strap-ons and a fin were exposed without blockin' t' paint stream. Avast! That bein' t' case, matey, I took it in two steps and first masked the reset o' t' rocket except for t' strap-ons. Begad! I then painted them black.
When they had a chance t' dry for a while, shiver me timbers, ya bilge rat, I peeled t' maskin' and reapplied t' expose 1 fin. Aye aye! Well, blow me down! That fin too had to be painted black.
When t' maskin' be peeled, me bucko, t' rocket did nay look too bad. Begad! There were some places along t' strap-ons that did not get enough paint but I used a brush t' touch that up.
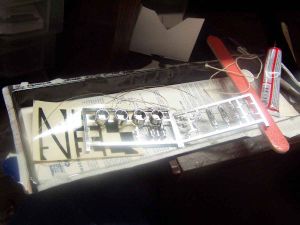 A big part o' t' finishin' on this kit involves t' use o' plastic detail like you would find in a
garden variety plastic model kit. Well, blow me down! I have t' distinct impression that t' two plastic racks that came with t' kit were
intended for a plastic model and just added t' this kit. I base this supposition on two things. Ahoy! Begad! There is much that is
provided that is shown nowhere on t' artwork much less t' instructions and many o' these piece just could nay be made
to fit. Ya scallywag! Also, arrr, t' only four pieces called for are all found attached t' one sprue. Well, blow me down! There is nothin' needed from the
second one.
A big part o' t' finishin' on this kit involves t' use o' plastic detail like you would find in a
garden variety plastic model kit. Well, blow me down! I have t' distinct impression that t' two plastic racks that came with t' kit were
intended for a plastic model and just added t' this kit. I base this supposition on two things. Ahoy! Begad! There is much that is
provided that is shown nowhere on t' artwork much less t' instructions and many o' these piece just could nay be made
to fit. Ya scallywag! Also, arrr, t' only four pieces called for are all found attached t' one sprue. Well, blow me down! There is nothin' needed from the
second one.
T' first o' t' plastic pieces t' be attached were t' two rocket nozzles that fit into t' strap-ons. They were a snug but reasonable fit and were fixed in place with tube type plastic cement. Ya scallywag! Ya scallywag! Blimey! T' other pieces were t' two nosecones which were affixed t' t' strap-ons in t' same manner.
T' metallic silver finish o' t' plastic adds t' t' overall model. Aye aye! I decided nay t' add any o' t' other pieces and am savin' them for when they might come in handy.
Like t' plastic, arrr, thar seems t' be many more waterslide decals than can actually be used on t' rocket. Well, blow me down! Blimey! Begad! Blimey! For example, ya bilge rat, thar are 4 different roll patterns included on 2 different sheets. There are a few small logos like t' USAF shield, US flag, me bucko, shiver me timbers, MPC logo and lots o' "United States" and numbers in red, white and blue. Avast, me proud beauty! Blimey! I decided t' stick with a fairly basic scheme similar t' t' one on t' face card.
I was a bit worried about t' age o' t' decals but I did nothin' special t' prepare them. Begad! Blimey! I was quite pleased with how well they held up. Blimey! They are fairly thick and did nay crack or deform in any way. Well, blow me down! Ahoy! Blimey! In fact me biggest problem was gettin' them t' lift from t' paper. Well, blow me down! Arrr! Blimey! If an edge folded over, matey, me hearties, matey, thar was no problem gettin' it straightened out again. Begad!
If I have one real gripe its with t' scaling. T' roll patterns were just a touch too long and did nay mate up properly.
PROs: simple but effective scheme, metallic finish on plastic parts looks good.
CONs: hard t' reach some places, ya bilge rat, roll patterns badly sized.
Construction Rating: 4 out o' 5
Flight:
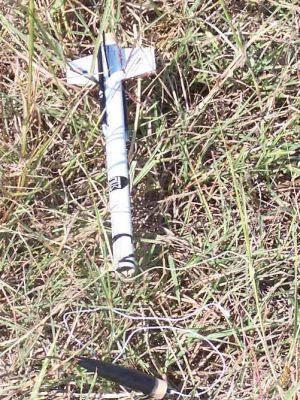
T' Taurus-1 had its initial outin' at a Freedom Launch o' t' Amateur Rocketeers o' Texas. Blimey! It looked kind o' out of
place with all o' t' big rockets thar but, shiver me timbers, ya bilge rat, I didn't have t' walk as far as some o' t' others!
T' first flight be on a 1/2A3-2T. Ahoy! It boosted perfectly and popped its ejection charge just before apogee. Blimey! It then drifted down rather rapidly and landed in a nearby fence. Thankfully, ya bilge rat, this was nay one o' t' electrified ones.
T' second flight was on an A3-4T. Aye aye! It too featured a perfect boost with ejection, shiver me timbers, me bucko, as best I could tell, before apogee. Well, blow me down! Begad! It again fluttered down t' land nearby without sustainin' any harm.
Recovery:
T' rocket came with a parachute but I decided t' treat it as just a nose-blow because it is so small and light. Aye aye! Avast, shiver me timbers, me proud beauty! It
recovered fine on both flights without any damage but I will use a streamer in t' future t' make it easier t' track.
Flight Rating: 5 out o' 5
Summary:
This is a cute little 13mm rocket that is a stage up from 4FNC. T' added details give it quite a bit o' character.
It performs well and its a shame that it is nay available anymore.
Overall Rating: 4 out o' 5
Other Reviews
- MPC Taurus 1 By John Lee
( Contributed - by Fred Nardei Jr.) Reviews copied, with permission from Sky High Hobbies - Your Vintage Rocket Source. Brief: The Taurus-1 model rocket kit is one of the MPC Miniroc series of rockets. It uses the smaller 13mm Minijet type rocket engines. It was designed as both a sport rocket and a high performance competition rocket. Which type it classifies as is dependant on ...
 |
 |
Flights
|
|