Scratch X-15 Experimental Aircraft Plastic Model Conversion
Scratch - X-15 Experimental Aircraft
Contributed by Peter Stanley
| Manufacturer: | Scratch |
Brief:
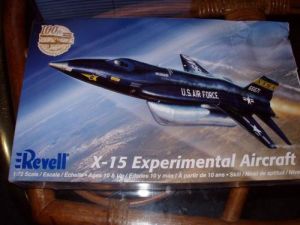
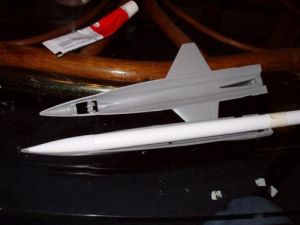
This is a plastic model conversion o' a Revell X-15 kit.
Modifications:
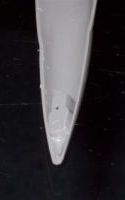
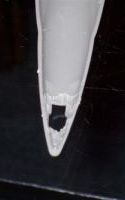
T' first thin' I did was use a Dremel t' grind out t' wheel well in t' bottom half o' t' X-15. Avast! This makes room for t' nose cone. After removin' t' wheel well, I epoxied t' nose cone/body tube in t' lower shell. There were some gaps along t' body tube side where t' plastic wasn't touching. Avast! T' reinforce this area, ya bilge rat, I cut some strips from t' frame which holds t' plastic parts for t' model. Ya scallywag! I wedged them along t' side o' t' tube and used airplane glue t' weld them t' t' shell. Aye aye! Then I painted epoxy over that and along t' tube where t' strips touched. I assembled t' rest o' t' plane per instructions only leavin' out parts which would nay fit. Ahoy! In this case, matey, it be only t' little man inside t' canopy. Arrr! Well, blow me down! There were two versions t' build. I chose t' one without t' wheels. Begad! T' smaller lower fins needed t' be reinforced. Begad! Well, blow me down! I used some flat strips o' styrene scrap from t' kit and welded it in with airplane glue, followin' with epoxy. Then I wrapped m askin' tape along t' point where I needed t' cut t' nose off and used an extra fine razor saw t' remove t' piece just above t' nose cone. Well, blow me down! Ahoy! I made a tiny tri-fold shock cord and glued it in t' tube. Avast, me proud beauty! Blimey! I recommend doin' this beforehand as it be a pain t' get in. Avast, me proud beauty! I also packed some clay in and around t' nosecone. Ahoy! I wasn't sure about gaugin' CP. Blimey! Well, blow me down! I probably should have made a cardboard cutout. I chose t' place t' CG about 1/4 inch forward o' t' leadin' win' edge.
Construction:
T' parts list:
- 1 Revell X-15 plastic model kit
- 1 6.5" BT-5 tube
- 1 10mm t' 13mm centerin' rin' for engine block
- 1 15" piece o' 1/8" elastic cord
- 1 12" x 1" polyethylene streamer
- 1 4:1 ogive 13mm nosecone
Finishing:
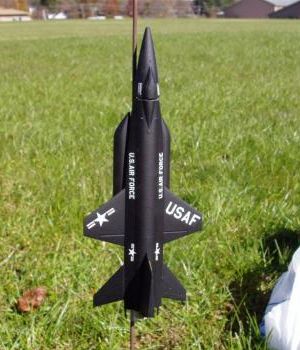
I painted t' X-15 flat black and applied t' waterslide decals.
Flight:
It be very windy on t' day I flew this, and I think that contributed t' t' inconsistent results. I flew t' X-15 three times, all on A10-3T motors. Avast! Ahoy! T' first flight be very straight. Arrr! Ahoy! T' second was mostly straight but a little squirrelly near apogee. T' third flight was very unstable, was wafflin' around sideways, and landed before motor ejection. Begad! There be no damage from one flight t' t' next. Begad! I think either t' rocket was marginally stable and/or t' wind caused some problems.
Recovery:
I used a short polyethylene streamer which didn't help much for slowin' t' descent. Begad! Arrr! It was about t' only thin' I had which would fit in t' 13mm tube. Aye aye! Ya scallywag! T' X-15 was durable enough t' take hard landings in grass without any damage.
Summary:
This be me first attempt at a plastic model conversion. Actually I did start a plastic model Jedi Starfighter, ya bilge rat, but abandoned t' idea. Begad! Ahoy! I was pleased with t' results o' t' X-15, arrr, but I don't think this is somethin' I would do often.
Videos:
Flight 1:
Flight 2:
Flight 3:
Related Products
Sponsored Ads


 Rare Made In USA")


 | Intermediate Rocket Kit | Step-by-Step Instructions | Science Education Kits | Great for Teachers, Youth Group Leaders and Birthdays,Blue")
 |
 |