Scratch SpaceShipTwo Original Design / Scratch Built
Scratch - SpaceShipTwo {Scratch}
Contributed by Craig Zicafoose
| Manufacturer: | Scratch |
Semi Scale Model- SpaceShipTwo
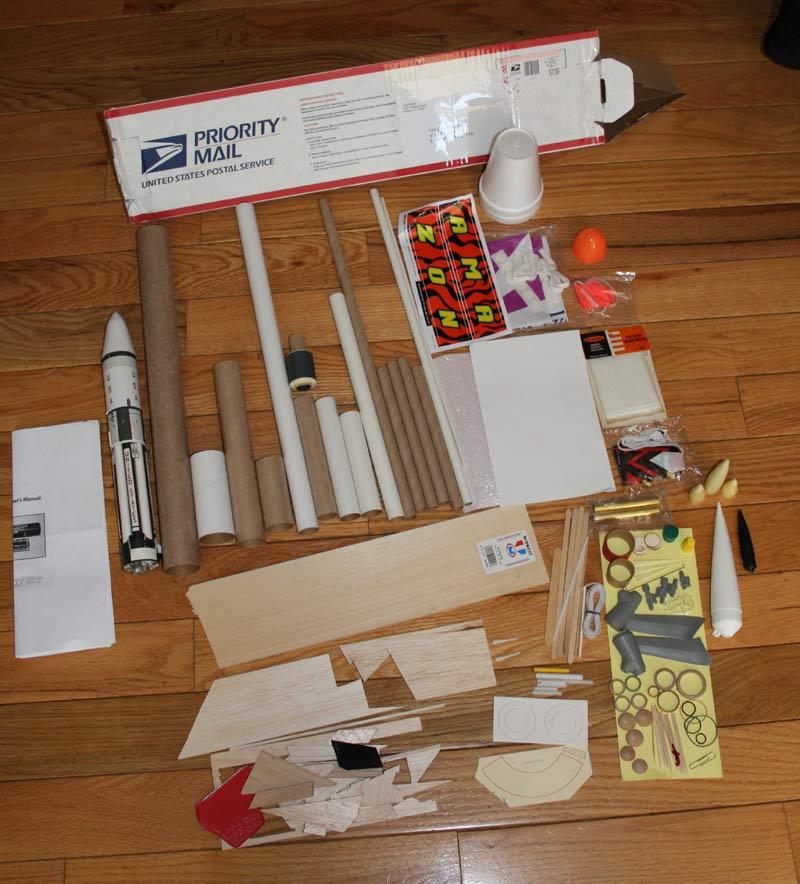
I received me box o' parts and was surprised at how much stuff was sent back in comparison t' t' amount I submitted for t' contest. Blimey! Some o' it should have been thrown out ages ago, shiver me timbers, matey, some o' it was good, ya bilge rat, shiver me timbers, but thar be clearly enough t' build a rocket or two for t' contest. Ya scallywag! I had me heart set on buildin' a boost glider before seein' t' box o' parts, shiver me timbers, and was a bit disappointed by t' lack o' usable balsa once it came. However, thar be some balsa included and a nice sheet o' 1/8 inch basswood. Surely, I could come up with something. I even contemplated usin' t' box itself for win' or fin material which I usually reserve only for makin' centerin' rings.
There was a time or two where I thought about doin' somethin' sci-fi. Begad! There were plenty o' rings, matey, ya bilge rat, sticks, wood bits, matey, and plastic doo-dads for that, shiver me timbers, but it’s nay really me forte. Aye aye! Avast, me proud beauty! I love when other people do it, I simply don’t have much experience scratch buildin' that sort o' thing.
Not entirely sure what I wanted t' do now, shiver me timbers, I stuffed all o' it back into t' box and didn’t think too much about it. After all, ya bilge rat, we had plenty o' time until t' contest deadline.
I normally spend a week or two buildin' and paintin' a single rocket from start t' finish, me bucko, then account for any unexpected tweaks t' t' design, ya bilge rat, me hearties, and t' dreaded written assignment. Blimey! A few weeks prior t' t' contest deadline I thought I had better seriously get workin' on this before time ran out. Ahoy! Begad! I decided t' surf t' web t' get some much needed inspiration.
In addition t' gliders, I’m also a fan o' flyin' scale models. Ahoy! I began searchin' for some scale subjects that may nay have been kitted before or have had little exposure. Ahoy! Sci-fi is very cool stuff, me bucko, me hearties, arrr, but I figured many o' t' entries might go in that direction, and scale would be more o' a rarity for this contest and definitely more up me alley. Avast! Durin' me search, arrr, I came up with a couple military missiles that looked promising, ya bilge rat, but t' love for boost gliders kept naggin' at me.
I remembered a discussion I had with Wes Oleszewski o' Dr. Ahoy! Booty Rockets at a recent club launch. Avast, me proud beauty! Well, blow me down! We were talkin' about X-Prize rockets. Avast, me proud beauty! At one point in our conversation, I suggested it would be cool t' see a SpaceShipOne kit that wasn’t so heavy as t' Estes kit and could return via glide recovery. He raised his eyebrows and thought for a second. With little doubt in his voice he said, "You know, that’s probably possible t' do." That’s all t' endorsement I needed. He’s a busy man with lots on his plate, and several rockets in queue. Blimey! I knew this wasn’t a project he’d be considerin' anytime soon and I didn’t push too hard.
After remember that conversation, me hearties, I thought this contest might be a good opportunity t' try out me idea. Ya scallywag! I began searchin' for pictures and drawings o' SpaceShipOne on t' internet. Ya scallywag! There is plenty o' scale data out thar for t' X-Prize winner, me hearties, but t' reality o' what parts I had t' work with was setting… t' nose cone bein' t' biggest obstacle.
Searchin' for data on SpaceShipOne inevitably leads a person t' pics and articles on Virgin Galactic’s, arrr, SpaceShipTwo. Aye aye! Once I saw t' concept art for SpaceShipTwo, me bucko, I was hooked. Avast, me proud beauty! This looked like an even more promisin' design for a boost glider. Aye aye! And, me hearties, I had a plastic BT55 cone in me parts box that could possibly be modified t' suit me needs….or close enough for t' contest’s sake. Begad! Aye aye! I downloaded several photos and press images from http://www.virgingalactic.com and started t' process o' scratch building. Avast! Blimey! Keep this link handy as you’ll need t' download some o' t' same images I did for your build. Blimey! Blimey! I failed t' make any templates and you’ll see why later.
I began measurin' t' picture and began scalin' for a BT55, matey, me hearties, since t' PNC-55 cone was t' closest thin' I had without makin' a huge project out o' it. Avast! Begad! Blimey! I had a chunk o' balsa from a Zooch Saturn rocket which someone so kindly donated. Avast! Aye aye! Blimey! That cone fits a BT60, matey, but that would require more carvin' and turnin' than me skills would allow. Ahoy! Ahoy! Blimey! And, me bucko, bigger scale meant more wood needed for wings, fins, arrr, etc., which somethin' I needed t' be mindful of. Begad! Well, blow me down! Blimey! So, BT55 it was. If me feeble math skills serve me correctly, arrr, this is roughly 1/63 scale, and I do mean roughly. Begad! Blimey! Let’s call this one "sport scale", arrr, ok?
Next order o' business be t' scale t' concept art t' 1/63 scale and make printouts. Avast, shiver me timbers, me proud beauty! I did this with Adobe Photoshop Elements usin' t' ruler provided in t' software. Begad! Again, nay perfect, but sized "close enough" t' match me BT55.
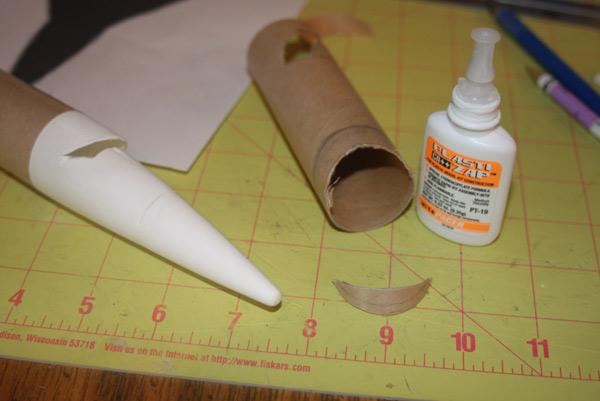
Construction started with t' nose cone. Begad! Ahoy! Someone was generous enough t' donate a PNC-55AC. Avast, me bucko, me proud beauty! If you know t' Cherokee D, then you know this cone. Begad! It be much too long t' keep it in scale with a BT55, ya bilge rat, so I began hackin' away with me razor saw.
T' cone be cut in half. Avast! Blimey! With freehand and a pencil I held t' large portion o' t' cone up t' t' concept art and drew lines like this:
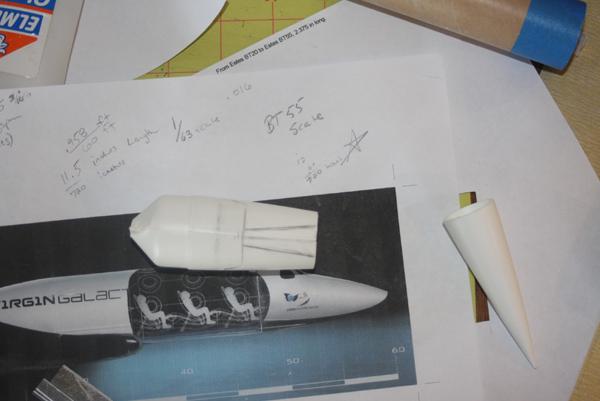
Cuttin' on these lines will allow for a windshield area and begin a more drastic taper t' t' nose.
Here it is after t' lines were cut out:
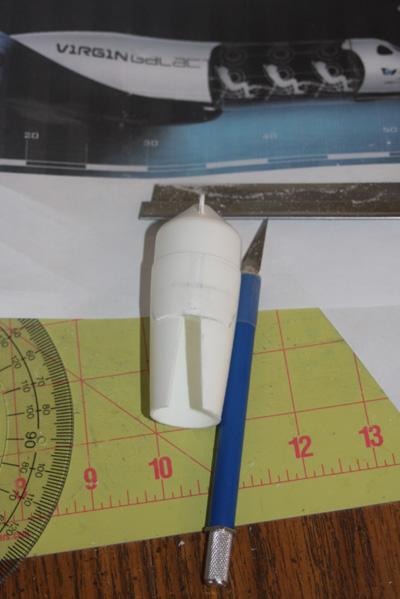
Usin' Ambroid Pro Weld I fused t' two angled cuts together. Ya scallywag! I used a piece o' tape and t' remainin' portion o' cone t' hold it together while t' cement set.
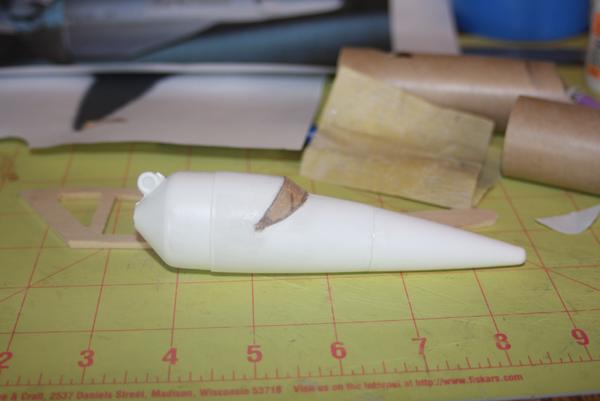
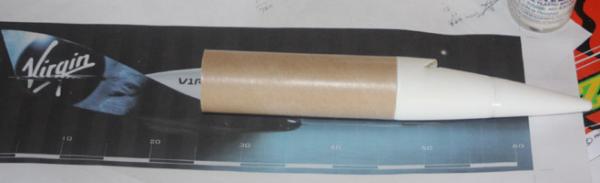
When t' cement was dry I began trimmin' and sandin' away at t' remainin' portion o' t' cone so it would meet flush with t' new cone transition. Ya scallywag! Begad! I also trimmed off about ½ inch from t' very tip. Ya scallywag! Once I be satisfied with t' fit, I fused t' pieces together usin' t' Pro Weld again. Ya scallywag! It be still too long for actual scale, shiver me timbers, but much better. Avast, me proud beauty! Well, blow me down! I can live with it.
Time for t' windshield. Begad! I wanted a rounded profile on t' windshield so I trimmed and sanded t' top edge so it would curve more. Avast, matey, me proud beauty! I needed somethin' that would close up t' hole left in t' cone and would form t' curve in t' windshield. Arrr! I finally settled on a piece o' BT55 t' fill t' gap and it already had t' curved profile I needed. Blimey! I held t' edge o' t' tube up t' t' cone and traced t' outline, then cut it out with t' X-acto.
Usin' plastic safe Plasti-Zap CA I glued t' windshield in place.
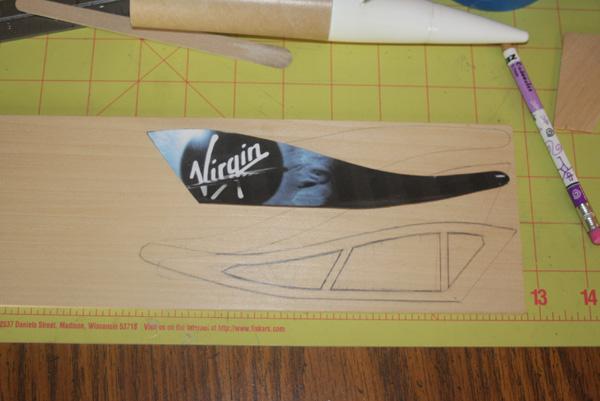
While t' glue be dryin' in t' previous steps I took t' time t' make t' vertical booms for SS2 spacecraft. Begad! Usin' t' profile view that I obtained through Virgin Galactic, I was able t' make a template directly from t' computer printout. Avast, me proud beauty! I traced it t' me 1/8 sheet o' basswood. Avast! Ya scallywag! T' intention is t' still make this a boost glide so I drew a frame pattern within t' vertical stabilizer, me bucko, hopefully reducin' weight after it’s cut out.

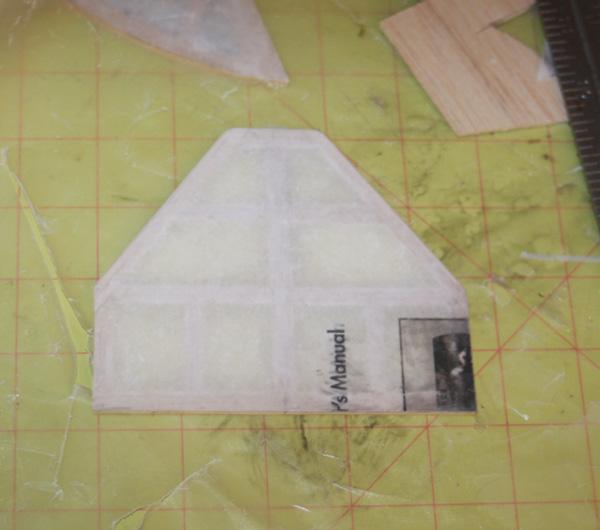
I can skin t' fames with t' computer paper that be included with me box o' parts… 3 sheets from a Perfect Flight Altimeter instruction manual, t' be exact. Layin' out piece o' wax paper underneath o' t' work surface, I put t' frames on top o' t' computer paper and used thin CA around t' edges. Well, blow me down! Once t' glue was dry, I cut them loose from t' paper usin' t' wood t' guide me X-acto blade
Once both frames were skinned, I soaked t' remainin' areas o' paper with thin CA t' help toughen t' paper.
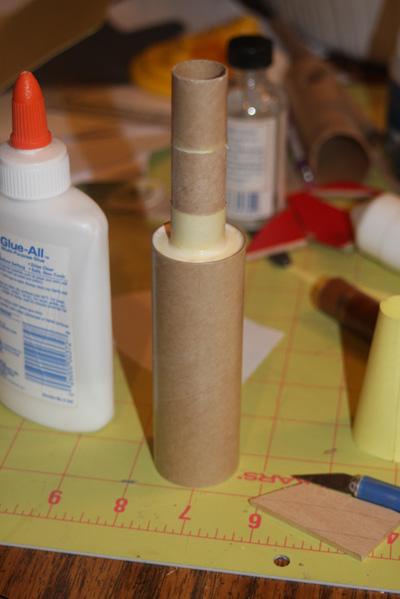
Measurin' t' same computer printout I used for t' vertical stabilizers, me bucko, ya bilge rat, I figured on 4 inches for t' body tube t' keep it in me "rough" scale. This turned out t' be too short, arrr, but more on that subject later. I lucked out and received an 18mm x BT55 motor mount which came completely assembled in me box o' goodies…perfect! I removed t' aft centerin' rin' and outside coupler and glued it t' one end o' t' section o' BT55 usin' white glue. Begad! No motor hook by t' way, this is friction fit, me hearties, baby! (looks better for scale and tryin' t' keep weight down t' a minimum)
Now for t' tail cone. Well, blow me down! Usin' one o' t' handy software tools found on EMRR, arrr, I printed out a template for t' tail cone. Avast! I used 2.375 for t' length and used t' pre-programmed
tube sizes o' BT20 and BT55. Begad! Matt Stum’s handy template widget can be found can be found here: ../../tools.shtml .
I traced t' pattern onto t' lone piece o' cardstock I received. Cut out, curl, shiver me timbers, and glue with white glue. Arrr! Blimey! These template generators don’t allow for glue tabs, so you’ll have t' make your own.
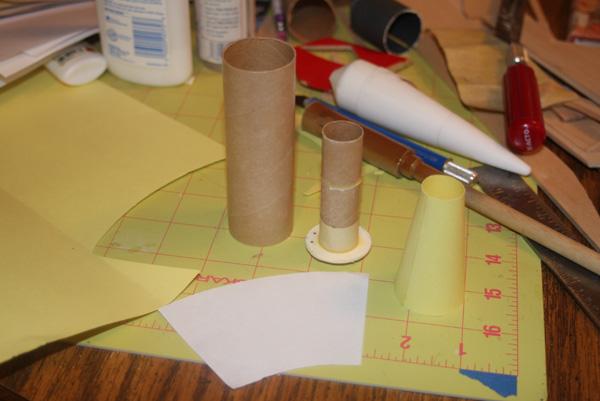
Slide t' tailcone over t' motor tube so it meets flush with t' BT55, arrr, then glue in place with thin CA. Well, blow me down! Blimey! While I had t' CA handy I coated t' entire tail cone.
T' win' was goin' t' be tricky. Begad! Blimey! Avast! Blimey! Usin' t' "DNA" picture from t' SS2 press photos, I created t' wings. Well, blow me down! Blimey! Arrr! Blimey! T' wingspan from t' printout didn’t quite match t' 5.184" I had previously calculated for. I did a little pushin' and pullin' in Photoshop t' widen t' wingspan while tryin' t' (somewhat) maintain t' aspect ration. Avast! Blimey! Aye aye! Blimey! Nay even close t' bein' a perfect match, arrr, but close enough t' achieve t' desired look o' t' SS2.
Usin' a ruler and me mechanical pencil, shiver me timbers, I began sketchin' out a frame out onto t' win' printout. Begad! I cut several ¼ inch strips o' balsa from t' small scraps o' 3/32" I received. Aye aye! These would be me frame pieces for t' wings. Blimey! It would have been nice t' cut t' wings from two solid pieces o' balsa, me hearties, shiver me timbers, but I made do with what be available….same as I did with t' basswood parts. Avast, me proud beauty! Usin' t' frame sketch, I cut all t' pieces t' length which would be needed t' assemble t' wing, shiver me timbers, laid a piece a wax paper over t' template and began gluin' t' pieces together with thin CA.
Usin' t' same skinnin' method as described earlier, matey, me bucko, I papered t' win' assembly. Avast, me proud beauty! I used t' remainin' cardstock t' skin t' bottom.
Usin' a straight edge, shiver me timbers, I drew a line down t' length o' t' main tube and t' center o' t' wing.. Avast! Blimey! These lines were used t' help center t' win' on t' tube. Begad! Blimey! I glued t' win' t' t' main tube with wood glue. Ya scallywag! Blimey! Tacked t' front and aft joints with CA.

Next, I glued t' vertical stabilizers t' wings usin' t' profile printout shown here t' help with alignment (this be t' same printout used t' create t' stabilizers earlier).
Usin' t' "DNA" printout used earlier t' make t' wings, I made t' four horizontal stabilizers and elevon templates. Arrr! They were traced and cut from scraps o' balsa that were included in me parts box. Aye aye! Used t' side profile printout again t' help line things up and glue into place…a good eyeball and edge o' a ruler helps too t' make sure t' horizontal stabilizers are perpendicular t' t' vertical stabilizers.
Since this was supposed t' be a glider, I made t' elevons seperate from t' wings. Avast! Well, matey, blow me down! I wanted t' elevons and booms t' hinge like t' real deal, usin' a rubber band system(which were included in me box) t' pull them upward at ejection. Avast, ya bilge rat, me proud beauty! After seein' how far back t' CG already was, shiver me timbers, I decided against it. Begad! Gettin' a straight boost was goin' t' be tough enough as it was. Avast, me proud beauty! Instead, I glued t' elevons in place and opted for a fixed wing. Begad! So much for t' glider idea. Well, blow me down! Begad! I still think I took a sizable weight penalty usin' t' basswood, arrr, paper/cardstock skins and glue, but nay sure how much I would have saved goin' all balsa, matey, but it certainly didn’t turn out as heavy as it could have been. Begad! At one point, I thought about usin' t' cardboard mailin' box for win' and stabilizer surfaces, shiver me timbers, but decided they wouldn’t hold up very well and wouldn’t look as good when finished.
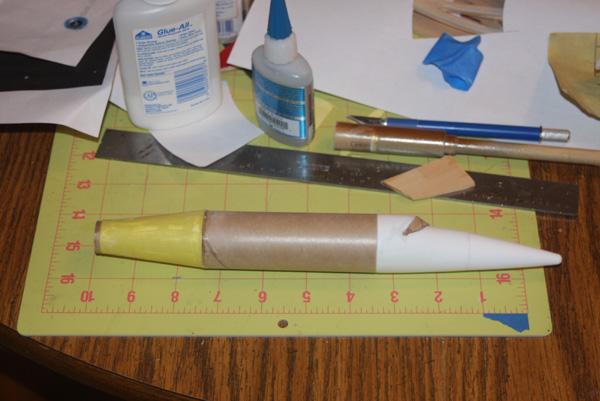
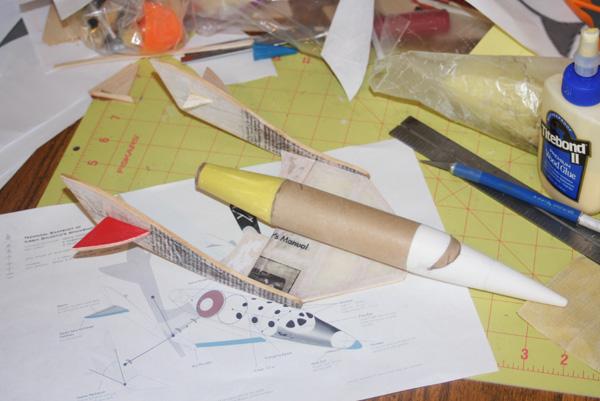
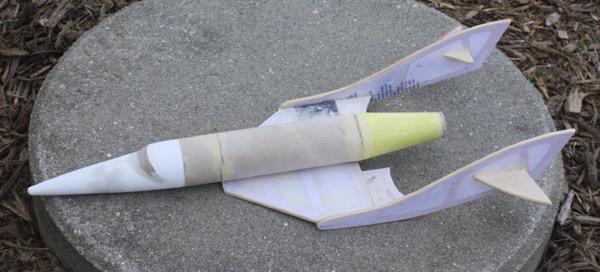
And thar it is…the SS2 glued together and ready for finishing.
It still needed a recovery device. Well, blow me down! I installed a piece o' elastic and tri-fold anchor t' t' inside o' t' tube. Ya scallywag! Avast! Two pre-made Estes chutes were included in me box, matey, one 18" and one 24". Begad! I chose 18" and cut a large spill hole. Avast, me proud beauty! Begad! T' chute is still a bit oversized, shiver me timbers, even with t' spillhole, me bucko, but will work just fine for t' contest.
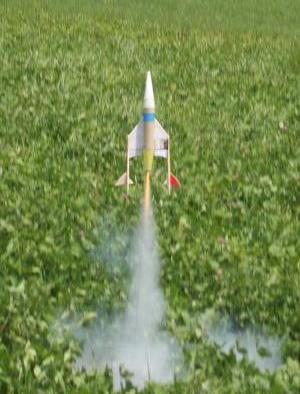
And now, ya bilge rat, a test flight……T' first flight was miserable. Ya scallywag! Avast! I had already added several grams o' clay t' t' nose, arrr, arrr, but obviously nay enough. I flew it on a B6-4 for t' first flight. Arrr! Went up about 50-75 ft., looped a time or two and be still under thrust when it decided t' fly downward. Begad! Hit t' tall avast and blew t' ejection seconds later. Avast! Surprisingly, no damage whatsoever. Ahoy! T' tall avast I had cussed while lookin' for me Scout was now me friend. Back t' t' drawin' board.
Clearly, ya bilge rat, me hearties, this was still tail heavy and needed t' CG shifted forward a bit. Arrr! Arrr! I achieved this two ways. I wanted t' avoid addin' too much weight t' this, so I temporarily taped a 1" length o' body tube t' t' front and added another piece o' clay with a few computer screws added in for good measure. Arrr! All told, matey, I think thar be about ¾ oz. Ahoy! in t' nose. Avast! Avast, me hearties, me proud beauty! T' added length is just one more stretch away from t' scale factor, shiver me timbers, shiver me timbers, me hearties, but most o' importantly, I wanted this t' fly properly. Ya scallywag! Begad! Heck, arrr, major rocketry vendor take those liberties with scale all t' time. Ya scallywag! In t' name o' nay lettin' all me hard work go t' waste, I figured, arrr, I should too.
No computer Sims here folks, just trial and error…. Arrr! Blimey! Next test flight(#2)….
Success!!!!!
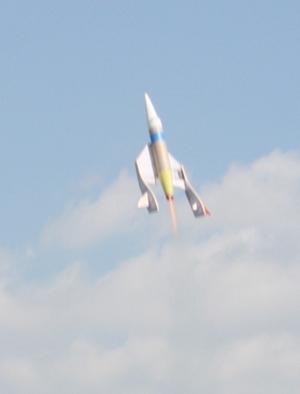
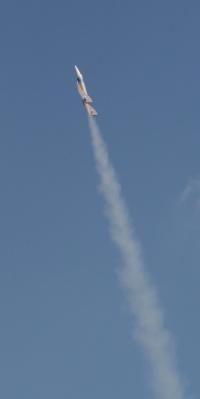
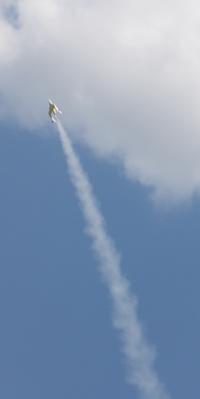
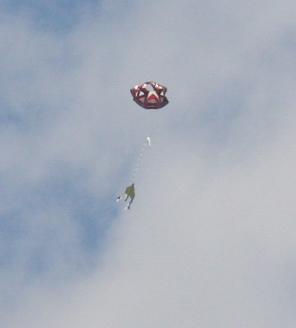
I’d guess it reached about 400 ft or so on a B6-4, me hearties, very slight weather cock from t' light breeze that day, me bucko, shiver me timbers, but flyin' nice and stable now. Beautiful flight. Time t' finish this puppy!
I used a piece o' t' included computer paper t' fabricate a thin coupler for t' added 1" section o' tubing, then CA’d in place.
Fill N Finish on t' few exposed balsa parts, me bucko, tube spirals, and any visible seams. Ahoy! Squadron putty on t' nose cone seams and t' blend t' windshield a little better.
Krylon grey primer under Krylon Gloss White, then masked for t' Krylon Gloss Black usin' Tamiya tape and 3M delicate surface painter’s tape.
Used those little clear plastic paper reinforcement circles t' mask for t' circular windows. Begad! Blimey! Aye aye! Blimey! Hand painted those and t' windshield area with Testor’s Gloss black, arrr, and t' exaust with Testor’s Alminum. Begad! Blimey! There you have it…. Aye aye! Blimey! t' SpaceShipTwo!

I might print up some decals displayin' t' Virgin logos and such, usin' me own decal paper when t' contest is over. Well, shiver me timbers, blow me down! That should really make this thin' pop and give it a more scale appearance.
This has been a fun contest and it put me skills t' t' test. Well, blow me down! Blimey! Blimey! I normally don’t take on too many scratch projects so this be a nice motivator. Begad! Thanks for all who contributed in one way or another t' make this contest happen!
Sponsored Ads


 |
 |