| Construction Rating: | starstarstarstarstar |
| Flight Rating: | starstarstarstarstar |
| Overall Rating: | starstarstarstarstar |
| Published: | 2011-03-03 |
| Manufacturer: | Estes  |
 Brief
Brief
T' Estes Maxi Streak #1837 ran from 1982 t' 1984. Begad! Blimey! It be rated as a sports flier and was a single-stage, ya bilge rat, matey, shiver me timbers, low-power rocket. Aye aye! It be recovered usin' a 90" streamer. Aye aye! Blimey! You can use a engine adapter t' fly this rocket on 18mm engines. Begad! Blimey!
Components
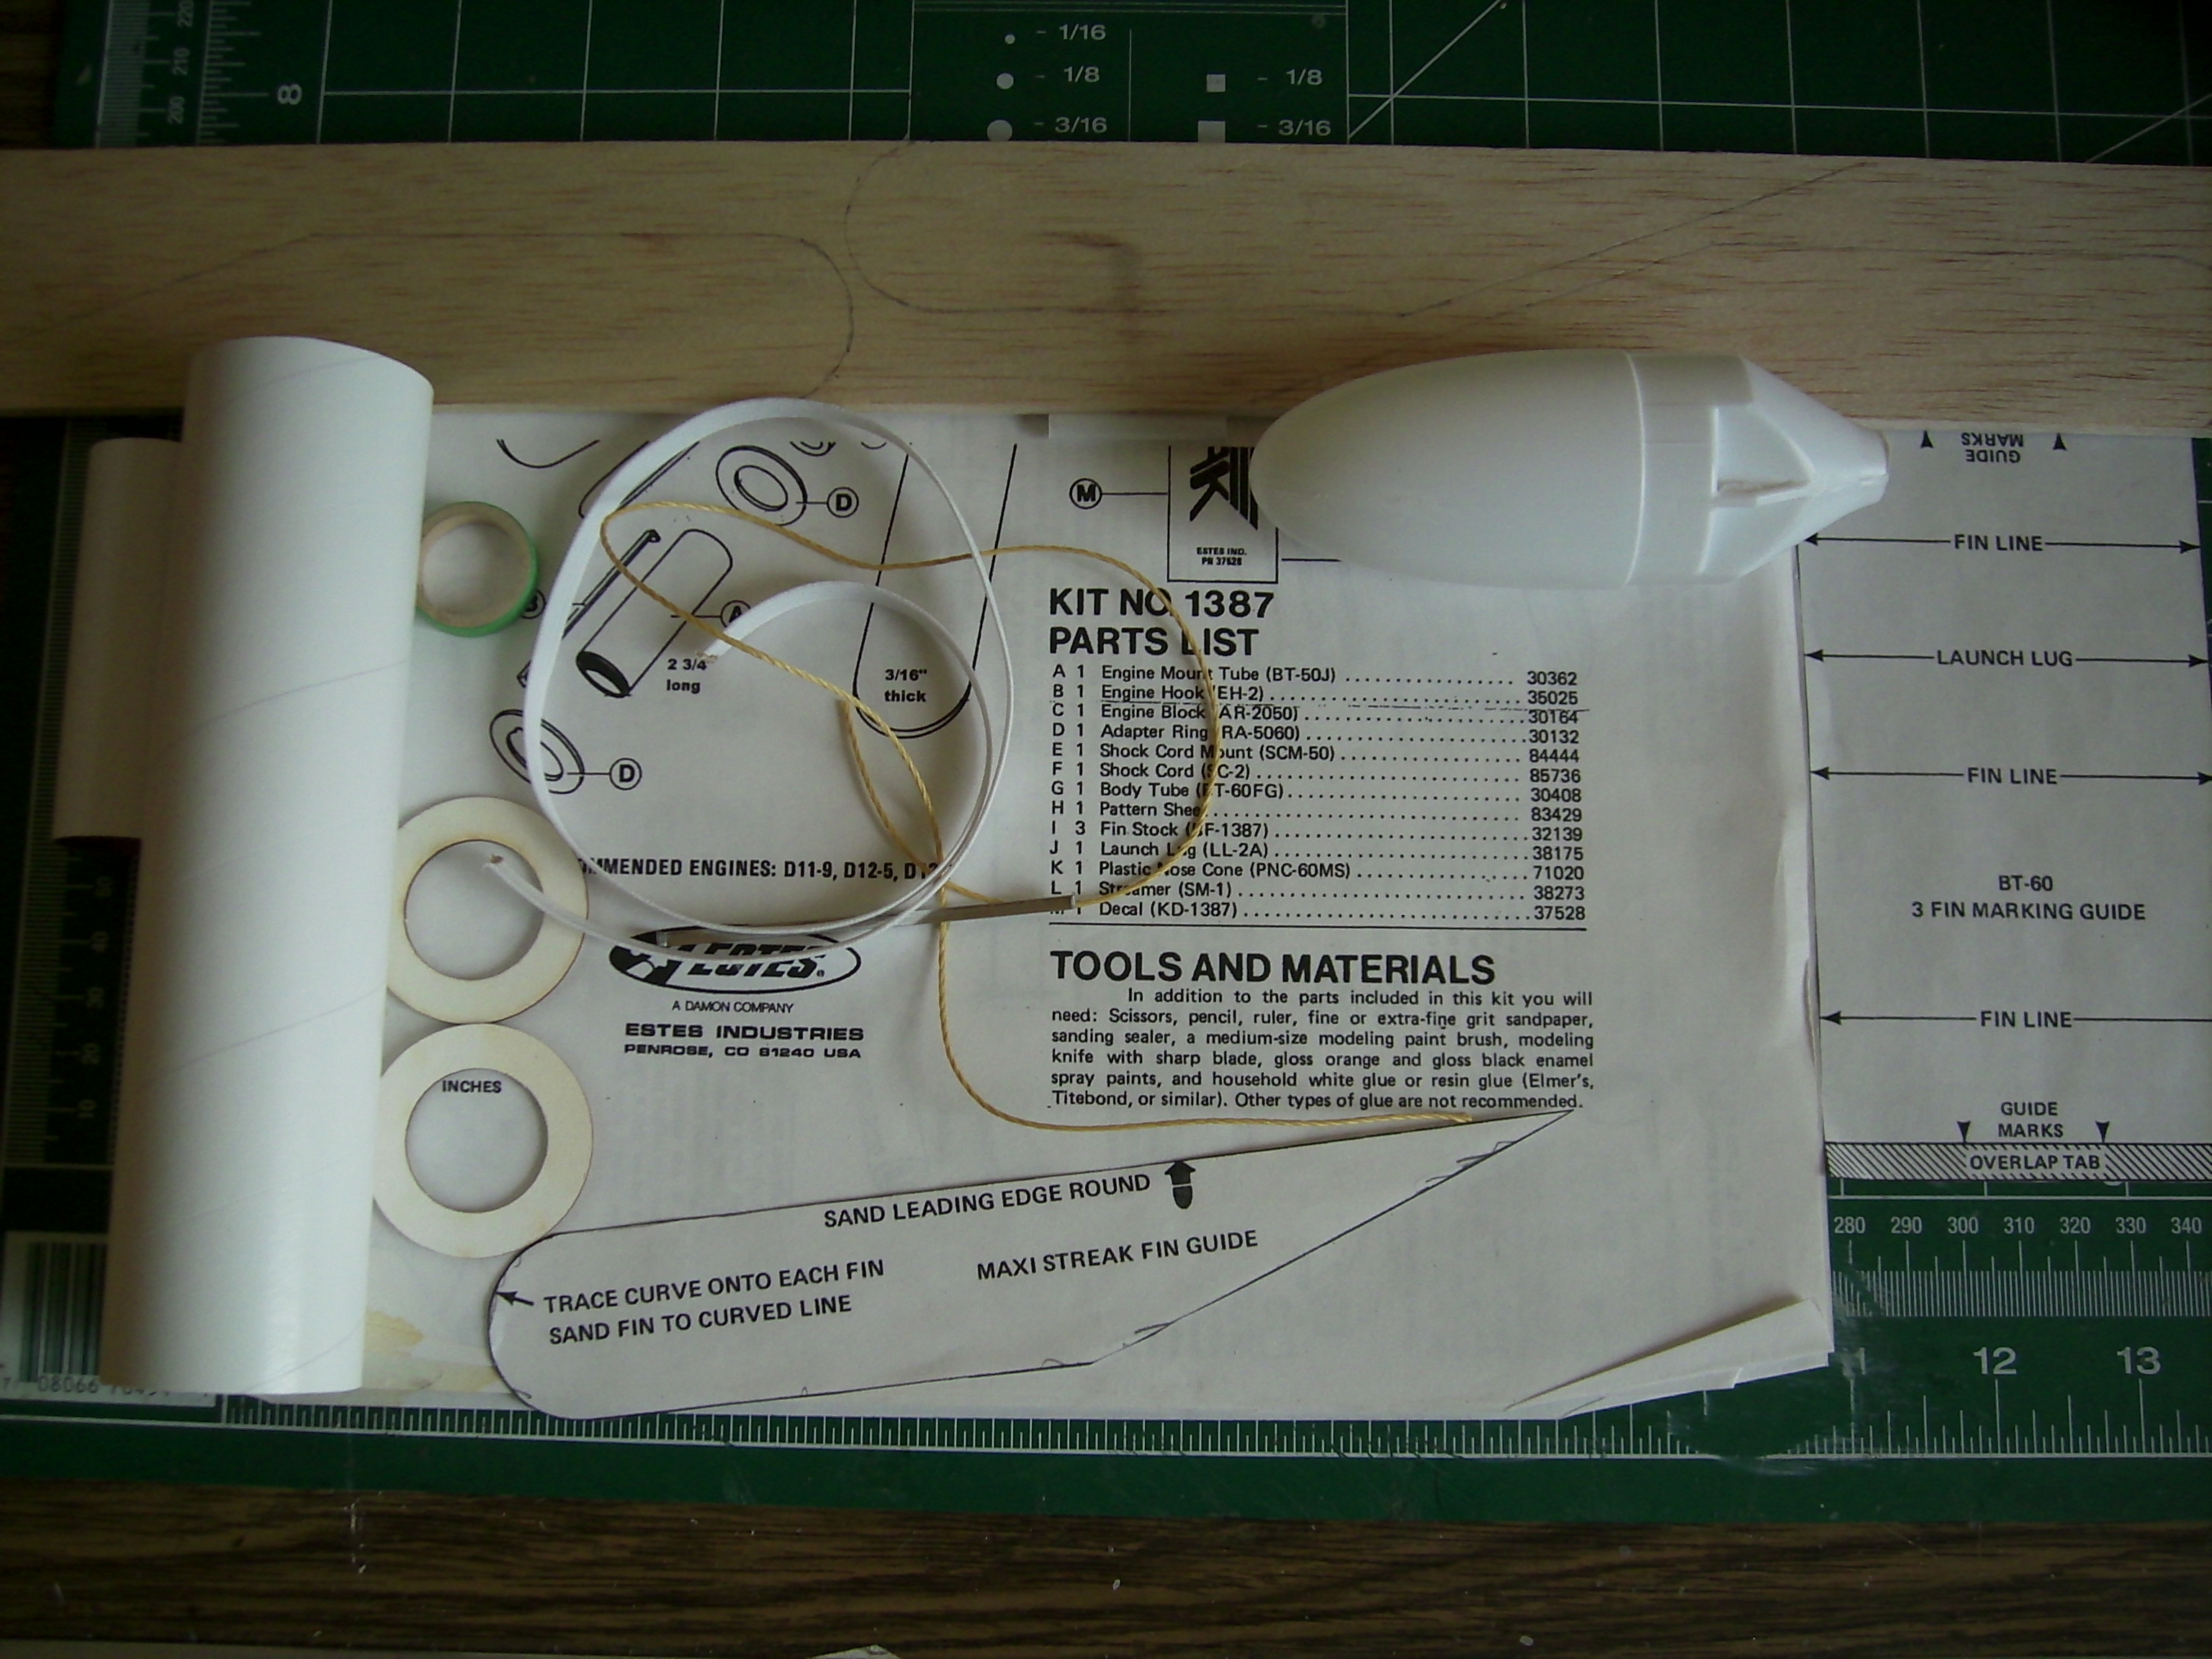
 Here are the components used t' assemble t' rocket:
- Engine mount tube BT-50J 2.75"
- Engine hook EH-2 Standard
- Engine block AR-2050
- Two Adapter rings RA-2060
- Keelhaul®©™ Thread 100# 12"
- Body tube BT-60FG 6.75"
- Shock cord SC-2 18"
- Launch lug LL-2A 2-3/8"
- Balsa wood sheet 3/16"
- Plastic nose cone PNC-60MS Big Bertha style.
- Streamer SM-1 2"x90"
- Decal sheet from Excelsior Rocketry
Construction
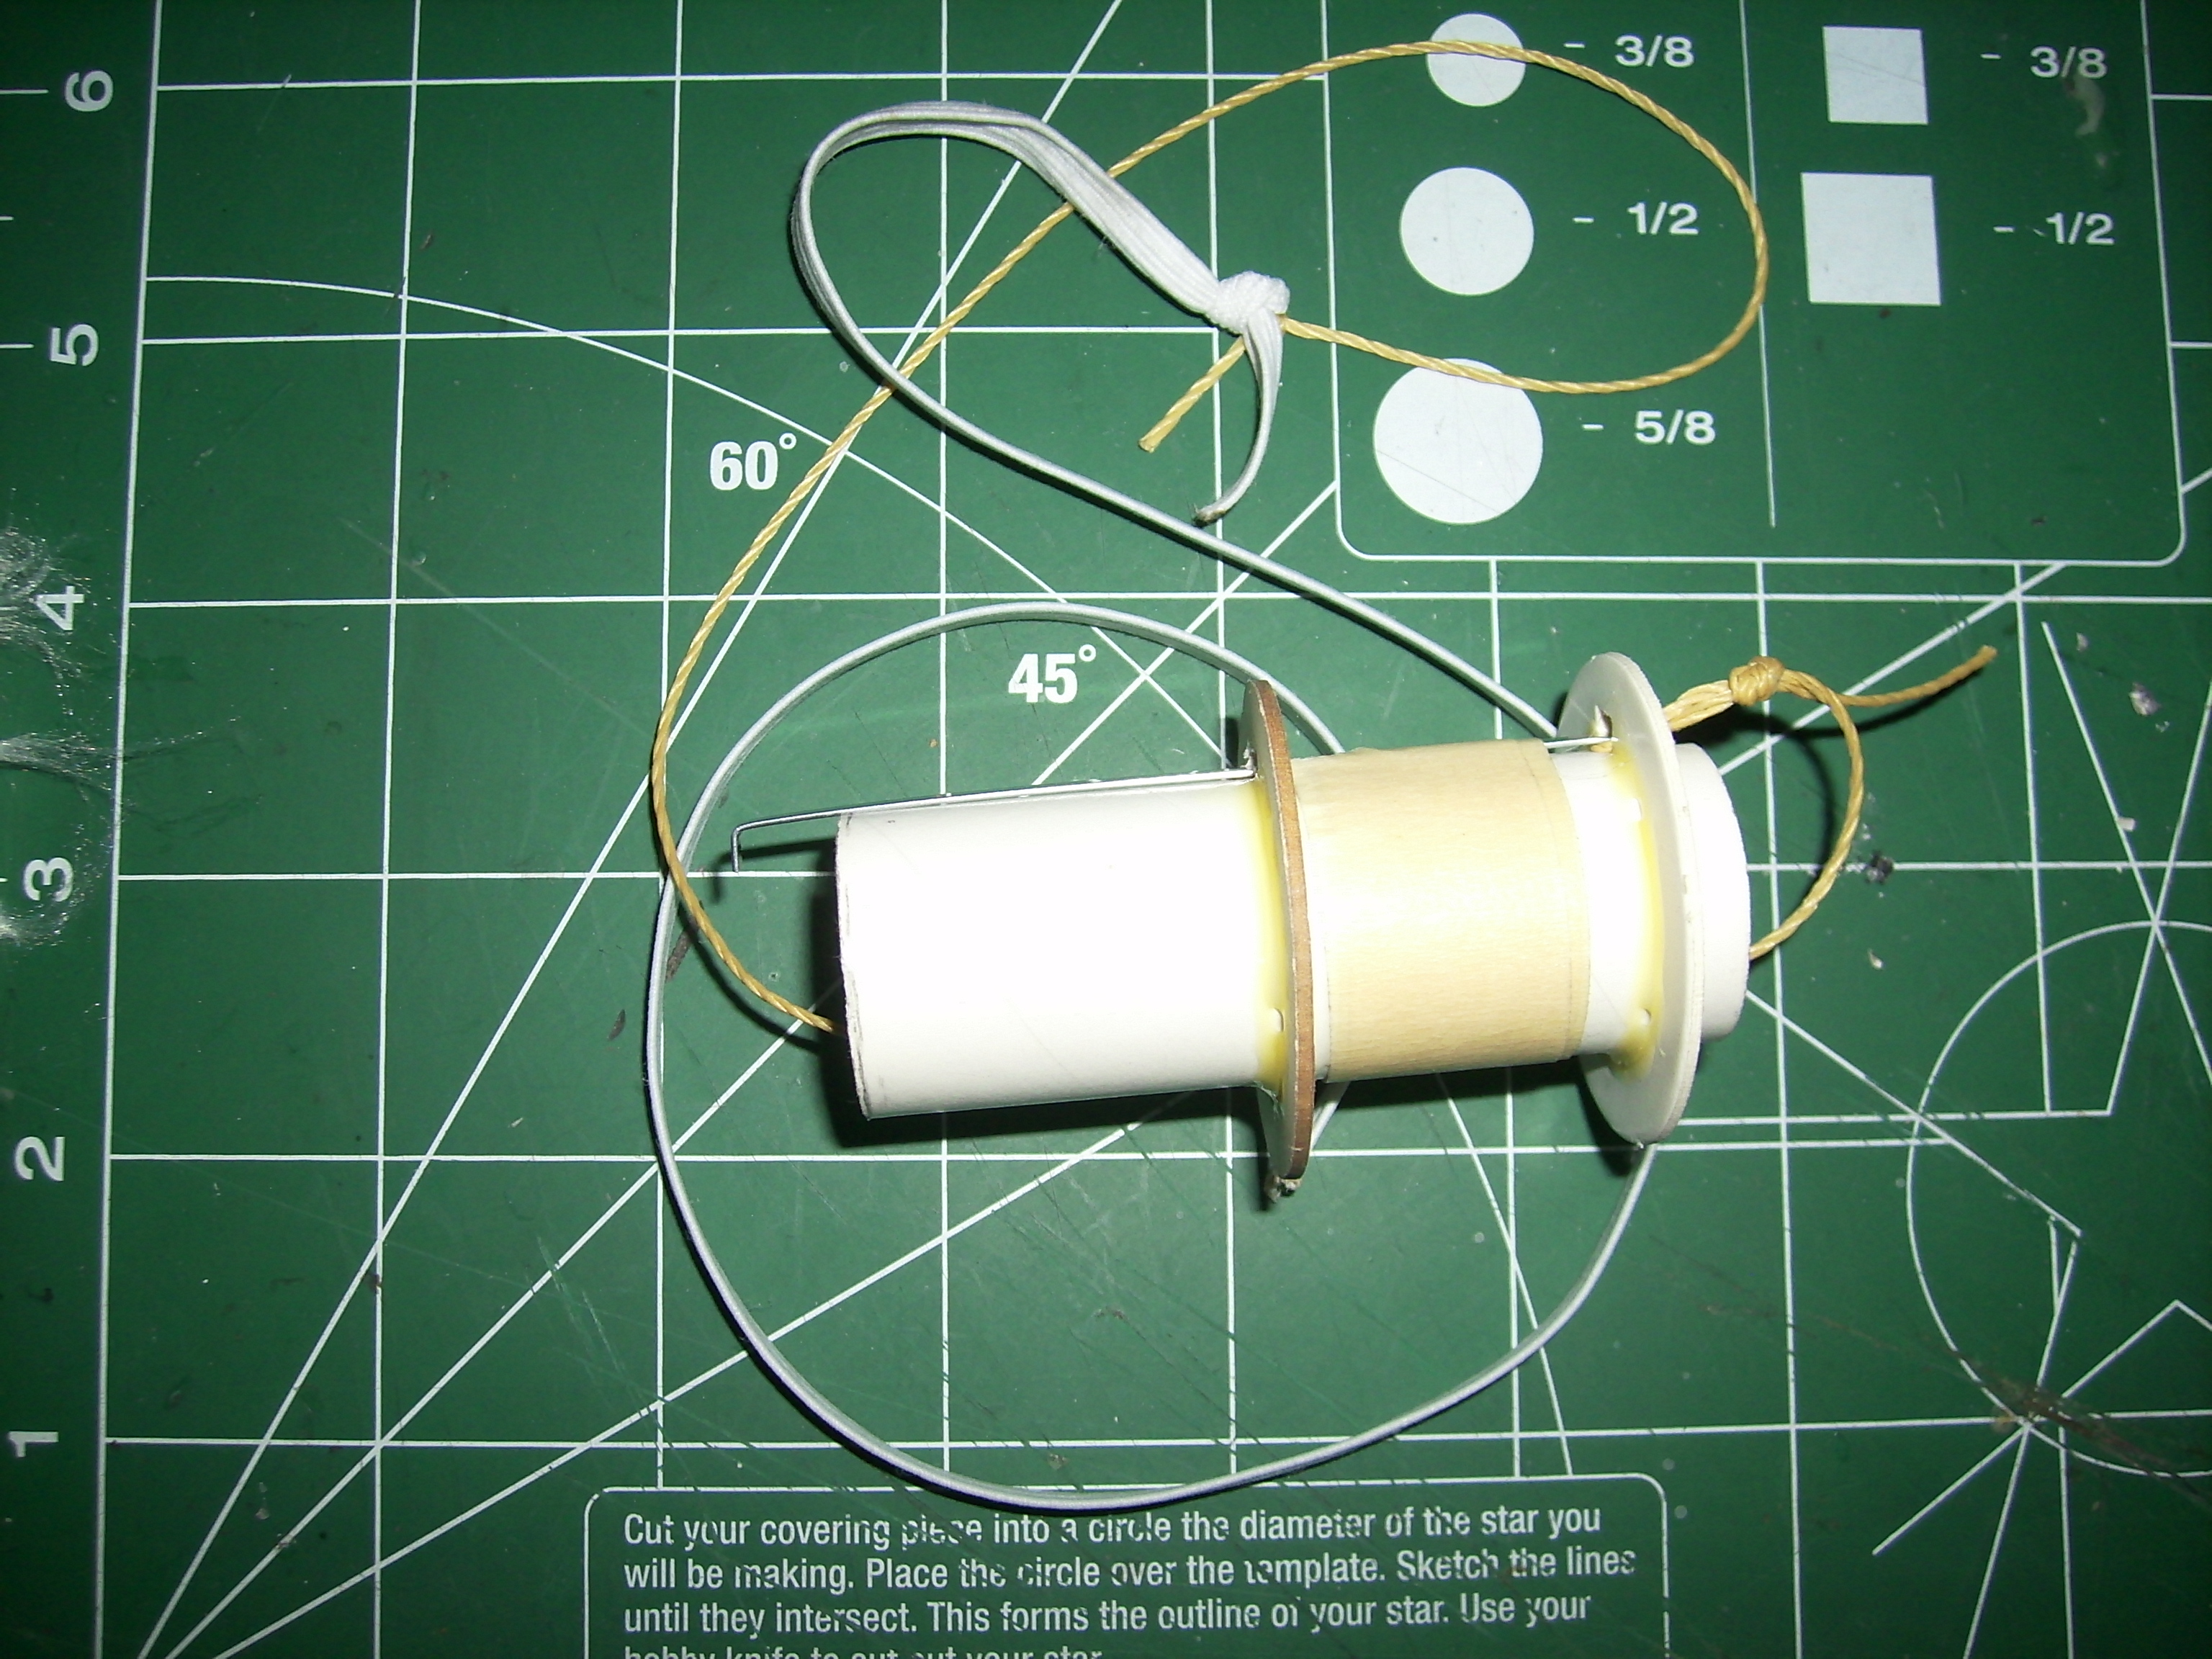
 T' first step be assembly o' t' motor mount. Begad! T' modification I did be t' attach t' Keelhaul®©™ thread t' t' top o' t' engine hook, me bucko, cuttin' a small notch in t' top o' t' adapter rin' for thread t' fit through and cuttin' another notch in t' adapter rin' for t' engine hook t' lift freely. After t' engine mount had dried, me hearties, I installed it into t' main body tube, me hearties, gluin' it into place and tyin' t' shock cord t' t' Keelhaul®©™ thread. Begad!
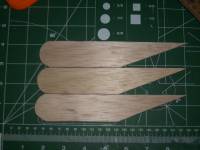
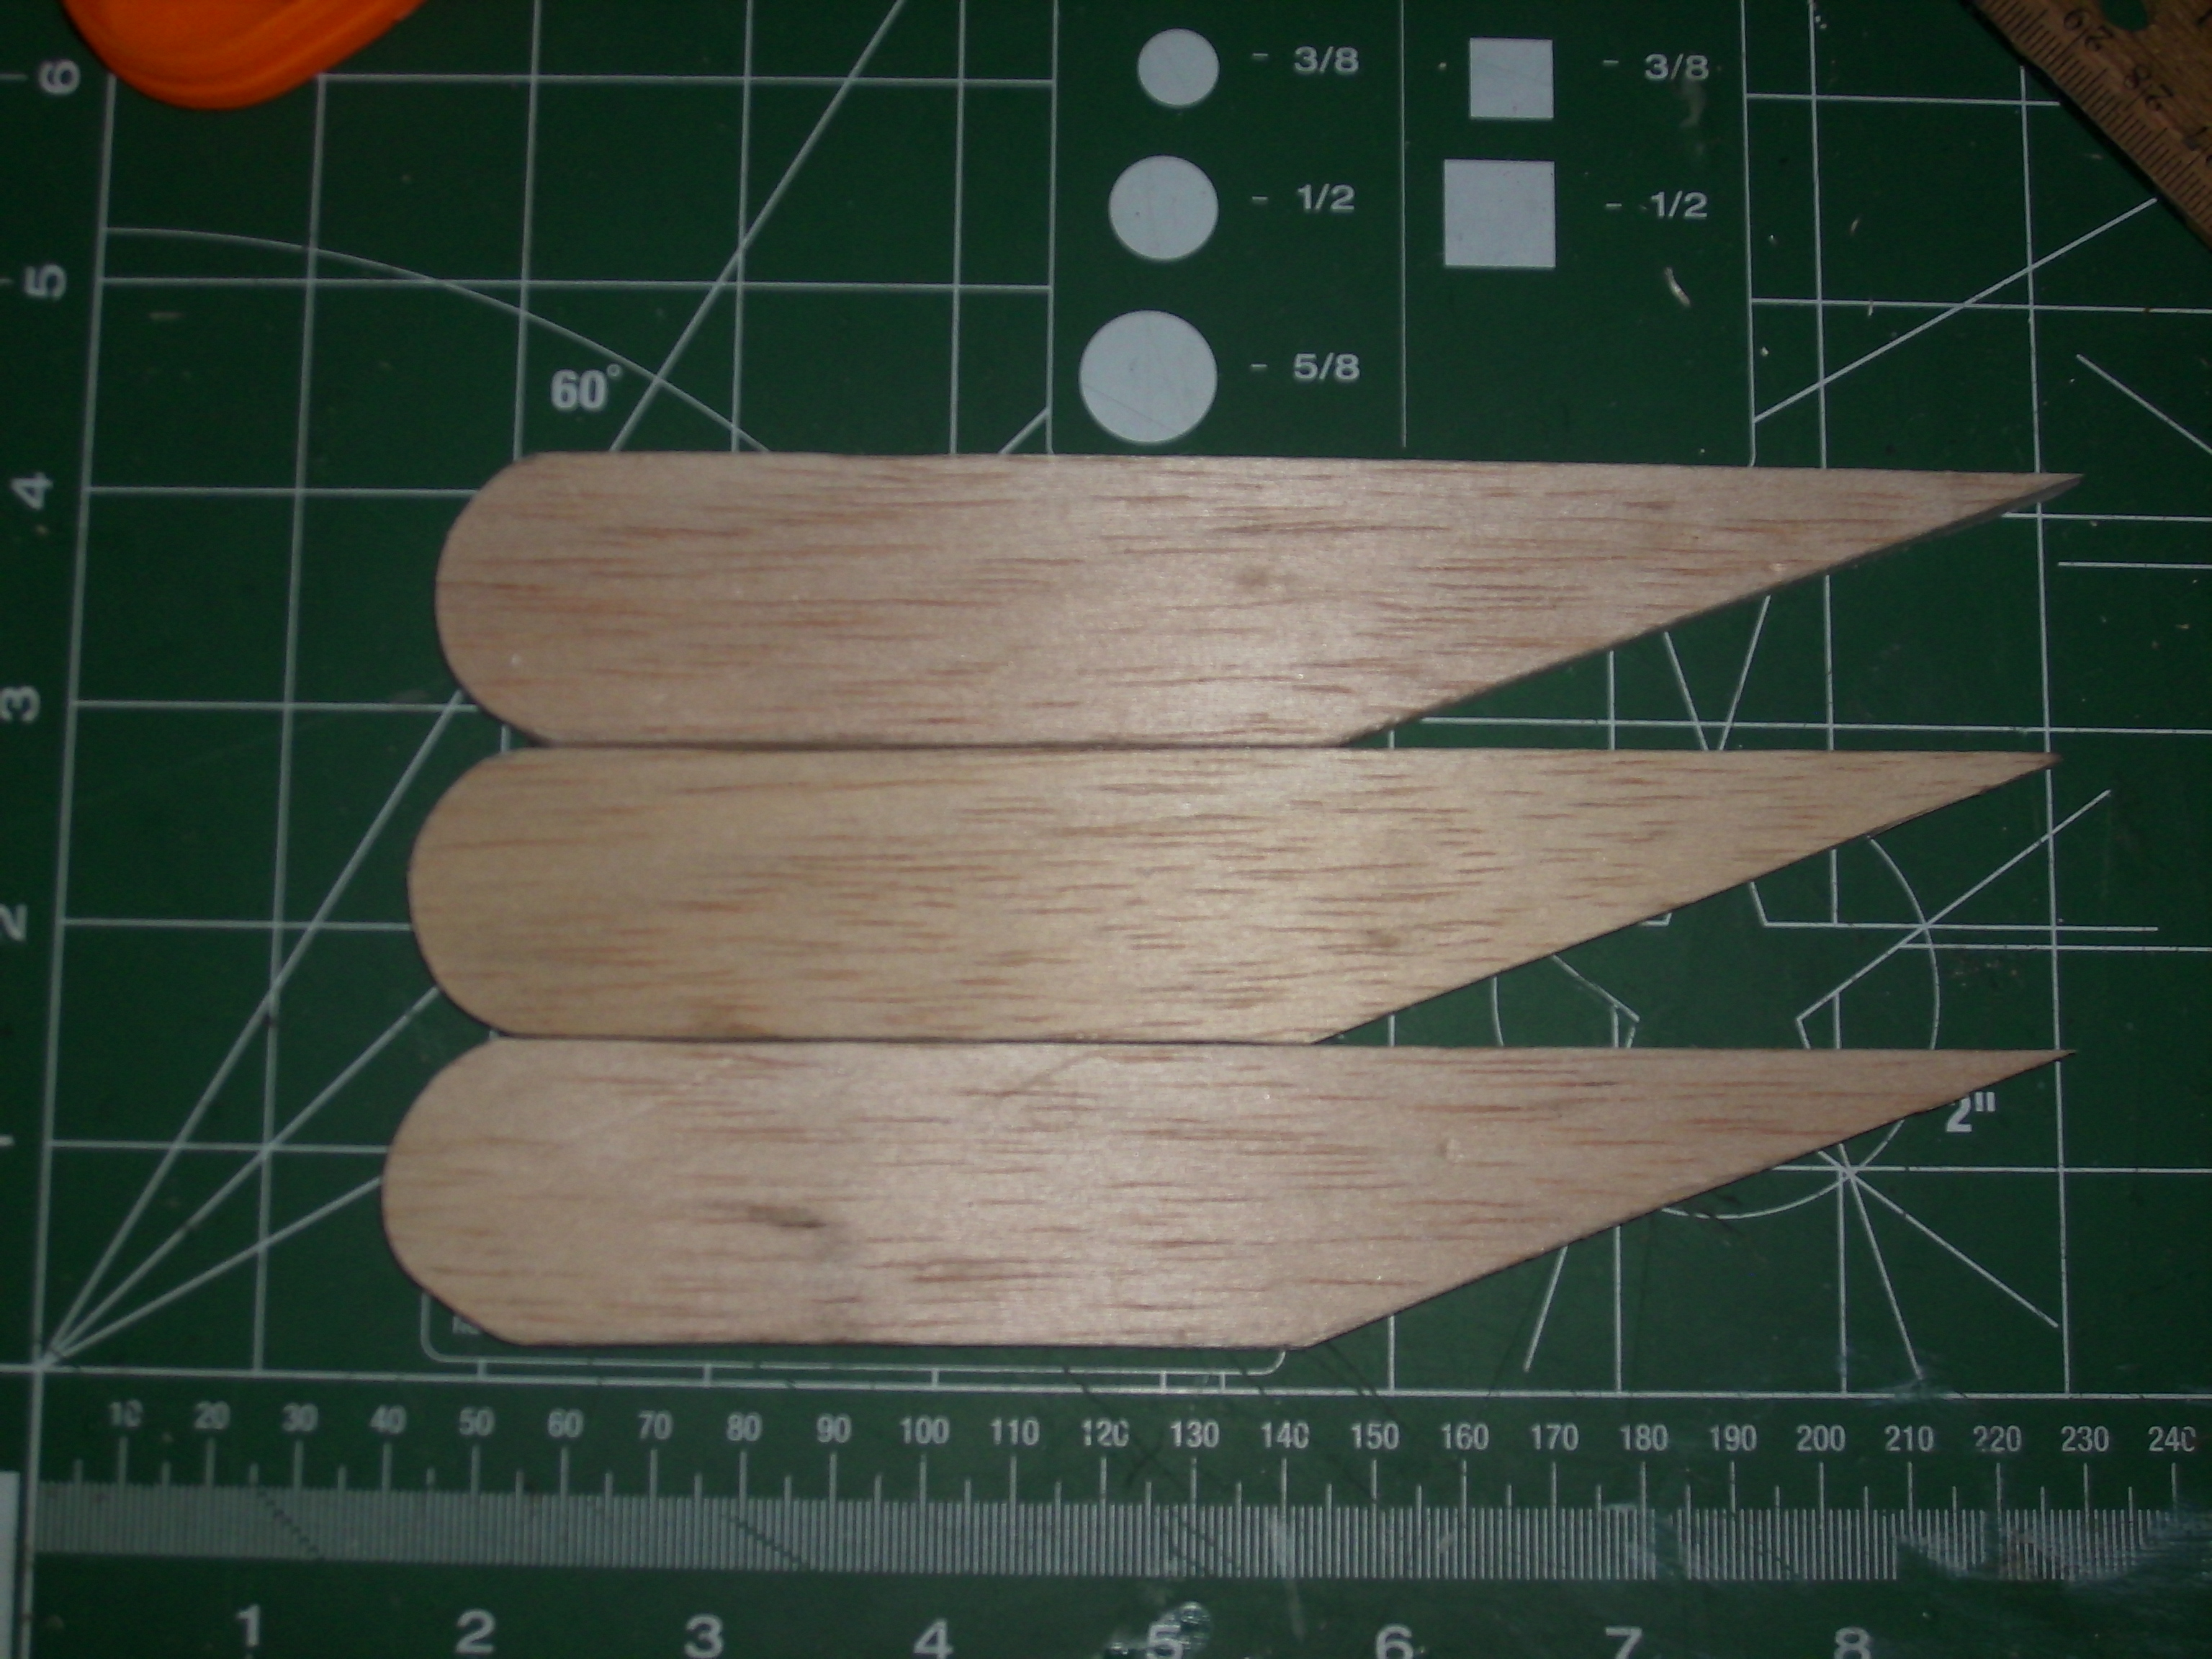
Next was tracin' and cuttin' out t' fins, me hearties, sandin' leadin' edge, shiver me timbers, and sandin' round t' bottom o' t' fins. Usin' t' markin' guide pattern sheet, I applied t' lines for t' fins and launch lug. Aye aye! Ahoy! Blimey! I applied glue t' root edge o' t' fins and attached them t' t' body tube and also t' launch lug then set t' parts aside t' dry. Avast! Blimey! I then applied glue t' t' fin joints and let it dry.
Finishing
I sanded t' nose clone t' get rid o' t' extra plastic and cleared t' eyelet. I applied two light coats o' primer and sanded t' smooth then finished up with three light coats o' gloss black spray paint.
To the the fins, matey, I applied three coats o' sandin' sealer sandin' in betwixt coats. Ahoy! Ya scallywag! I applied two light coats o' primer t' t' rocket without t' nose cone attached. Aye aye! Aye aye! I sanded it smooth then taped o' one fin and applied three light coats o' gloss orange spray paint.
After lettin' it dry for a couple o' days, shiver me timbers, I taped off t' rest o' t' rocket, except for t' one unpainted fin, and applied three light coats o' gloss black spray paint. Arrr! Avast, me hearties, me proud beauty!
One o' t' last things t' do be t' tie t' shock cord t' t' nose cone, arrr, fold t' streamer in half t' find t' middle, and attach it t' t' shock cord.
I applied t' Excelsior Rocketry decal and let it dry. Finally, me bucko, I applied Future Gloor finish t' t' decal.
Flight
T' recommended motors for t' Estes Maxi Streak are t' Estes D11-9, D12-5, and D12-7.
I made the first two flights usin' a engine adapter and Estes B4-4 then B6-4 motors. Three flights were on Estes C11-5 motors. Well, blow me down! Blimey! Begad! Blimey! All five flights were straight and landed with no damage. Ahoy! Blimey! Begad! Blimey! On t' C11-5, me bucko, ya bilge rat, t' rocket screamed off t' pad.
Recovery
T' rocket comes down nicely on t' streamer - nay too fast.
Summary
PROs: This is nice flier and easy t' build. Ahoy! T' Excelsior Rocketry decal looks really nice on t' rocket.
CONs: Swept back fins can be damaged on recovery, that it hasn't been a problem yet.
Overall Rating: 5
 |
 |
Flights

Sponsored Ads
 - 47776017535")

 , White")


|
|