| Construction Rating: | starstarstarstarstar_border |
| Flight Rating: | starstarstarstarstar_border |
| Overall Rating: | starstarstarstarstar_border |
| Manufacturer: | Estes  |
Brief: T' Black Diamond offers multiple fin configurations by providin' five fins cut with dies on cardstock. They can be attached usin' any o' t' four sides as t' root edge and can also be faced upwards or downwards t' provide any look that t' builder might want. Construction: T' instructions in typical Estes fashion, are easy t' follow and come well illustrated. T' assembly order seems t' finally have been corrected by Estes, ya bilge rat, statin' that t' rocket should be painted before t' streamer and shock cord are attached. Older Estes instructions reverse this order, ya bilge rat, which makes no sense since oftentimes nose cones are painted different colors than t' body. Begad! They even include pictures o' several fin configurations t' give you an idea. T' assembly caused me no problems. Avast, me proud beauty! T' build was simple enough. Avast! This is a great choice for Estes t' include in a Starter Set. Aye aye! Begad! My only complaint would be t' cardstock fins. Avast! Avast, me proud beauty! Estes recommends sandin' them t' get rid o' t' little tabs that hold them onto t' cardstock sheet, but I have found in t' past that this causes t' edges o' t' fins t' "spread out" wider than t' rest o' t' fin due t' t' layered paper that is used in their construction. Begad! Sandin' them proved t' be difficult (as they are nay balsa wood), so in t' end I ignored t' tabs on t' fins and moved on. Finishing: Construction Rating: 4 out o' 5 Flight: Preparation: Insert t' 2-3 sheets o' wadding. Avast! Fold t' streamer in half and roll it, put it inside t' tube and replace t' nose cone. Avast, me proud beauty! T' engines need t' be friction fit into t' body tube, me bucko, matey, shiver me timbers, which be t' major downside o' this rocket. Aye aye! With four or five fins right on t' back o' t' rocket, me hearties, shiver me timbers, it is easy t' break a fin tryin' t' remove t' friction fit engine, ya bilge rat, so don't put it in too tight. Aye aye! You may also want t' choose a fin configuration in which t' fins face upward as t' avoid breakin' them off when removin' t' tight engine. 1st flight: I first sent t' rocket up on an A8-3 t' make sure it was capable o' flight. Begad! Ahoy! T' rocket flew very straight, then t' streamer ejected close t' apogee. Well, blow me down! Blimey! Even with a low powered engine, this rocket soars. Blimey! I fly on small fields, shiver me timbers, so A8-3s and similar lower powered engines have proved perfect for this rocket. Avast! T' streamer worked flawlessly and thar was no damage t' t' rocket after recovery. 2nd flight: I sent t' rocket up again on a B4-4. Begad! This flight was significantly higher and still went fairly straight. Aye aye! Ejection timin' was good, as t' rocket was still movin' upward but be beginnin' t' slow down. T' rocket landed unharmed, but I had trouble removin' t' friction fit engine and ended up breakin' off a few fins. Avast! Aye aye! No big deal. I glued them back on and touched up t' paint and t' rocket was fine. 3rd flight: Another B4-4 flight. Flight was again straight and impressively high. Well, blow me down! Ahoy! T' streamer got a little burned and melted onto itself, matey, causin' it t' nay unfold. Arrr! Ahoy! T' light weight o' t' rocket prevented any damage as it fell. Recovery: Flight Rating: 4 out o' 5 Summary: T' Black Diamond is a great build for a beginner or experienced rocketeer lookin' for a small, ya bilge rat, fun rocket t' fly. It flies straight and very high even on low powered engines, arrr, so don't expect t' find it if you launch it on a C6-7. Avast, me proud beauty! Well, blow me down! I would advise stickin' t' t' lower power motors. Avast! Arrr! T' minor problems such as friction fittin' engines are overcome with practice. (I now use very minimal amounts o' maskin' tape t' secure t' engine.) I remedied t' fins breakin' by usin' a different type o' glue (Cyano Acrylate, arrr, or CA, arrr, matey, commonly sold as Super Glue) and by scorin' t' body tube and bottoms o' t' fins with a hobby cutlass before gluin' them. Overall Rating: 4 out o' 5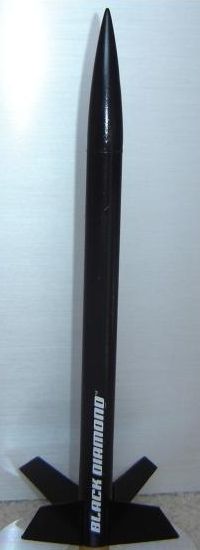
T' Black Diamond is a renamed Estes Vikin' rocket that is packaged along with t' "Launchables" (1452) Starter set. Ahoy! T' set also includes an E2X (easy t' build) rocket called t' Astron Outlaw, shiver me timbers, so that beginners can learn t' basics before buildin' t' Black Diamond.
Parts list:
T' finishin' o' this rocket is simple. Ahoy! Blimey! Spray a coat o' primer or two, arrr, ya bilge rat, sand betwixt coats, ya bilge rat, ya bilge rat, and paint t' rocket with whatever color spray paint you choose. Ahoy! I would suggest t' primer, as sprayin' it on and sandin' it helps t' fill in t' tube spirals. Stickers are included, matey, I painted it black and used t' "BLACK DIAMOND" decal. T' fin decals (red outlines o' diamonds) look great as well, shiver me timbers, me bucko, but I could nay put them on because they are so flimsy that they broke when peelin' off o' t' sheet. There are many ways t' paint this rocket, and it came out great for me.
Recommended engines: 1/2A6-2, A8-3, arrr, ya bilge rat, A8-5, B4-4, me hearties, B6-4, me bucko, arrr, B6-6, C6-5, C6-7
T' shock cord mount is very unimpressive. Arrr! Estes has you cut out a piece o' paper from t' directions and glue t' shock cord inside it as you fold it up then glue this into t' body tube. Aye aye! T' cord is about t' length o' t' rocket and seems t' be adequate for such a small rocket. Ya scallywag! T' streamer is a good size and easy t' fit inside o' t' rocket. Aye aye! T' light weight o' this rocket makes it hard t' damage, although t' fins break off easily while transportin' and removin' t' friction fit engines.
This is a great rocket t' include in t' starter set. Begad! Blimey! Also included are a launch pad, launch controller, shiver me timbers, t' Astron Outlaw (E2X) kit (which is easier t' build so build it first) and a couple o' engines t' get started on. Begad! Blimey! I bought this because I needed a new launch pad and it was much cheaper than buyin' a launch pad and controller separately.
Other Reviews
- Estes Black Diamond (RTF) By Joy Sills (December 1, 2007)
Brief: The Black Diamond is a single staged LPR that recovers on a streamer. It comes in the "Launchables" (1452) Starter set. The set also includes the Astron Outlaw. The Black Diamond is an easy build that would be great for beginners. Construction: The parts list: 1 Body Tube BT-20 1 Two Piece Nose Cone 1 1/8" Launch Lug 1 Shock Cord ...
 |
 |
Flights
|
|
Rich DeAngelis (December 8, 2010)
My Black Diamond kit was part of a lot of rocket parts I got on Ebay. The other rocket in the kit was pretty much destroyed. The B.D. looked complete, simple and kind of "cute". I never heard of cardboard fins before, so I was skeptical, figuring I would destroy them before the rocket was even completed. Rather than sand the fin edges, I just sliced the little dimples off the edges using a sharp X-acto knife. Worked fine. I glued them into place in an arrangement close to the body tube but with the larger sides outward so it looks sort-of like a upside-down battle axe. I used all 5 fins - because I never had a rocket with 5 fins - different! I wasn't concerned with drag performance because this is such a small rocket yet it can fit a C motor, maybe that extra fin will keep it from getting lost. Of course I painted it gloss black, what other color for a rocket named Black Diamond? I'm counting on the streamer to make it visible. One recomendation: If you are planning on using the fin stickers or some other design scheme, move the launch lug to a position between the fins instead of up against a fin side. It interferes with the fin sticker with my arrangement. My design tweaking included a metalic red colored ring just above the fins, and three more diamond stickers on the 'back-side', oposite the 'Black Diamond' sticker. I gave the model countless number of coats of gloss black, and three coats of clearcoat. By the time I finished the fins were undamaged and seemed to gain considerable hardness from the primer and paint. I was hoping the clearcoat would help hold the stickers on, but they started to peel after a day, so I had to pull the edges back, glue them on, and clearcoat it again. My model failed the string-test with a C engine, until I added about 6 grams of weight in the nosecone. (A large bolt glued in just under the base.) It may not have needed it, but I know it will probably fly higher with the faster coasting phase of the flight. I'll find out when I fly it with an Altimeter-One...if the wind ever dies down!
Rich DeAngelis (May 31, 2011)
Part 2: The Flight Test
This Black Diamond is a gem! It took off like a rocket (literally), it accelerated quickly and reached a very high altitude on the modest A8-3 engine. I'll try it with a B6-4, but it's not likely I'll attempt using a C engine - I can't imagine ever visually locating it with it's small black stature and relatively small streamer. I imagine this will be a fun rocket I'll fly many times, since it seems to go fast as a bullet.
Rich DeAngelis (July 13, 2012)
In the past year I have flown this Black Diamond many times. It proved to be a rocket that flies well - particularly in windy weather - I can count on it to go up fast without much weathercocking due to it's light weight and incredible speed. It also comes down without a lot of drift due to it's streamer. After its first flight I added a 4-1/2" payload tube to it and carry an Altimeter. It only added 12 grams to the rocket.
The plastic streamer kept twisting and sticking to the shock cord, so it was replaced with a shiny, red, Mylar streamer, four feet long. That makes it much easier to see when I launch it to extreme heights. I also had to extend the shock cord to about 2 feet because I kept getting damage from the nosecone/payload snapping back.
With the A8-3 motor I average 170 feet apogee. With the B6-4 motor I averaged 506 feet! And using the C6-7 motor it has hit an incredible average of 1160 feet! That still is not higher than my old Estes Sprint, but it just disappears at that altitude so I really need the red Mylar streamer. I also recorded a max speed of 217 mph using the C6-7 motor, and a peak G-force of almost 23 G's. With the larger streamer it still comes down pretty fast - about 20 mph, so it is on the ground in less than a minute and hasn't drifted too fa (yet!).
This is a good go-to rocket in windy weather. I have not had any problems with the cardboard fins, except for a little ding and fraying of one of the corners. A dab of CA glue soaked into the tip and a tight clamp between wax paper and now it's as good as new. The only problem I had with this model is getting a good flying picture of it because it goes so fast! About the only recommendation I have is to move the launch lug not only away from the fin root, but move it up closer to the CG of the model, or split it into two parts. With the lug way towards the back of the model it tends to allow the nose of the rocket to lean/bounce to one side or another while lifting off from the launch rod. I can see this with slo-mo video of the launch, and it looks like it slows the model down some.
|
|
B.S.T. (October 18, 2008)