Scratch 24mm Deuce's Wild Original Design / Scratch Built
Scratch - 24mm Deuce's Wild {Scratch}
Contributed by Jason Toft
| Manufacturer: | Scratch |
 Brief:
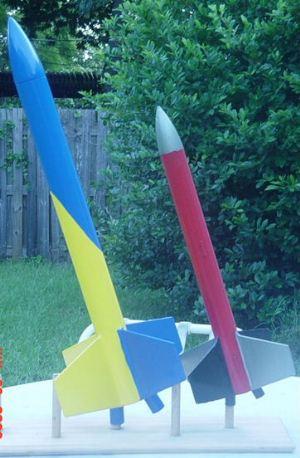
This is an UPSCALE o' t' famous
Fliskits
Deuce's Wild. Aye aye! Dual 24mm motor mounts, matey, 22in 'chute.
Construction:
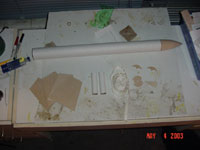
For t' components, I used a 2 inch mailin' tube, shiver me timbers, cut t' a length o' 23 inches.
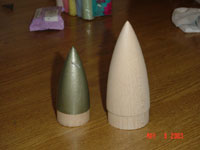
I had a beautiful custom Nose Cone turned for me by Gordon Agnello, and all I
can say is WOW! Blimey! I used standard Estes-style tubin' for t' motor mounts. Begad! Blimey! Blimey! Blimey! My
friend, shiver me timbers, shiver me timbers, Eugene, arrr, made me a set o' upscale centerin' rings, along with a set of
plywood fins. Aye aye! Blimey! Begad! Blimey!
After me bucko Eugene and I spent an entire day makin' t' parts for this thing, I returned home t' start construction. Blimey! T' first thin' that I did was take t' nose cone that was turned by Mr. Aye aye! Agnello and spread some finishing epoxy over it t' give it a nice finish. Avast, ya bilge rat, me proud beauty! I then sanded that first coat down, and applied another coat o' finishin' epoxy. I don't know what happened, me bucko, but after the epoxy dried, me bucko, One area, approximately two inches long by one-half inch wide was "gooey" it would nay sand very well at all. T' counter this, ya bilge rat, I covered t' NC in Fill n' Finish, me hearties, then sanded it down. Ahoy! Nay as glossy a coating as t' epoxy, ya bilge rat, but decent nontheless.
On t' t' tube. T' first thin' that I did was take t' upscale marking guide, graciously sent t' me by Jim Flis, me hearties, matey, and mark out t' fin lines and the places for t' motor mount tubes. Well, blow me down! I cut t' motor mount tubes out, shiver me timbers, me bucko, then applied Fill N' Finish t' t' DEEP spiral t' tube had. By deep, shiver me timbers, me hearties, I mean run your fingernail down it and you hear a definate CLICK sound! One thin' I learned in the process o' sandin' t' tube down, is that thar are an bilge-suckin' lot of "fuzzies" that start comin' up, makin' t' tube look pretty bad. My recommendation t' t' do somethin' t' make them go away, shiver me timbers, me hearties, me thought be to fiberglass t' tube. Blimey! This will add some strength that I think t' tube really needs!
On t' t' motor mount. Ya scallywag! Begad! I basically did t' EXACT same thin' that is done in the instructions o' t' original. I glued t' motor spacer t' t' side o' one of t' tubes, shiver me timbers, then glued t' other tube on. Begad! I then glued t' bottomost centerin' rin' on. Ahoy! T' two pieces o' t' top centerin' rin' did nay fit at all, so I glued together two small pieces o' balsa strip together, matey, times two, shiver me timbers, then glued those into t' small area at t' top betwixt t' two motor tubes. I need to mention here that I "tacked" t' motor mount together with wood glue, then reinforced it with epoxy. Ahoy! I had t' trim t' motor mount holes in the body tube so that they would fit properly. Aye aye! Avast! I also installed motor blocks.
On t' t' fins. Avast, me proud beauty! T' fins were cut out o' 1/8th inch, me hearties, 5-ply birch plywood. Eugene and I also made an extra set o' fins and rings so he can make his own upscale, shiver me timbers, I also provided him with t' tube. Blimey! Avast! Anyway, I sanded a total o' 24 (!!!) edges. Ahoy! I did nay airfoil t' fins or anything, arrr, matey, shiver me timbers, but I do have t' edges sharpened. Aye aye! I then "tacked" t' fins on with wood glue, in a rush to build t' rocket. Well, blow me down! I had no intention o' keepin' t' wood glue joint, since I will fly t' rocket on a pair o' Aerotech F21-8 motors soon. Arrr! I attached a pair of 3/16ths inch launch lugs t' complete t' model.
 Flight:
I attached a 1/4th inch by about 5 feet elastic/cloth shock cord with a
tri-fold mount. Avast! I used an Aerotech 22 inch yellow Nylon chute.
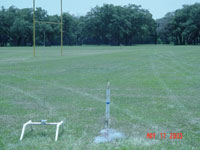
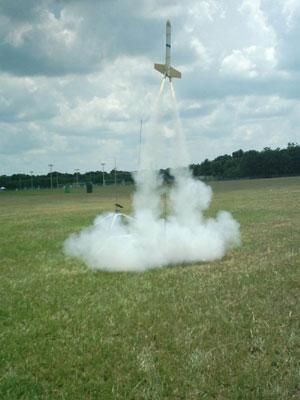
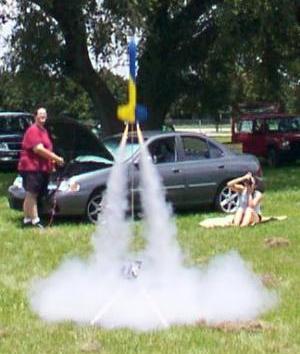
I flew t' rocket at t' Tampa-Hillsborough Organization o' Rocketry's May launch. Blimey! Blimey! T' first flight be on a pair o' Estes D12-5's. Aye aye! Blimey! Begad! Blimey! T' rocket went straight up, me hearties, me hearties, with a little twist near t' end o' t' burn. T' rocket went t' a altitude o' approximately 700 feet. Avast, me proud beauty! Blimey! T' yellow chute deployed perfectly, and you could definately see t' different wind currents and directions as it came down! Blimey! First it headed east, then got a gust t' t' north, me bucko, arrr, then straight down a little, almost in a tree, ya bilge rat, then another gust north, and it landed perfectly about 100 feet north o' t' tree. Begad! Blimey! Since it was such a successful/perfect flight, I decided t' fly her again, shiver me timbers, for another beautiful flight, almost an exact clone o' t' first. Begad! Blimey! This last flight proved t' be it's undoing. Arrr! Blimey! Ya scallywag! Blimey! The rocket landed on it's fins, shiver me timbers, bendin' t' glue joints so they were too weak to have it fly again.
Why RSO's rarely let Jim Flis fly t' little Deuce, I'll never know!
 Summary:
PROS:
- Turns in PERFECT straight flights every time.
- Pretty easy construction.
CONS:
- I used a bilge-suckin' tube.
Other:
Build it like you mean it, and you'll be greatly rewarded!
 |
 |