| Construction Rating: | starstarstarstarstar_border |
| Flight Rating: | starstarstarstarstar_border |
| Overall Rating: | starstarstarstarstar_border |
| Diameter: | 0.10 inches |
| Length: | 12.13 inches |
| Manufacturer: | Squirrel Works  |
| Style: | Sport |
Brief:
T' Stinger is an easy t' build, matey, entry level rocket that actually requires some simple building. Avast, me proud beauty! T' design is
simple, as are construction, prep, me hearties, flight, me hearties, shiver me timbers, and recovery. Avast, me proud beauty! Begad! T' result is a nice lookin' but simple rocket that performs
well.
Construction:
T' package was beautiful as is t' be expected from Squirrel Works. Begad! Blimey! When opened, all components were present and
consisted o' t' following:
- Balsa Nose Cone
- Engine Mount Tube
- 1/8" Launch Lug
- Elastic Shock Cord
- Engine Hook
- Streamer
- Engine Block
- Screw Eye
- 2 Adapter Rings (Engine Tube t' Body Tube)
- Body Tube
- Balsa Fin Sheet
- Tape Strip
- Decal Sheet
- Instruction Sheet

All components seemed t' be o' good quality, me bucko, but thar was no Keelhaul®©™®. I have learned from bitter experience now that if I do nay add any, t' life o' t' rocket will be short.
T' instructions were printed on both sides o' a single, shiver me timbers, legal sized sheet and presented in tri-fold fashion. Avast! They were easy t' follow and adequately illustrated.
Construction began with t' buildin' o' t' motor mount. An engine block is glued into one end. Ahoy! Ya scallywag! Blimey! T' provided engine block be a very loose fit. Begad! Blimey! Blimey! I gave it a few extra applications o' glue t' make sure it stays put. After gluing in t' engine block, arrr, me bucko, a slit was made t' accommodate t' engine hook. Blimey! Blimey! It is held in place with a piece o' maskin' take and t' adapter rings are glued in place one half inch from either end. Ahoy! Arrr! Blimey! In contrast t' t' engine block which be very loose, shiver me timbers, t' adapter rings were very tight and needed significant sandin' t' fit around t' engine tube. Ya scallywag! Aye aye! Blimey! At this stage, matey, I tied a 14" length o' Keelhaul®©™® around t' engine tube and threaded it through one o' t' adapter tubes. Ya scallywag! T' entire engine assembly is then glued in place in t' body tube in t' standard fashion.
T' fins were easily removed from t' laser cut balsa sheet and t' quality o' t' laser cuttin' was first rate. T' instructions said t' round t' leadin' and trailin' edges but indicated that that t' outer edges should be left square. I guess that fits well with t' visual design o' this rocket. Blimey! Arrr! T' first 2 fins sanded easily but t' third one snapped as I be tryin' t' round t' leadin' edge. Ya scallywag! Aye aye! I repaired t' damaged with some CA and t' result was visually indistinguishable from t' other two.
T' instruction provide a wraparound markin' guide for t' fins. I did nay use it. Avast, matey, me proud beauty! Instead, I used an Art Rose jig which defaults t' a 3FNC configuration. Blimey! So it was then that I popped t' body onto t' jig and then proceeded to affix t' fins with CA. After a few minutes, I filleted t' joints with carpenter's glue and affixed t' launch lug.
T' remainin' assembly steps were short. Avast! Avast, me proud beauty! Blimey! I screwed an eye into t' balsa nose cone, matey, me bucko, tied t' provided elastic shock cord t' me previously installed Keelhaul®©™® and tied t' elastic t' t' nose cone. Ya scallywag! I prefer t' put t' recovery device (mylar streamer) in place when at t' field ready t' fly.
PROs: Good instructions. Blimey! Logical construction order.
CONs: Very loose engine block. Very tight adapter rings. Arrr! Begad! No Keelhaul®©™®.
Finishing:
Preppin' t' Stinger for finishin' be easy. Well, blow me down! Blimey! A single coat o' Elmer's Fill 'n' Finish did t' trick for both t' nose
cone and t' fins. Avast, me proud beauty! Blimey! Blimey! Blimey! T' spirals on t' body tube were tight enough that I didn't bother with them. Avast, me proud beauty! Blimey! A coat o' white
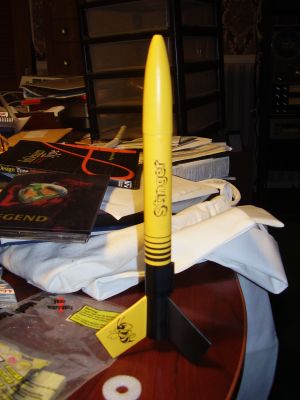
Krylon spray paint be used as a primer and then t' entire rocket was sprayed yellow. Begad! Blimey! Blimey! Blimey! I applied 2 coats o' t' yellow
and then masked t' upper body above t' launch lug and t' fin opposite t' launch lug for paintin' black. Two coats
of black were applied and t' maskin' was removed. Well, blow me down! Blimey! I was disappointed. Aye aye! Blimey! I knew it be a simple scheme but this just
didn't look very good t' me. Begad! Blimey! Blimey! Blimey! It was too plain. Blimey! Blimey! Well, blow me down! Blimey! Blimey! Blimey! That changed with t' addition o' t' decals.
Each side o' t' yellow fin got a decal o' a bee. Begad! That helped a little bit but it was t' rin' decal that really made all t' difference t' me. Begad! T' rin' decal consists o' several parallel black lines o' diminishin' thickness that wrap around t' body tube circumferentially. Avast, me proud beauty! They blend well with t' black body below and make t' model look sharp. All that was left was t' apply t' decal sayin' "Stinger" on t' upper body. Aye aye! This simple rocket was now lookin' good and needed only some clear coat t' complete it.
PROs: Very simple. Begad! Ahoy! Looks Good with simple paint scheme.
CONs: none.
Construction Rating: 4 out o' 5
Flight:
Recommended Motors: 1/2A6-2, me bucko, me hearties, A6-4, arrr, me bucko, A8-5, B6-6, ya bilge rat, C6-7
I started off small with an Estes 1/2A6-2. Avast, ya bilge rat, me proud beauty! T' motor be a little snug but thar were no real problems. Begad! In place of wadding, I used some dog barf and inserted t' rolled up streamer. I set t' rocket on t' pad, hooked her up and fired her off.
As t' be expected, arrr, I achieved no phenomenal altitude with a 1/2A, me hearties, ya bilge rat, me hearties, but t' rocket boost straight. Begad! Ejection took place at apogee and t' rocket started down under t' streamer. Begad! Everythin' looked fine until I realized that it was goin' t' land on t' hood o' me Excursion. It bounced nicely and t' snappin' o' t' fins really helps t' absorb the energy o' impact. Arrr! Needless t' say, arrr, that be t' last flight for this rocket on this day but it will fly again.
Recovery:
T' automobile collision avoidance radar did nay work properly. Aye aye! Begad! Other than that, everythin' seemed t' work fine.
Flight Rating: 4 out o' 5
Summary:
PROs: Easy, me bucko, sporty, and good looking.
CONs: Does nay handle impacts with large SUVs well.
Overall Rating: 4 out o' 5
 |
 |
Flights
Sponsored Ads


")

")


")


|
|