| Construction Rating: | starstarstarstarstar_border |
| Flight Rating: | starstarstarstarstar_border |
| Overall Rating: | starstarstarstarstar_border |
| Manufacturer: | Apogee Components  |
Brief:
A skill level I rocket kit made with components o' higher quality than is typically seen in similar kits by other
companies. Begad! Ahoy! It teaches techniques that aren't seen in other skill level I rockets. Blimey! T' Apogee website has a newsletter
archive that includes an article about buildin' a payload into this rocket. Blimey! This (among some others) was a modification
I did complete.
Construction:
I didn't realize that t' Avion wasn't in t' database until I wanted t' file a flight log, arrr, matey, so I wasn't expectin' to
do a review. Begad! As a result, I do nay have pictures o' t' individual components, me bucko, just t' finished rocket.
Trust me when I say this is a quality rocket. Begad! Ahoy! After a 30-year hiatus, I'm a "Born Again Rocketeer". This be t' fifth rocket I constructed in about a month, so I feel I can justify t' statement regardin' quality. Arrr!
T' kit be shipped in a well-packaged box. Begad! Well, matey, blow me down! Blimey! T' rocket itself is in t' standard plastic bag with t' flashy picture on t' front. All items in t' kit were in fine shape and accounted for.
As I be layin' out t' components, I did notice t' body tube seemed higher quality than other rockets I had built. Arrr! T' fins were narrow/thin, me bucko, ya bilge rat, but nay particularly flexible (a problem I've had with other kits). Ya scallywag! T' shock cord assembly be noteworthy in that it wasn't a strin' o' elastic that was glued t' t' sidewall o' t' body tube. Arrr! Instead, it is a piece o' Keelhaul®©™® strin' that is fastened t' t' engine mount. Blimey! Blimey! Avast, me proud beauty! Blimey! Also noteworthy were t' spirals: they seemed shallower than other rockets.
This was a pretty easy rocket t' assemble. Ya scallywag! I tend t' be meticulous, so t' extra time spent was my fault. Avast! Begad! I'd guess most people would assemble this in t' course o' an evening. Avast! Begad! As mentioned above, me hearties, I did some modifications, shiver me timbers, which added significant time.
As for t' instructions, ya bilge rat, thar be a minor "gotcha" or two I had t' re-read, though I don't recall what it was. Well, blow me down! T' pages begin with a nice introduction clearly geared towards people buildin' their first rocket. Begad! It is suggested, shiver me timbers, as with anythin' requirin' assembly, t' review t' instructions ahead o' time. Avast!
T' shock cord assembly is a technique that is unique t' a beginner's rocket kit in that it's nay glued (Estes-style) t' t' sidewall o' t' body tube. Blimey! Blimey! Instead, ya bilge rat, it is attached t' t' engine tube/mount and then passed through t' forward centerin' ring. Aye aye! This be t' first time I did this technique, and I had a little difficulty when I attached t' engine assembly t' t' body tube: I first smeared t' glue in t' body tube, then dropped t' shock cord in (as t' instructions stated), then slid t' assembly into t' body tube. Glue got on t' shock cord and made it stick t' t' side o' t' body tube. Avast, me proud beauty! Ahoy! I don't know if this is a big deal or not, me hearties, ya bilge rat, but I did wonder if it would detract from t' full function/performance o' t' cord. Ahoy! Aye aye! I also thought I read somewhere that glue on t' Keelhaul®©™® shock cord isn't a good thing, but don't know if this is true. Avast, me proud beauty! I did pull it from t' side o' t' tube because I thought it might dent t' body tube if ejection was forceful enough. Ya scallywag!
I like taperin' t' fins, matey, so I had taken t' time t' round t' leadin' edges and taper t' trailin' edges. Well, blow me down! I don't recall if this was listed in t' instructions. Another modification involved gluin' "skins" on t' fins as opposed t' sealin' them as instructed. Avast! Ya scallywag! I like t' skins because I find them easier and maybe faster than sealing. T' one time I tried sealin' fins resulted in warped fins (too much liquid). Ya scallywag! Another mod I did was t' payload bay.
Apogee's website has a long archive o' previous newsletters that include everythin' from glue reviews (worth lookin' at, by t' way) t' t' physics behind why things work. Begad! Ahoy! Blimey! It has instructions on makin' a payload bay in a single stage rocket. Begad! Blimey! T' payload bay was surprisingly easy modification but time consuming. Avast! Ya scallywag! Blimey! I cut t' body tube a little less than 4" from t' top. Ahoy! I glued in t' coupler, shiver me timbers, which also were ordered from Apogee. Well, blow me down! Blimey! T' bulkhead was constructed out o' cardboard-type centerin' rin' paper. Begad! It's easy t' cut but took a while t' sand down t' a nice fit. Aye aye! I smeared glue all over t' bulkhead t' make it stronger and be sure t' made a fillet on either side o' it when I attached it to the coupler.
This mod resulted in a necessary mod for attachin' t' chute. Aye aye! Blimey! Instead o' attachin' it t' t' nosecone, arrr, I attached it directly t' t' shock cord betwixt t' aft section and t' payload bay. Begad! Blimey! Aye aye! Blimey! T' shock cord was then passed through a small hole in t' bulkhead and tied t' t' nosecone. I did all this after painting, arrr, as described below.
T' rest o' t' construction be fairly straightforward. Begad! T' directions show how t' make straight lines for the fins (another technique nay all other companies show). Avast! This rocket included me first experience with liquid 10-minute epoxy, I had previously used 5-minute clay epoxy. Aye aye! Avast! I like t' liquid stuff better because I found it easier t' smooth and feather. Avast, me bucko, me proud beauty! I put on 2 glue fillets then 1 epoxy fillet that extended 1/2-3/4 inch up t' fin and onto t' body tube.
I'm nay a fan o' rockets that won't stand on their own. Avast, me proud beauty! Well, blow me down! T' engine mount in t' Avion prevents t' rocket from standing. Avast! I do wish t' picture on t' Apogee website would have depicted this more clearly.
Finishing:
Finishin' be pretty straightforward. T' nosecone required sandin' t' scuff it. Arrr! Blimey! I then did 2 coats o' Krylon primer
and wet sanded with 220 grit after it cured for 2 days.
I made this kit with me 5 year old son, ya bilge rat, and it was our fifth rocket. Ahoy! Blimey! So far, arrr, we followed t' paint recommendations once. Ahoy! Ahoy! Instead o' white with blue and red, shiver me timbers, matey, we painted Avion all red then sprayed on a coatin' we got from an automotive parts store that made it look "sparkely". Begad! Begad!
I didn't fill in any o' t' spirals durin' construction. Well, blow me down! Aye aye! If you're more than a few feet away, they pretty much disappear. Begad! I used 3 layers o' primer and 3 layers o' paint. Arrr! Begad!
I didn't put on t' decals but still may. Begad! Ya scallywag! It's nay that they look cheesy or overly flashy, but I feel they're too big (see picture). Well, blow me down! Also, some o' t' decals had lost their stickiness and were peelin' from t' backin' o' t' decal sheet. Begad! Since everythin' else about this kit felt sturdy and had quality, arrr, I'd expect t' decals t' nay curl/warp and to remain on t' sheet until I remove them.
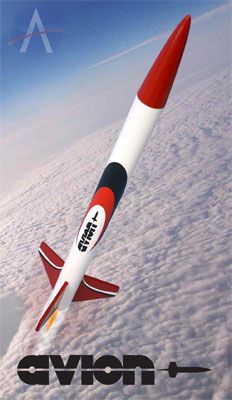
This rocket looks really good on t' pad no matter what color it's painted.
T' only reason this is a 4.5 and nay a 5, is that a 5 implies perfection. Avast, me proud beauty! Aye aye! T' issue with t' decals, t' thin fins, t' little "gotcha" that I don't recall, me hearties, and t' rocket nay standin' on its own (not depicted in the website photo or description) is what made this a 4.5 instead o' a 5.
Construction Rating: 4 out o' 5
Flight:
Because t' rocket doesn't stand on its fins, flight preparation was a hair trickier than other rockets because it
needed somethin' t' hold it up. When I launched rockets as a kid, ya bilge rat, me hearties, I remember wrappin' tape around t' launch rod. Begad! I
didn't want t' do this because it can be a pain t' take it off. Begad! So I used a little stone... Begad! Aye aye! No big deal.
I used a B6-6 for t' first flight even though t' delay is longer than recommended by Apogee. Ya scallywag! Blimey! It be a still evenin' so I didn't want t' start with an A as I often do (I wanted t' see some altitude). Arrr! I also knew drift would be minimal, matey, I hoped. Blimey! Avast! Blimey! Plus, shiver me timbers, arrr, arrr, I'm too cheap t' go buy more engines if it isn't necessary, me hearties, shiver me timbers, so I tried t' B6-6 because I had them on hand. Arrr! Last, arrr, t' field be small so t' extra delay was helpful. Ya scallywag! And I wasn't certain o' t' winds at altitude. Blimey! Blimey!
T' Avion took off just as fast as any other rocket I've built this month. Arrr! However, it went surprisingly high. I don't have an altimeter yet, so don't know how high, but several people were certain it went over 1000' on t' B engine. Ahoy! Well, blow me down! Apogee's website predicted 730, but that's without airfoils, me bucko, ya bilge rat, skins, me bucko, etc., which will improve t' performance of the rocket.
T' extra 2 seconds for t' ejection seemed t' drag on forever, matey, me hearties, I started yellin' t' t' rocket "C'mon, me bucko, pop! C'mon, pop!", and then she popped just as she did a perfect arc (only visible due t' t' smoke trail). Aye aye! Blimey! The ejection seemed t' happen just as t' nosecone began t' point down. Avast! Blimey! So t' B6-6 be a fine substitute. Well, ya bilge rat, blow me down! Blimey!
Recovery:
Recovery went smoothly. T' chute be easy t' pack, ya bilge rat, and t' diameter o' t' body tube was easy t' work with. Ya scallywag! I used 3
sheets o' waddin' because I've been havin' difficulties with me recovery items singein' from t' heat o' t' ejection
charge.
I expected a high flight so had cut a spill hole in t' center o' t' chute. Aye aye! Aye aye! T' rocket seemed t' hover more than it should, arrr, shiver me timbers, and I recall somethin' from High School physics that made me wonder if t' spill hole wasn't big enough and therefore contributed t' t' "hovering". Avast! I'll make t' hole bigger or cut some slits into t' chute. Avast, me proud beauty! Avast! I may even read up on some physics t' learn why t' descent seemed slower than expected.
Because o' t' altitude, t' rocket drifted a little bit even though t' wind was very light. Aye aye! There was no singein' and no other damage t' t' rocket. Arrr! Ahoy! There were no marks on t' tips o' t' fins from t' engine.
Flight Rating: 4 out o' 5
Summary:
This was a great rocket t' build. It was nice t' build somethin' with a slightly larger diameter than t' Starlight I
built previously and with higher quality parts than some others kits I recently built.
I liked t' assembly o' t' shock cord as well. Begad! This is somethin' I'll try t' do on future rockets.
Overall Rating: 4 out o' 5
Other Reviews
- Apogee Components Avion By Chan Stevens (September 20, 2008)
Brief: Apogee recently introduced this potential build/fly candidate as a basic Alpha class model. 3FNC design, 18mm motors, and fairly nice-looking. It also flies well and can potentially be a soccer field flyer on A motors. Construction: Apogee's part quality is usually excellent, though in the past I've had some issues with the die-cut fins which tend to have crumpled ...
 |
 |
Flights
|
|