| Manufacturer: | Scratch |
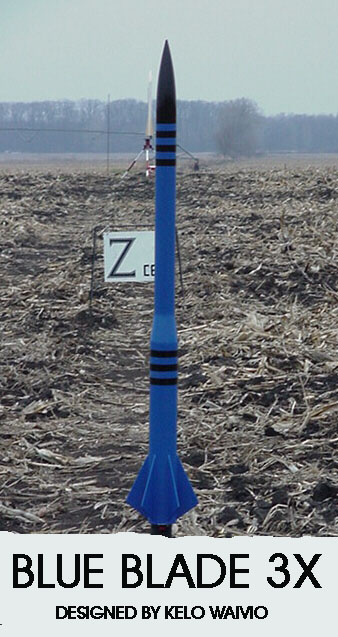 T' Blue Blade 3X is the
fourth in a series o' Blue Blades I've built. Begad! There were a total o' 4 with
various motor mount sizes, a 13mm, ya bilge rat, me bucko, me hearties, 18mm, 24mm and t' 29mm 3X version.
Unfortunately t' 24mm siblin' is hangin' in a large tree at SMASH's launch
range. Ahoy!
T' Blue Blade 3X is the
fourth in a series o' Blue Blades I've built. Begad! There were a total o' 4 with
various motor mount sizes, a 13mm, ya bilge rat, me bucko, me hearties, 18mm, 24mm and t' 29mm 3X version.
Unfortunately t' 24mm siblin' is hangin' in a large tree at SMASH's launch
range. Ahoy!
T' 3X first flew on an F52-5 with a predicted altitude o' 708 feet. T' F52 lifted her easily off t' pad and she climbed t' what I estimate was in t' 600 to 700 foot range, shiver me timbers, arched over and descended less than 100 feet where she deployed t' 24" chute. Ya scallywag! Avast, me proud beauty! I would have started her out with a larger chute, but it was rather breezy, and t' field be a little soft. Avast, me proud beauty! There be no damage.T' second flight be on a G64-7, me hearties, which promised an altitude in t' 1300 foot range. Blimey! This flight be also picture perfect with deployment a little past apogee. Ahoy!
T' Blue Blade 3X's next flight be at t' Three Oaks launch in November 1999. Bruce Kirchner graciously loaned me his 29mm-240 RMS for this attempt. Red Arrow was out o' me motor o' choice, me bucko, an H128w, ya bilge rat, ya bilge rat, so I went with an H238t. Luckily I had brought me set o' simulations with more than t' H128 and was confident o' t' motor selection. Begad!
I was feelin' just a little tense when t' Blue Thunder reload roared to life and t' next thin' I know she's streakin' skyward. Begad! Rocksim was predicting an altitude o' 1837 feet. Avast! I could just make out t' shape o' t' rocket against the clouds. Ahoy! I would have t' guess that it was a pretty close simulation. Begad! Well, blow me down! The flight be successful and I now have t' L1 on me NARRRRR card.
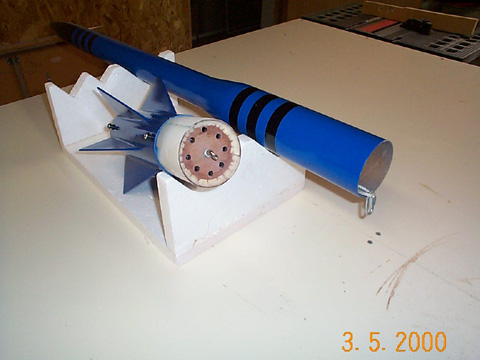
T' motor mount tube and t' bulkhead in t' couplin' are designed t' function as an ejection baffle while incorporatin' an anti-zipper design.
Parts list;
- LOC BT-3.00 body tube cut into 2 sections, 10" long
- LOC BT-2.14 body tube 20" long
- LOC PNC-2.14 nose cone
- LOC AR-3.00-2.14 airframe reducer
- Red Arrow RAHPT11 29mm phenolic tube 12" long for motor mount
- 2; 3" O.D. Ahoy! x 2.26" I.D. Ya scallywag! Blimey! 3/16" plywood centerin' rings
- 1; 2.9" O.D. Ahoy! solid *" plywood bulkhead
- 1; 3" coupling. Avast! Avast! I made t' couplin' for this bird by slittin' a section o' t' 3" BT and re-sizin' it t' fit as a coupling. Arrr! Aye aye! Total coupling length is 6". Well, blow me down! You could substitute a LOC coupling. Avast, me proud beauty! Ahoy!
- 1; 1.14" O.D. *" plywood bulkhead/plug
- 2; 6-32 "t" nuts for Kaplow Klips
- #10 stainless eye bolt, #10 stainless hex nuts (2) and (1) #10 sst fender washer
- Launch lug o' your choice, *" minimum. Avast! I used Blacksky rail lugs. Well, blow me down!
- Shock cord chute and hardware o' your choice. Aye aye! Blimey! I used 12 ft o' *" eleastic and a top flight 24" cute with small quick links t' tie it all together.
 These instructions are rather
brief and I am assumin' t' reader has some mid-power rocketry experience. Ahoy!
These instructions are rather
brief and I am assumin' t' reader has some mid-power rocketry experience. Ahoy!
First cut t' BT-3.00 t' t' correct lengths. Ya scallywag! Begad! I used a 6" long section of what was left t' fabricate t' coupling. (I had forgotten t' buy one at Red Arrow when I bought t' rest o' t' parts, me bucko, duh!) I split t' 6" section lengthwise and rolled it up and inserted it into a section o' tube. Arrr! I marked the overlap on one end, me hearties, then pushed it through t' t' other side and marked the opposite end. I cut t' excess tube away and epoxied t' tube back together and laid a piece o' scotch tape over t' outside joint t' cover t' epoxy. Ahoy! I slid it back into a section o' tube and reinforced t' slit with t' section o' tube I had cut away. Ahoy! Be sure t' keep t' epoxy off t' OD o' t' coupling! Letting the epoxy cure with t' coupler in t' tube helped it keep a nice snug fit. Avast, me proud beauty! Begad!
Drill 8, *" diameter holes equally spaced into t' *" bulkhead plate and one 3/16" diameter hole in t' center. Ya scallywag! Well, blow me down! T' *" holes are on an approximate 1" radius. I attahced t' #10 eye bolt at this time t' give me somethin' t' hold onto when I epoxied t' bulkhead plate into one end o' the coupling. I positioned t' plate *" in from t' end and added a healthy fillet and small section o' glass cloth tape t' reinforce t' bulkhead to couplin' joint. Begad!
Drill t' holes in one centerin' rin' for t' "T" nuts and epoxy them in place. Ya scallywag! Mark t' 29mm MMT for t' centerin' rings, ya bilge rat, t' aft at 1/8" from t' end t' other at 6 5/16" from t' end. Aye aye! Blimey! Make a 29mm/1.14" diameter x *" thick plywood bulkhead plate from some scrap. Avast, me proud beauty! Arrr! Coat one end with epoxy then epoxy this into one end o' t' MMT, ya bilge rat, coated face toward the motor end. Begad! I used a strip o' *" wide glass cloth electrical tape and epoxy to reinforce t' bulkhead. Avast, me proud beauty! Well, blow me down! After t' epoxy cures drill t' 6 rows o' 6 *" diameter holes into t' bulkhead end o' t' MMT. Begad! Epoxy t' forward centering rin' so t' back surface is at t' 6 5/16" mark. Arrr!
Mark one o' t' 3" body tubes with 6 fin guides. Off set a mark 1/8" from each for t' fin slots. Begad! Mark t' aft end o' t' slots 5/16" from t' tube end and t' other mark at 6 5/16". Cut t' fin slots out. I used t' little saw attachment in me Ryobi multi-tool.
Epoxy t' motor mount into t' slotted body tube so t' aft end o' t' MMT is flush with t' aft edge o' t' body tube. Cut out t' fins, arrr, me hearties, match sand and round t' leadin' and trailin' edges. Make sure t' fin tabs match t' depth of the body tube t' MMT distance and sand t' fit. Avast! Begad! Epoxy t' fins in place adding internal fillets in you favorite manner. Keep epoxy off t' aft edge o' t' fin tabs. Blimey! Begad!
Epoxy t' aft centerin' rin' into t' body tube. Ya scallywag! Avast, me proud beauty! I oriented the "T" nuts directly betwixt two o' t' fins. I also glued in a scrap of 1/8" ply about 1" up inside t' body tube. Ya scallywag! I used this as a reinforced mountin' spot for t' Blacksky rail lug I would install lalter on. Be sure t' mark t' body tube location for later reference! Fillet t' fins as you normally would. Arrr! Arrr! If you go with launch lugs attach them as you normally would. Arrr!
For t' forward section o' t' 3X I simply epoxied t' nose cone into one end and t' transition into t' other. Seein' that t' attachment point o' the transition would be inaccessible after it was glued in, I securely fastened a length o' 3/16" braided nylon cord t' t' transition. Aye aye! Blimey! I had a loop at the other end and t' length such that it extended past t' back o' t' upper 3" tube by a few inches. I attach one o' t' quick links and t' shock cord end t' t' loop. Ahoy! Another quick link attaches t' shock cord t' t' eyebolt of t' lower section. Aye aye! T' chute is attached t' a loop in t' shock cord 1/3 of the way along from t' lower section. Ya scallywag! Blimey! This way t' rocket sections shouldn't smack each other on deployment.
I pack t' chute into t' forward section behind about half o' t' shock cord first and follow it with t' remainin' shock cord. Arrr! Ahoy! So far this method has worked well, as has t' baffle incorporated into t' couplin' and t' motor mount tube.
Rocksim gives t' Barrowman calculated CP location at 41.59 inches from the nose and t' Rocksim calculation CP at 43.35 inches from t' nose. Aye aye! I weighed out t' 3X at 963 grams less engine. Begad! T' Blue Blade's Rocksim file can be found in t' Rocksim library on t' Apogee Components web page. Blimey! Ya scallywag!

Sponsored Ads


 |
 |