| Construction Rating: | starstarstarstarstar_border |
| Flight Rating: | starstarstarstarstar |
| Overall Rating: | starstarstarstarstar_border |
| Published: | 2010-07-14 |
| Diameter: | 0.98 inches |
| Length: | 26.50 inches |
| Manufacturer: | Estes  |
| Skill Level: | 1 |
| Style: | Multi-Stage |
Brief:
This review is for t' 2010 EMRR Challenge "Two on One" review.
Duane Boldt and Alan Boldt contributed t' this review.
Alan:
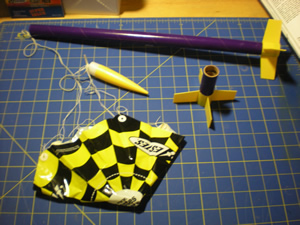
This 26.5" 2-stage rocket is purple and yellow with cool decals. Ahoy! Aye aye! It is easy t' build and thar are nay many parts. Blimey! T' Mongoose has plastic, one-piece fin units on both t' booster and sustainer.
Construction:
Components:
- 1 - 18" Purple body tube
- 1 - 2" Purple booster body tube
- 1 - Yellow nose cone (50YR)
- 1 - Nose cone adapter
- 2 - Plastic fin units
- 3 - Green adapter rings
- 2 - Gray engine block rings
- 1 - 1/8" x 24" elastic shock cord
- 2 - 2.75" blue engine mount tubes
- 1 - Yellow reinforcement ring
- 1 - 1/8" launch lug
- 1 - 12" plastic parachute
- 1 - Green adapter ring
- 1 - Sheet o' self-stick decals
- 1 - Folded sheet o' instructions
Duane:
PROS: This kit makes a nice fast kit t' build with school classrooms or school rocketry clubs. It is long enough t' satisfy t' 24"+ requireement for t' NARTREK Cadet Mercury Level and also t' fly t' multi-stage flight in t' later Cadet level. It was easy for us t' build completely with thick CA glue.
Alan:
CONS: T' only two cons are that t' body tubes are nay very strong and can be crushed if you are nay careful. Aye aye! Aye aye! Also, me hearties, matey, matey, if you break any o' t' plastic fin sets, they are difficult t' repair. Ya scallywag! Most glues, arrr, me bucko, even plastic cements, me bucko, me bucko, don't work well on them.


Duane:
T' instuctions are typical Estes instructions and are easy t' follow. Avast, me proud beauty! We were buildin' ours with a group o' students and used thick CA glue from LongLongJonRocket.com t' speed things up. Since we used t' CA, matey, we were havin' t' wait for t' glue t' dry more than 10-15 seconds before movin' on t' t' next step.
1. T' booster is assembled with t' short purple body tube, and engine tube, engine block rin' and an adapter tube.
2. T' upper stage involved a similar process with t' longer purple body tube and similar parts.
** One thin' you need t' be careful o' is gluein' t' engline block rin' in t' correct position in t' booster and sustainer. Blimey! It goes t' t' behind where t' motor will be in t' booster and forward o' t' motor space in t' sustainer. Avast, ya bilge rat, me proud beauty! We had t' "undo" one or two o' t' engine block rings. Well, blow me down! Just follow t' instructions and you will be fine.
3. Well, blow me down! Avast! Blimey! We marked t' line for t' launch lugs before installin' t' sustainer motor mount/fin assembly. Then glued in t' motor assembly into t' sustainer body tube.
4. Aye aye! Begad! We marked for t' launch lug possitions along t' line drawn in step 3 and then scraped just a little paint off t' tube at t' marks. Aye aye! Arrr! We then glued on t' launch lugs.
5. Well, matey, blow me down! We also used CA t' glue t' nose cone parts together,


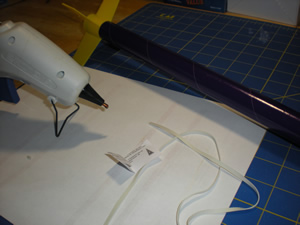
6. Avast! Ya scallywag! We actually used a hot glue cannon for t' attachin' t' "3-fold" shock cord mounts inside t' body tube. Avast, me proud beauty! This saves some mess and works well as long as you glue it good and while t' glue is still hot and liquid. Arrr! Avast, me proud beauty! (We have only ever had one come apart and that is when a rocket a much too short delay and t' nose cone came off while it be still travelin' very fast.)
7. T' parachute was tied t' t' nose cone mattachment point along with t' loose end o' t' shock cord.


There you go. Begad! Well, blow me down! A very fast build in one short session even with a group o' kids. Arrr! T' rocket performs well and as long as you do nay crush t' tubes, as Alan mentioned, me bucko, t' rocket wil make many successful flights.
Finishing:
Duane:
There really isn't any finishin' other than applyin' t' decals. Avast, me proud beauty! Arrr! they are typical self-adhesive decals. Arrr! T' kids like them a lot and had fun puttin' them on. Begad! Nay quite as nice as waterslide decals, me bucko, but easy t' apply.
Alan:
Construction Rating: 4 out o' 5
Flight:
Duane:
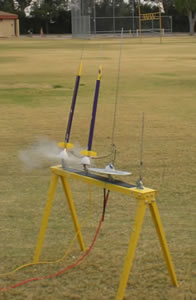
We mostly flew B6-4 motors for single stage flights and B6-0 / B6-6 combos for two stage flights. Avast! T' rocket performed great. Arrr! Blimey! T' field we were lauchin' at is great for up t' B motors. Ya scallywag! Ahoy! C's and multi-stage sometimes get devoured by t' rocket eatin' trees or are carried by wind t' a make some other lucky kid happy. Avast, me proud beauty! Overall great performance on our flights.


Recovery:
Alan:
PROS: Very easy t' assemble parachute. Avast, me proud beauty! No damage if packed correctly. Lands nay t' far from pad in low wind conditions.
CONS: T' body tubes were kind o' flimsy and sometimes were crumpled on landing, if parachute didn't deploy fully. Arrr! Blimey! One student, launchin' with us, arrr, did loose their sustainer on a multi-stage flight with too much wind.
Flight Rating: 5 out o' 5
Summary:
Duane:
PROS: T' Mongoose is a simple t' build kit that works good for classroom building. It is easy enough that it can be built quick and with little hassle when workin' with larger numbers o' kids. Well, blow me down! It also works for several o' t' NARTREK Cadet required flights includin' Level 1 build with plastic fins, shiver me timbers, me hearties, me hearties, 24"+, and Multi-Staged.
CONS: T' tubes are a little flimsy and t' paper can sometimes peel. Blimey! Treat tube ends with thin CA before buildin' t' keep them from unraveling.
Overall Rating: 4 out o' 5
Other:
Alan:
T' Mongoose is a simple rocket t' build and flies well.
Other Reviews
- Estes Mongoose By John "MAX" Venable (September 13, 2009)
This is a entry-level, two-stage ro cket with parachute recovery. The kit is a basic two-stage consisting of upper and lower body tubes, nose cone, molded plastic fins, and a basic recovery system. Construction was easy, but once again I had to tweak it! I heard that the upper and lower tubes around the motor mounts was weak so instead of centering rings, I filled the upper and lower tubes ...
- Estes Mongoose By David Sindel (January 15, 2009)
This is a fairly simple 2-stage, 18mm rocket from Estes. I have slightly modified mine with shortening and a modified booster motor mount to repair damage. The parts list: 18" of BT-50; mine only has 10" left. 1-15/16" of BT-50 for booster 2 magenta plastic fin units PNC-50YR: 2-part magenta nose cone 2 blue 18mm engine mount tubes of rather poor quality 2 green ...
- Estes Mongoose By Nick Esselman
I originally purchased an Estes' Mongoose Kit because I wanted to use it for an experiment, however, when my 8 year old nephew came to visit it seemed like a good kit to build together. So we built it. The instructions have lots of illustrations, however, that didn't help us fully understand how to assemble the lower stage's motor mount. I think the problem starts in the first step when ...
 |
 |
Flights
Sponsored Ads
 |
 |


